UK based
Prices for UK customers are shown inc 20% VAT
Other countries, inc EU, prices shown are ex VAT.
Bouwhandleiding


KASTENLOK INDEX
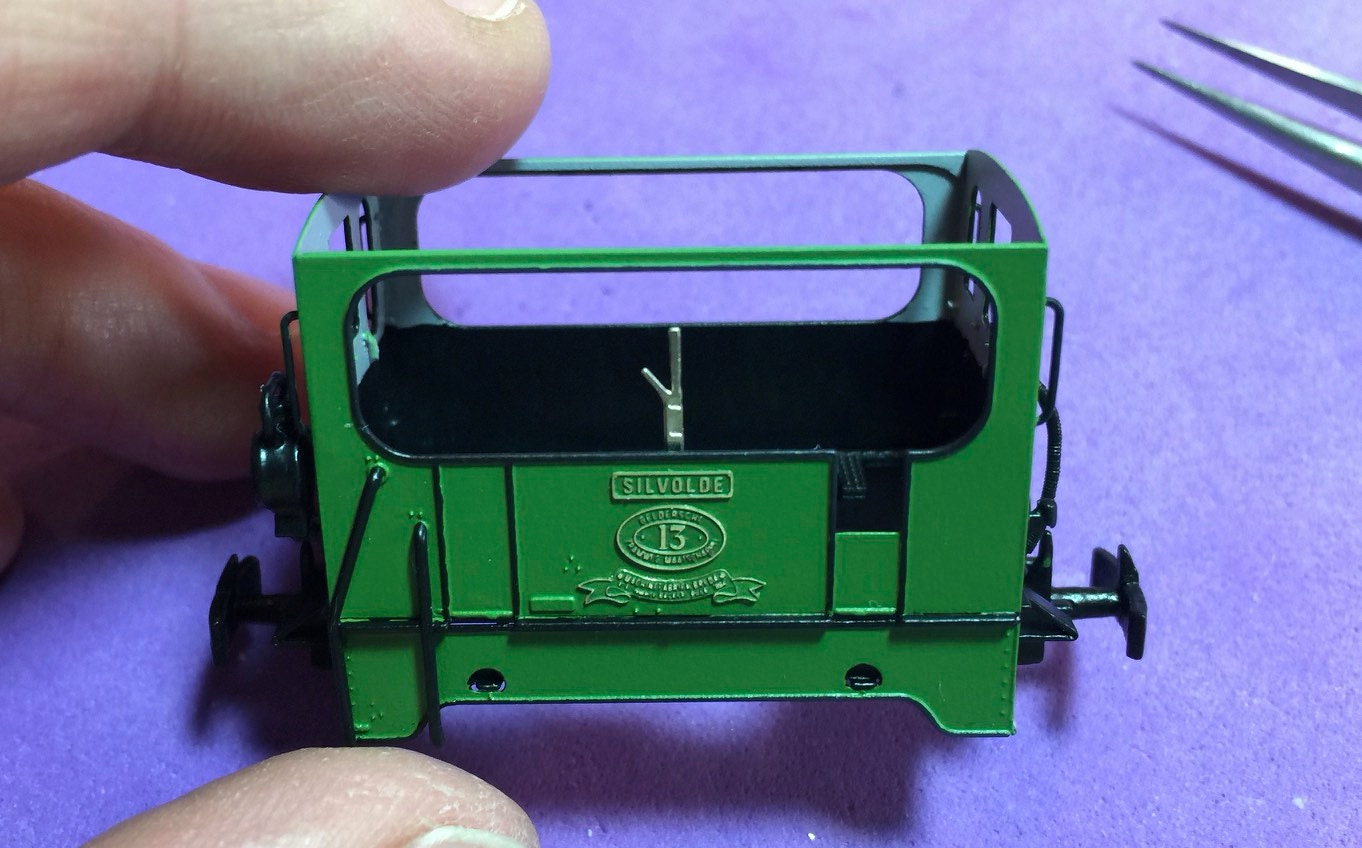
GTM 13 ‘Silvolde’


UK based
Prices for UK customers are shown inc 20% VAT
Other countries, inc EU, prices shown are ex VAT.
Bouwhandleiding
KASTENLOK INDEX
GTM 13 ‘Silvolde’
5. KAST VERVEN
5. PAINTING CHASSIS
Als het goed is, zijn de bodemplaat onderdelen al voorbewerkt met een tappertje en zit er een schroefdraad in voor de M1.6 schroef. Nu wordt het mystery van het halve ijsstokje duidelijk: je prikt deze in de het gele transparante onderdeel met de twee schroefjes (heb je er maar één, dan zit die andere nog in het zakje) en tadáá, plotseling is het een handige verfhouder!
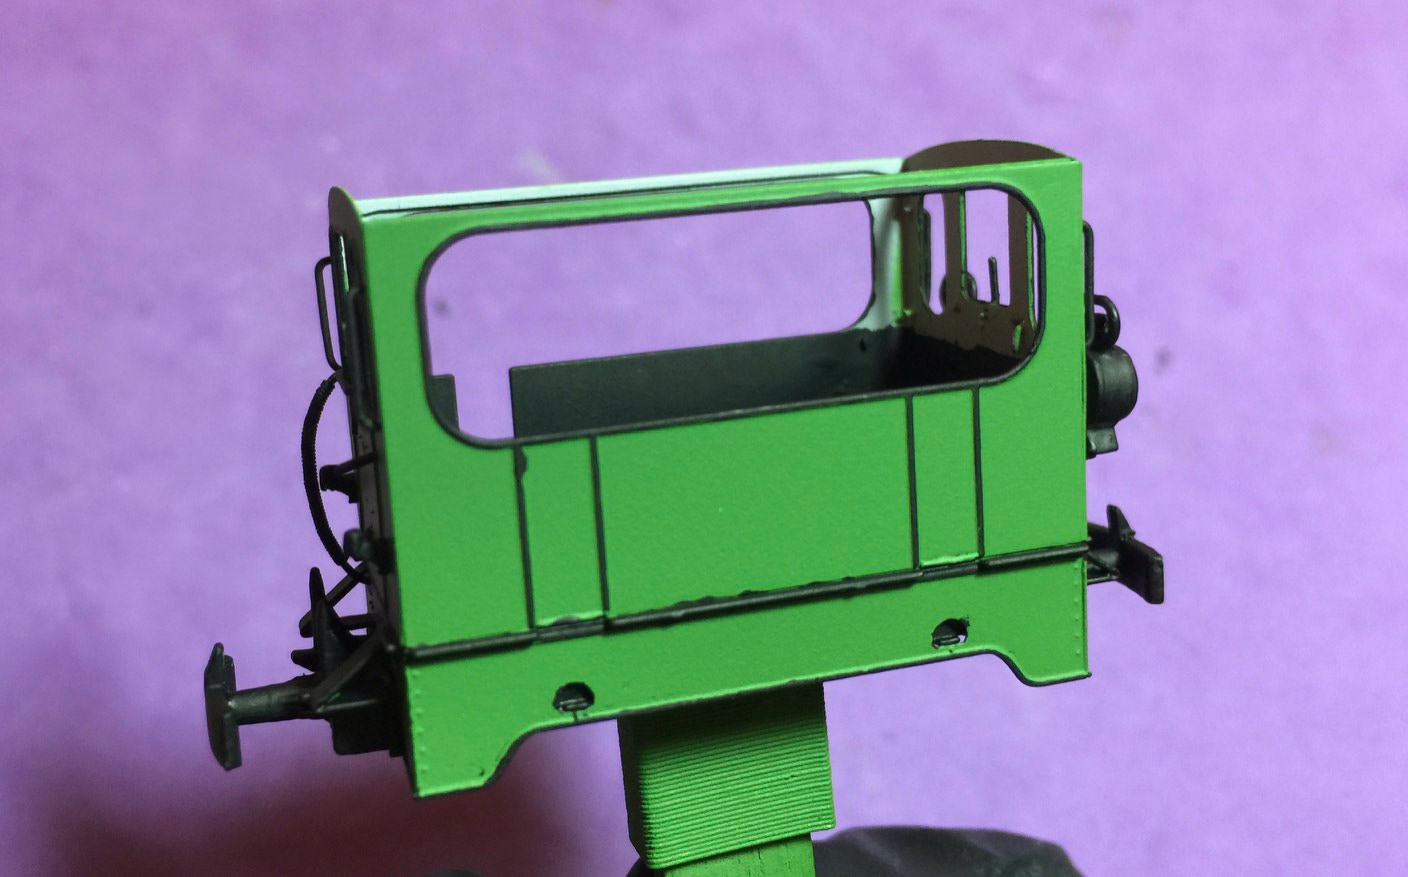
Spuit het model met etsende grondverf. Gewone grondverf hecht niet goed aan metaal. Doe dit in dunne lagen (twee of drie) met een wachttijd van ca 15 minuten tussen de lagen. Het is al snel te dik, dus voorzichtig! Let er op dat ook achter de lampen verf komt.

If all went as planned, the bottom plate of the loco has been prepared with a tapping tool to receive M1.6 (or 10BA) screws. Now the mystery of the popsicle is revealed: you push this into the yellow transparent part with the two screws (if you’ve only got one, then the other one is still in the bag) and presto, suddenly it is a very handy holder to paint the model!
Spray paint the model with etching primer. Ordinary primer will not hold on the model. Do this in multiple thin layers (two to three) with a drying time of about 15 minutes between layers. It quickly can be too thick, so be careful! Pay attention that also behind the lamps there is paint.
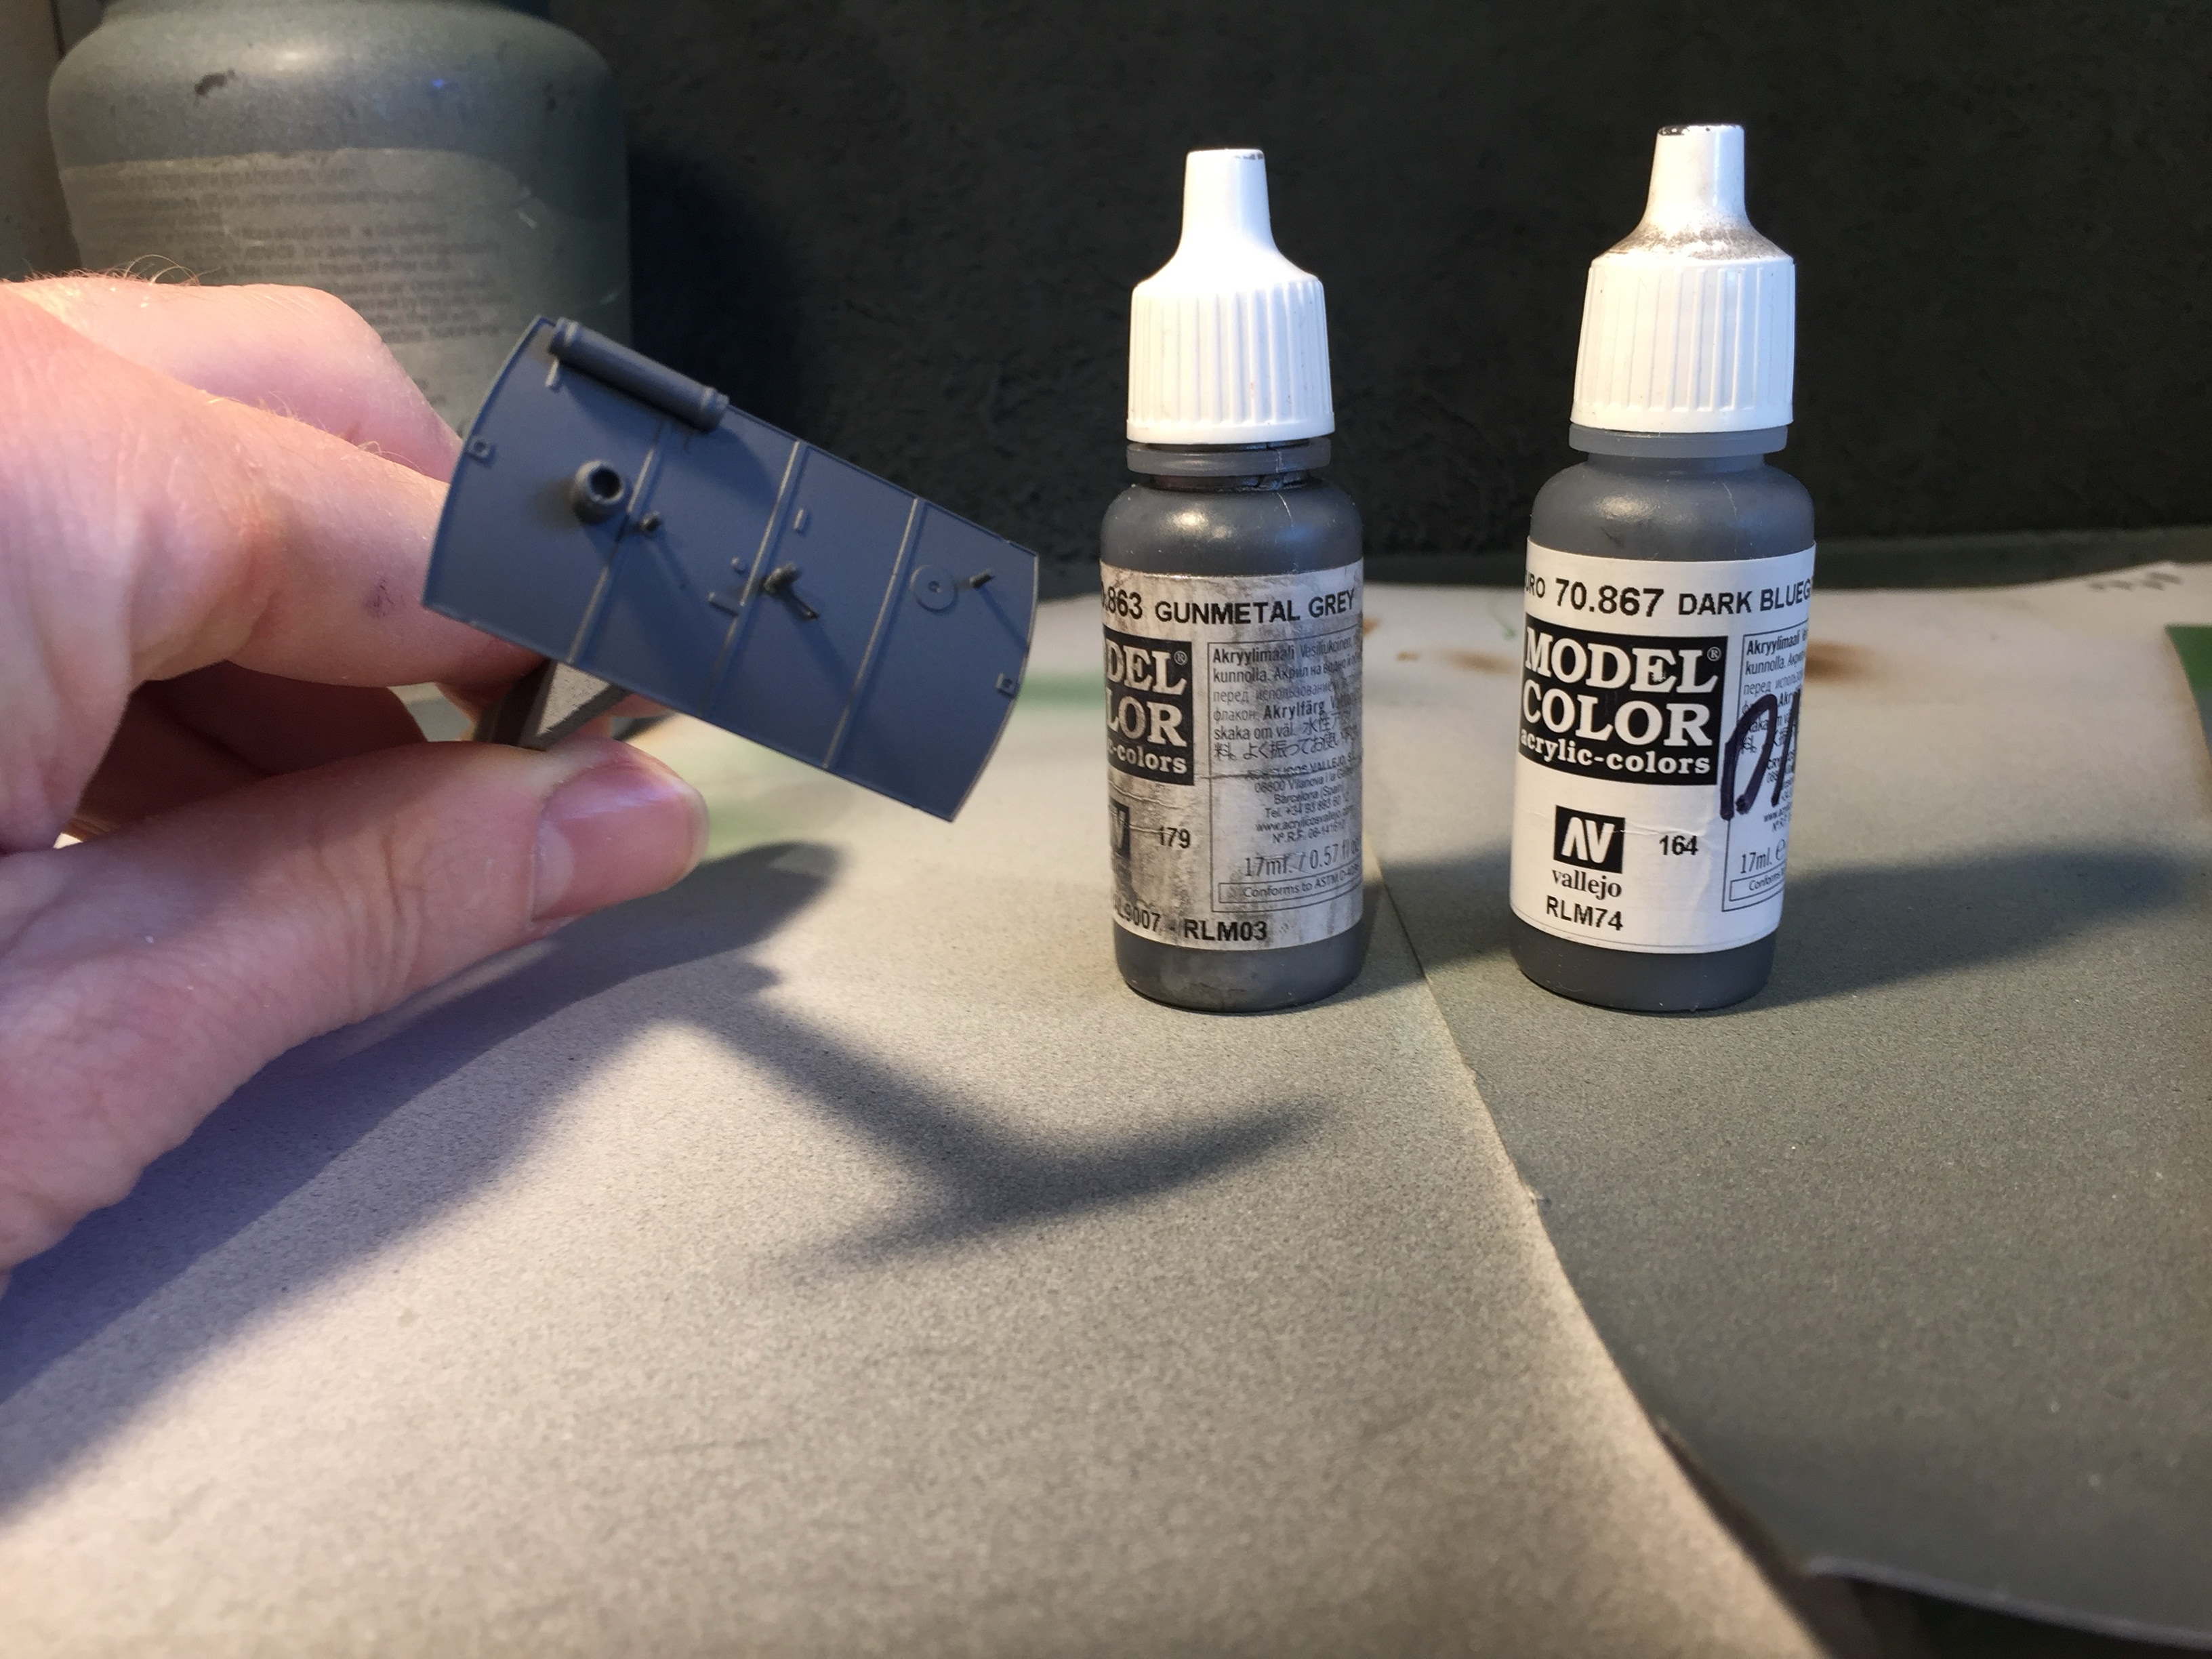
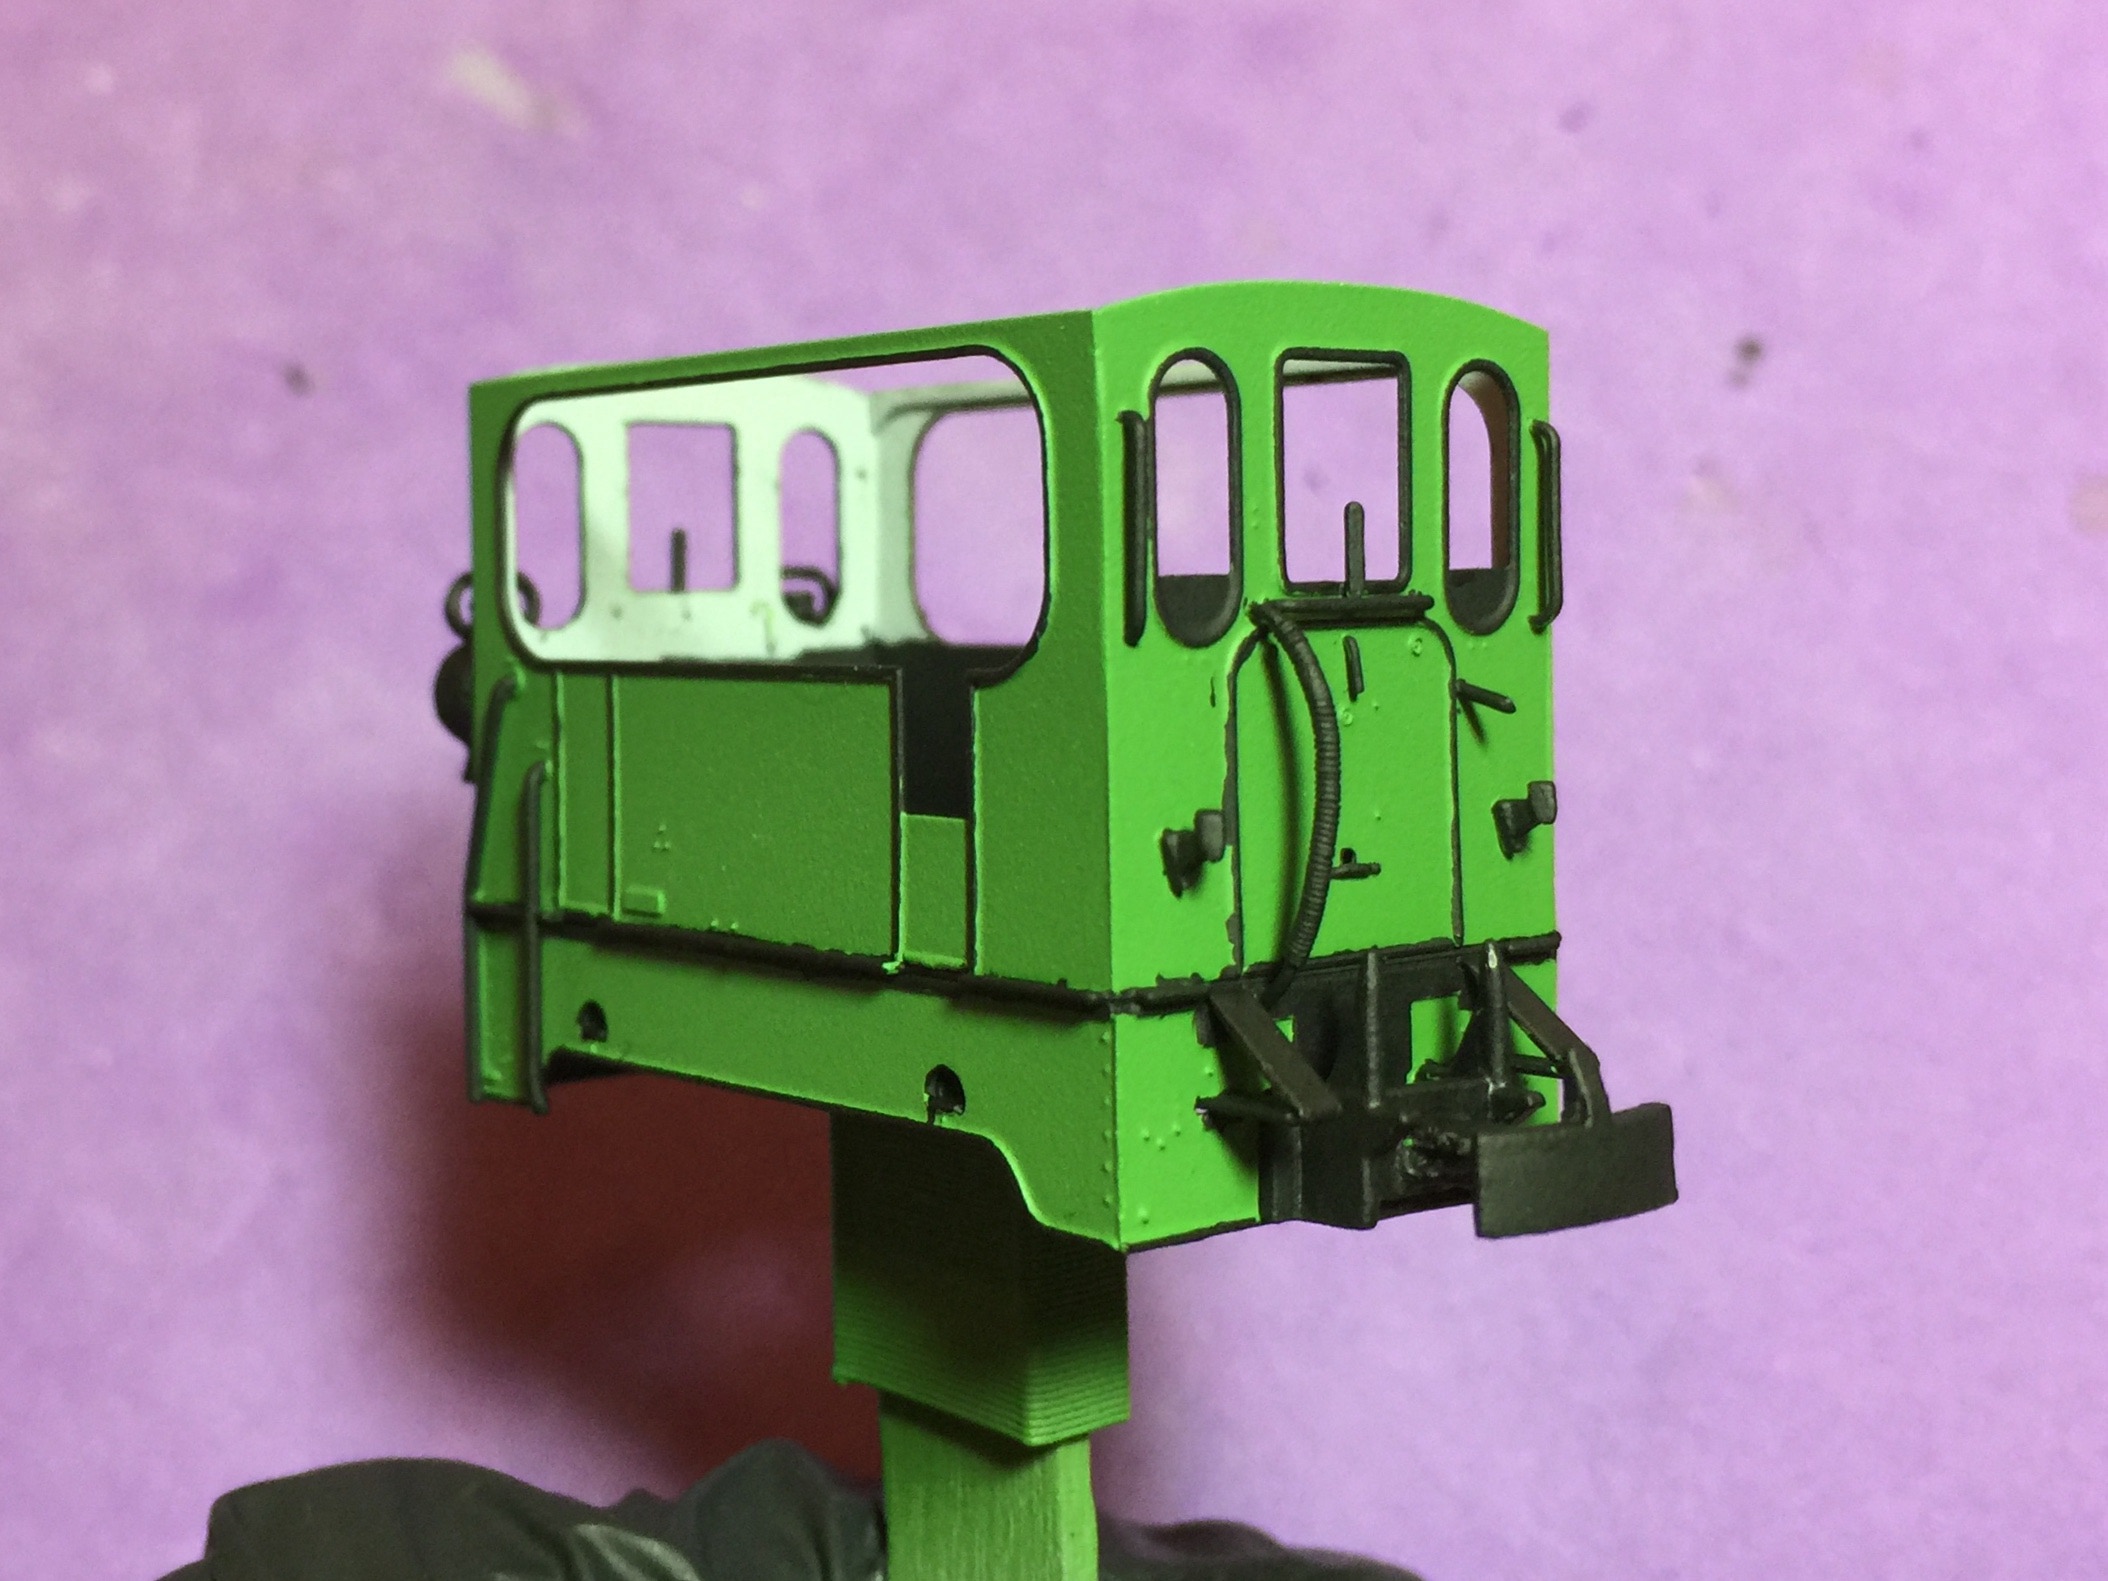
Verf tegelijkertijd ook het dak. Tips hoe dit te doen vind je via deze link. Zelf pas ik in onderstaand geval Vallejo Dark Blue met een druppeltje Gunmetal Grey toe, maar dat kan elke keer weer anders zijn.
At the same time, paint the roof as well. Tips on how to do this, follow the instructions in this link. I use Vallejo Dark Blue with a drop of Gunmetal Grey in the example below, but I might do different tints of grey, as many work well.
Verf de binnenkant naar wens licht grijs (Vallejo Sky Grey, dekt beter) of off-white (dekt minder goed, tot wel vijf lagen nodig).
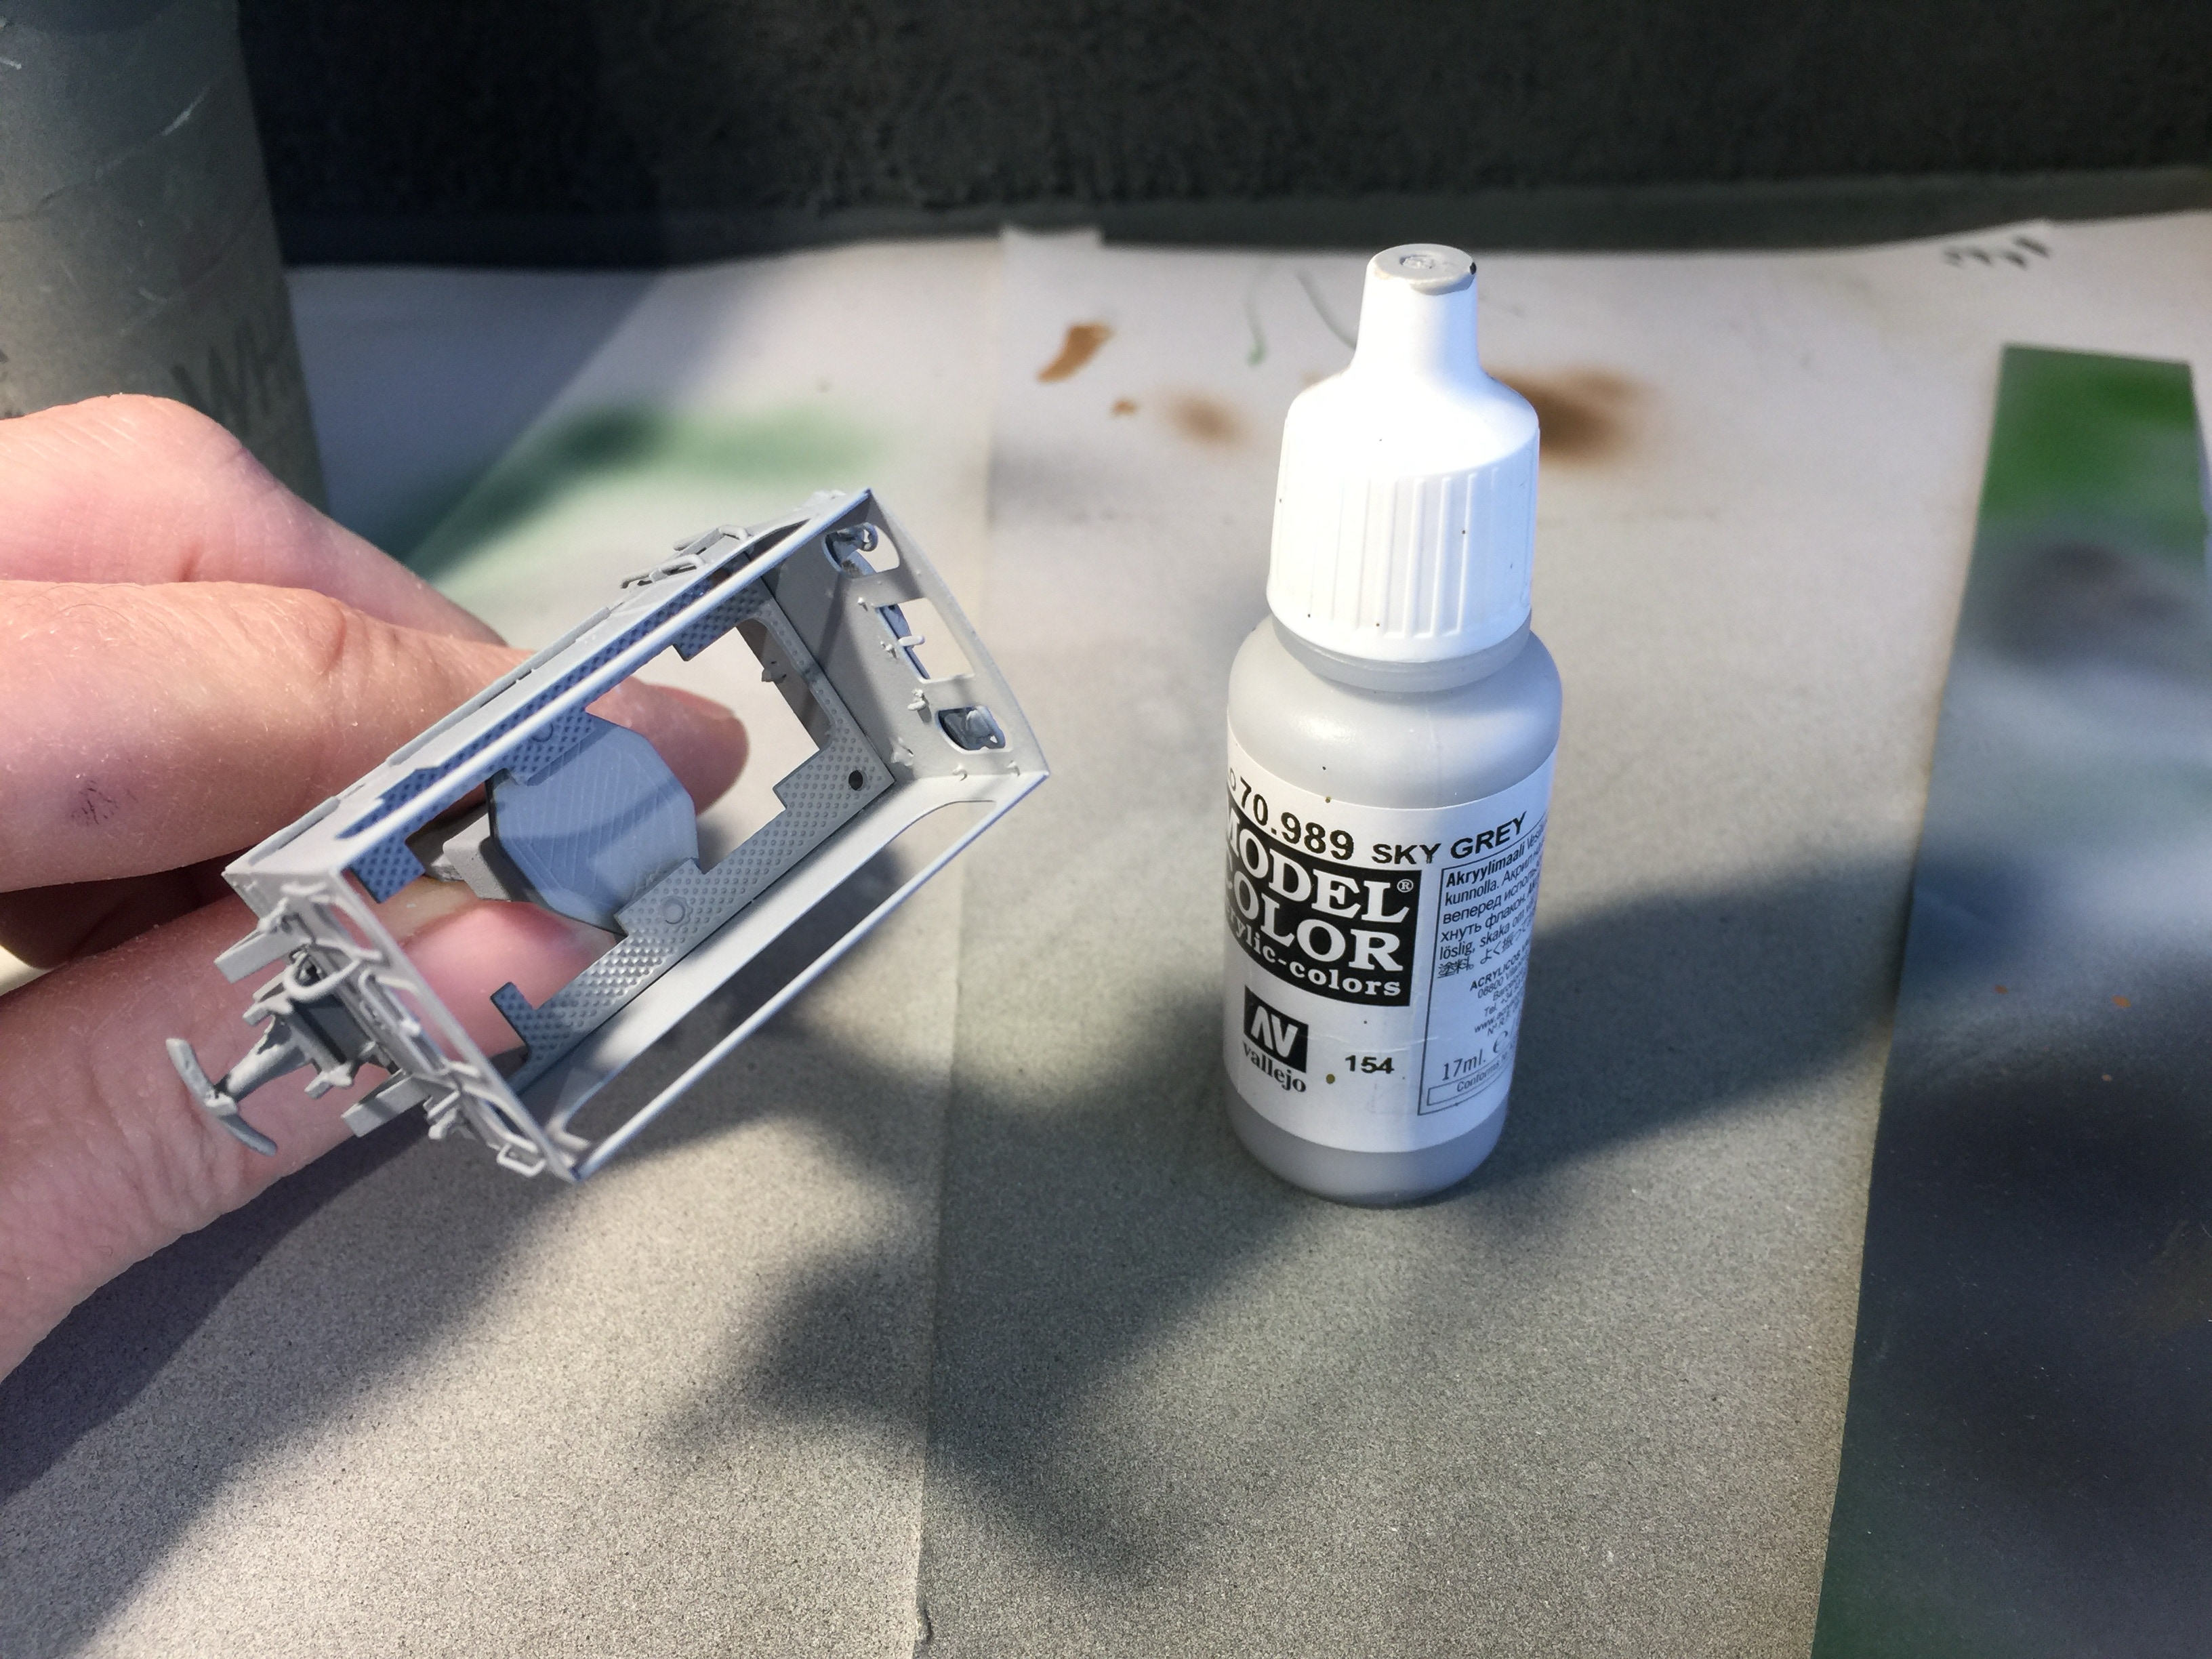
Paint the inside of the model light grey (Vallejo Sky Grey, covers better) or Off-White (covers less, you need up to five layers).
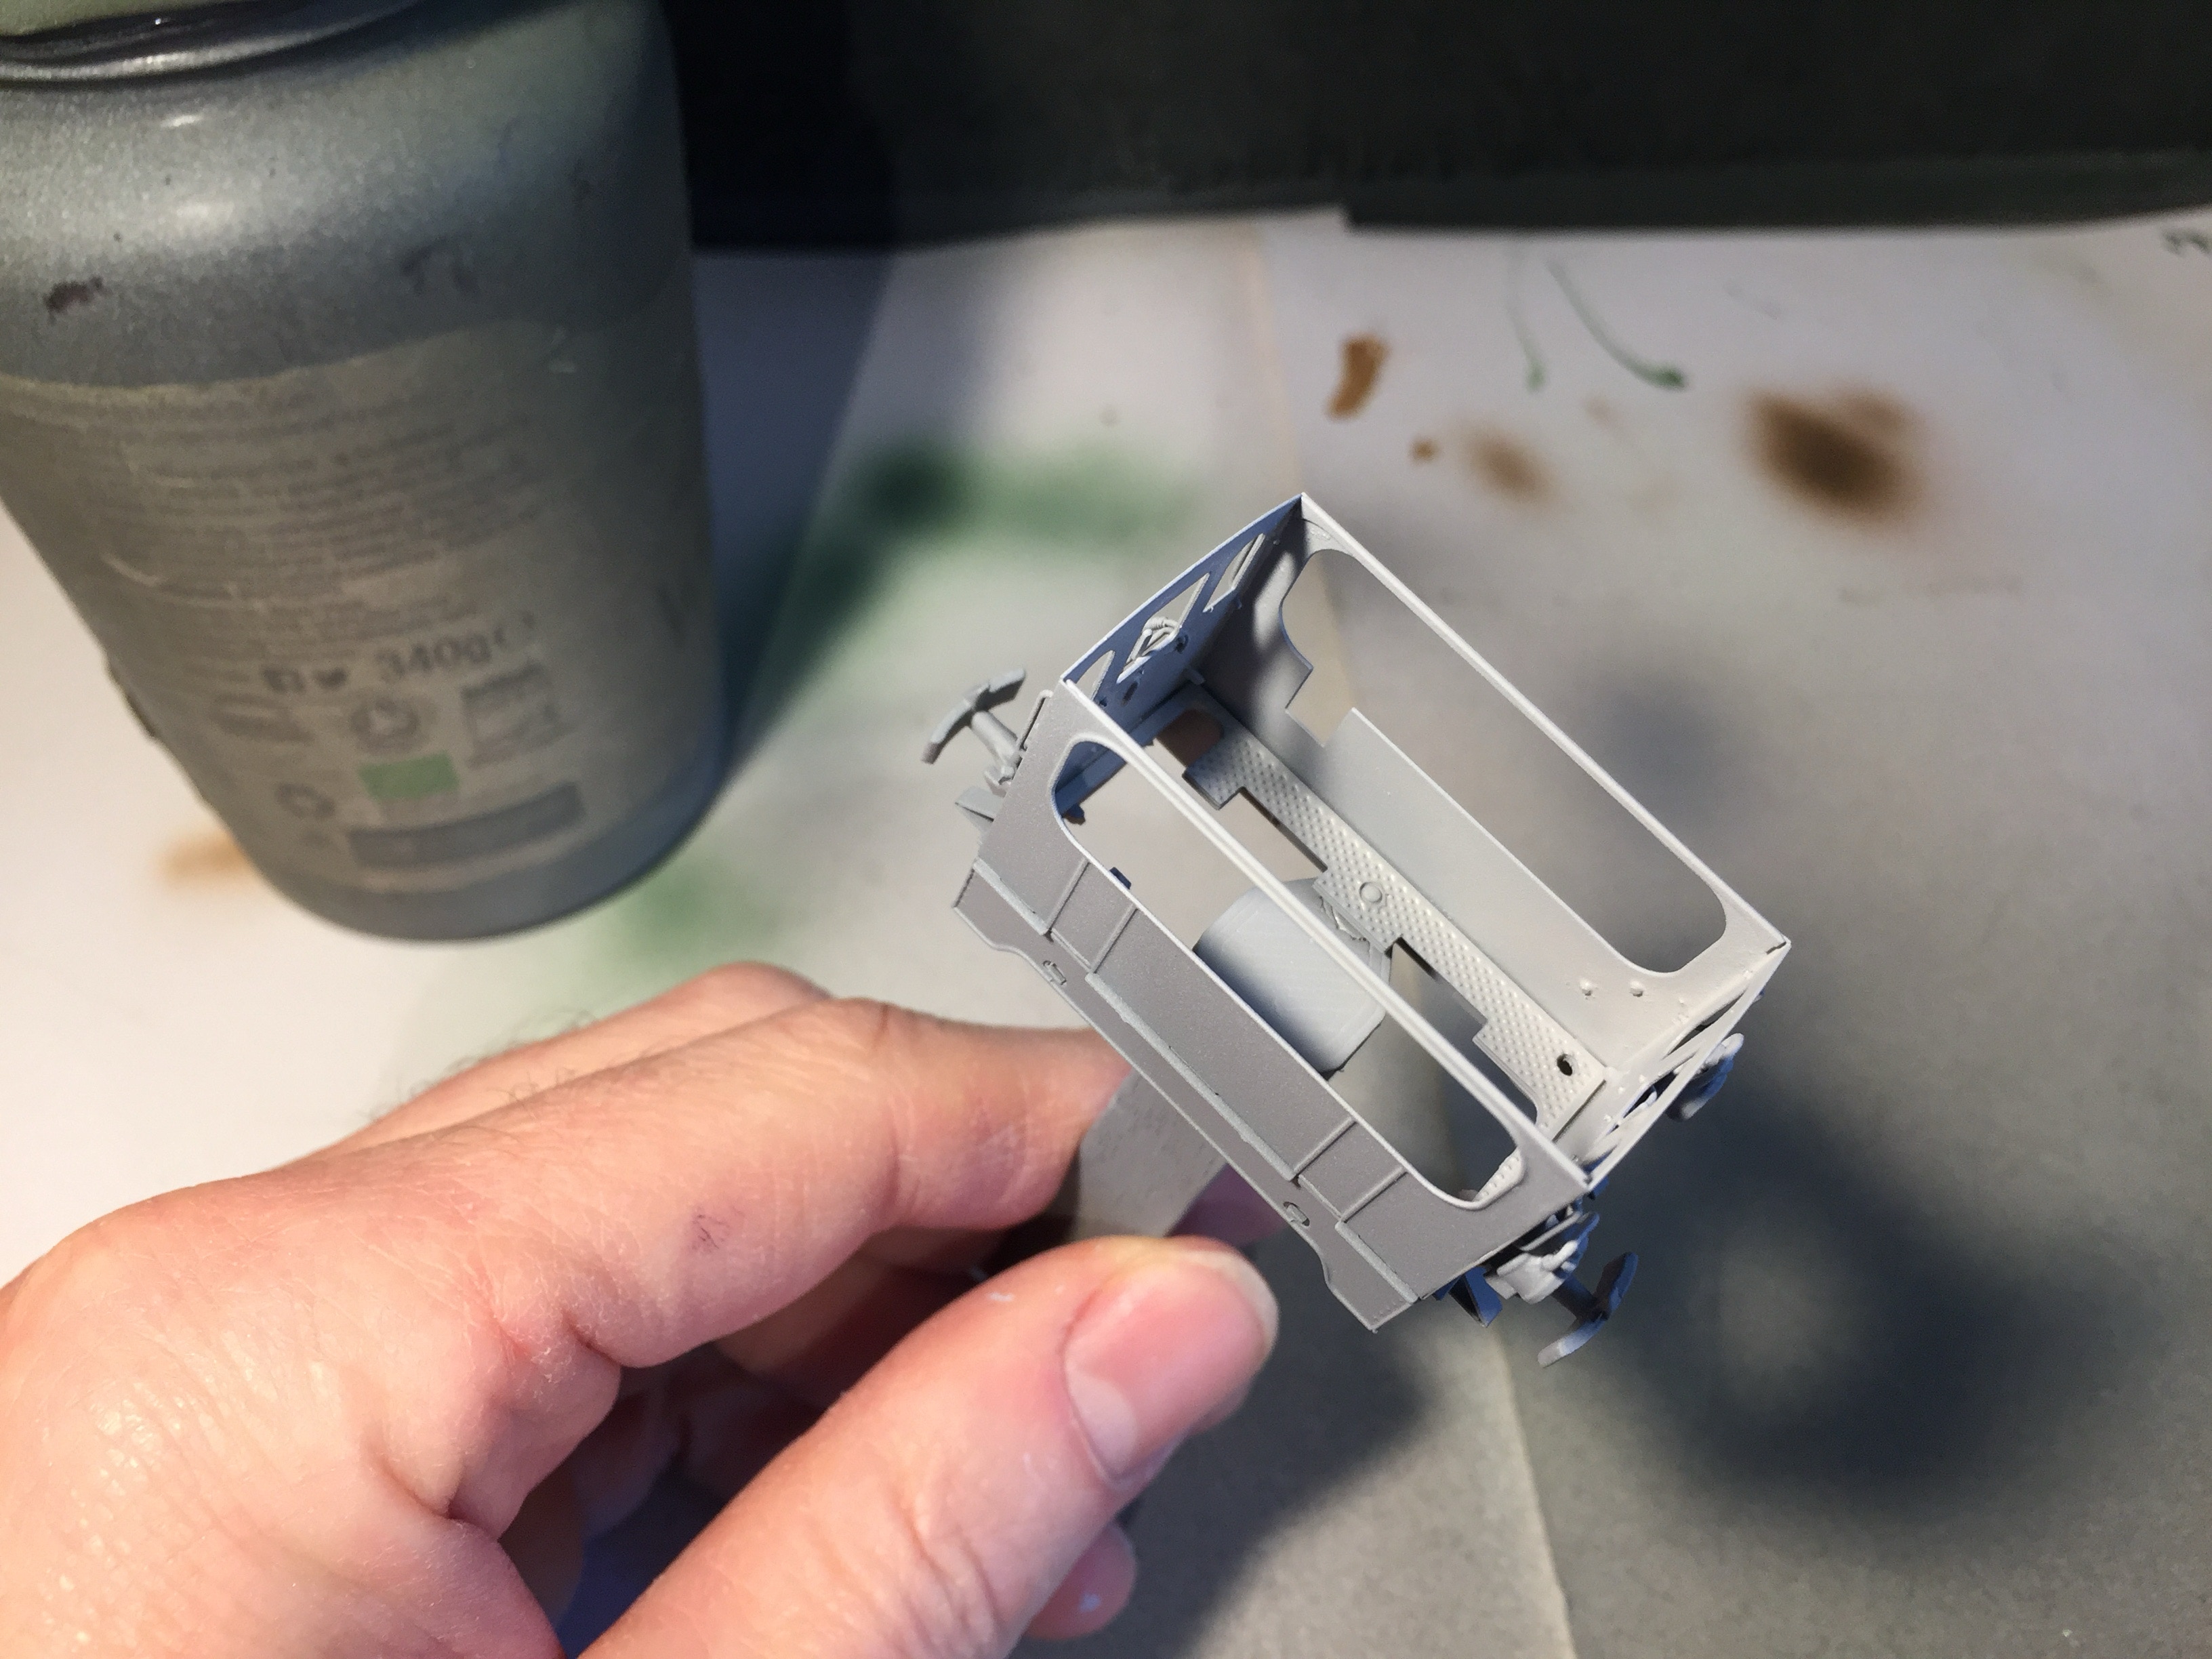
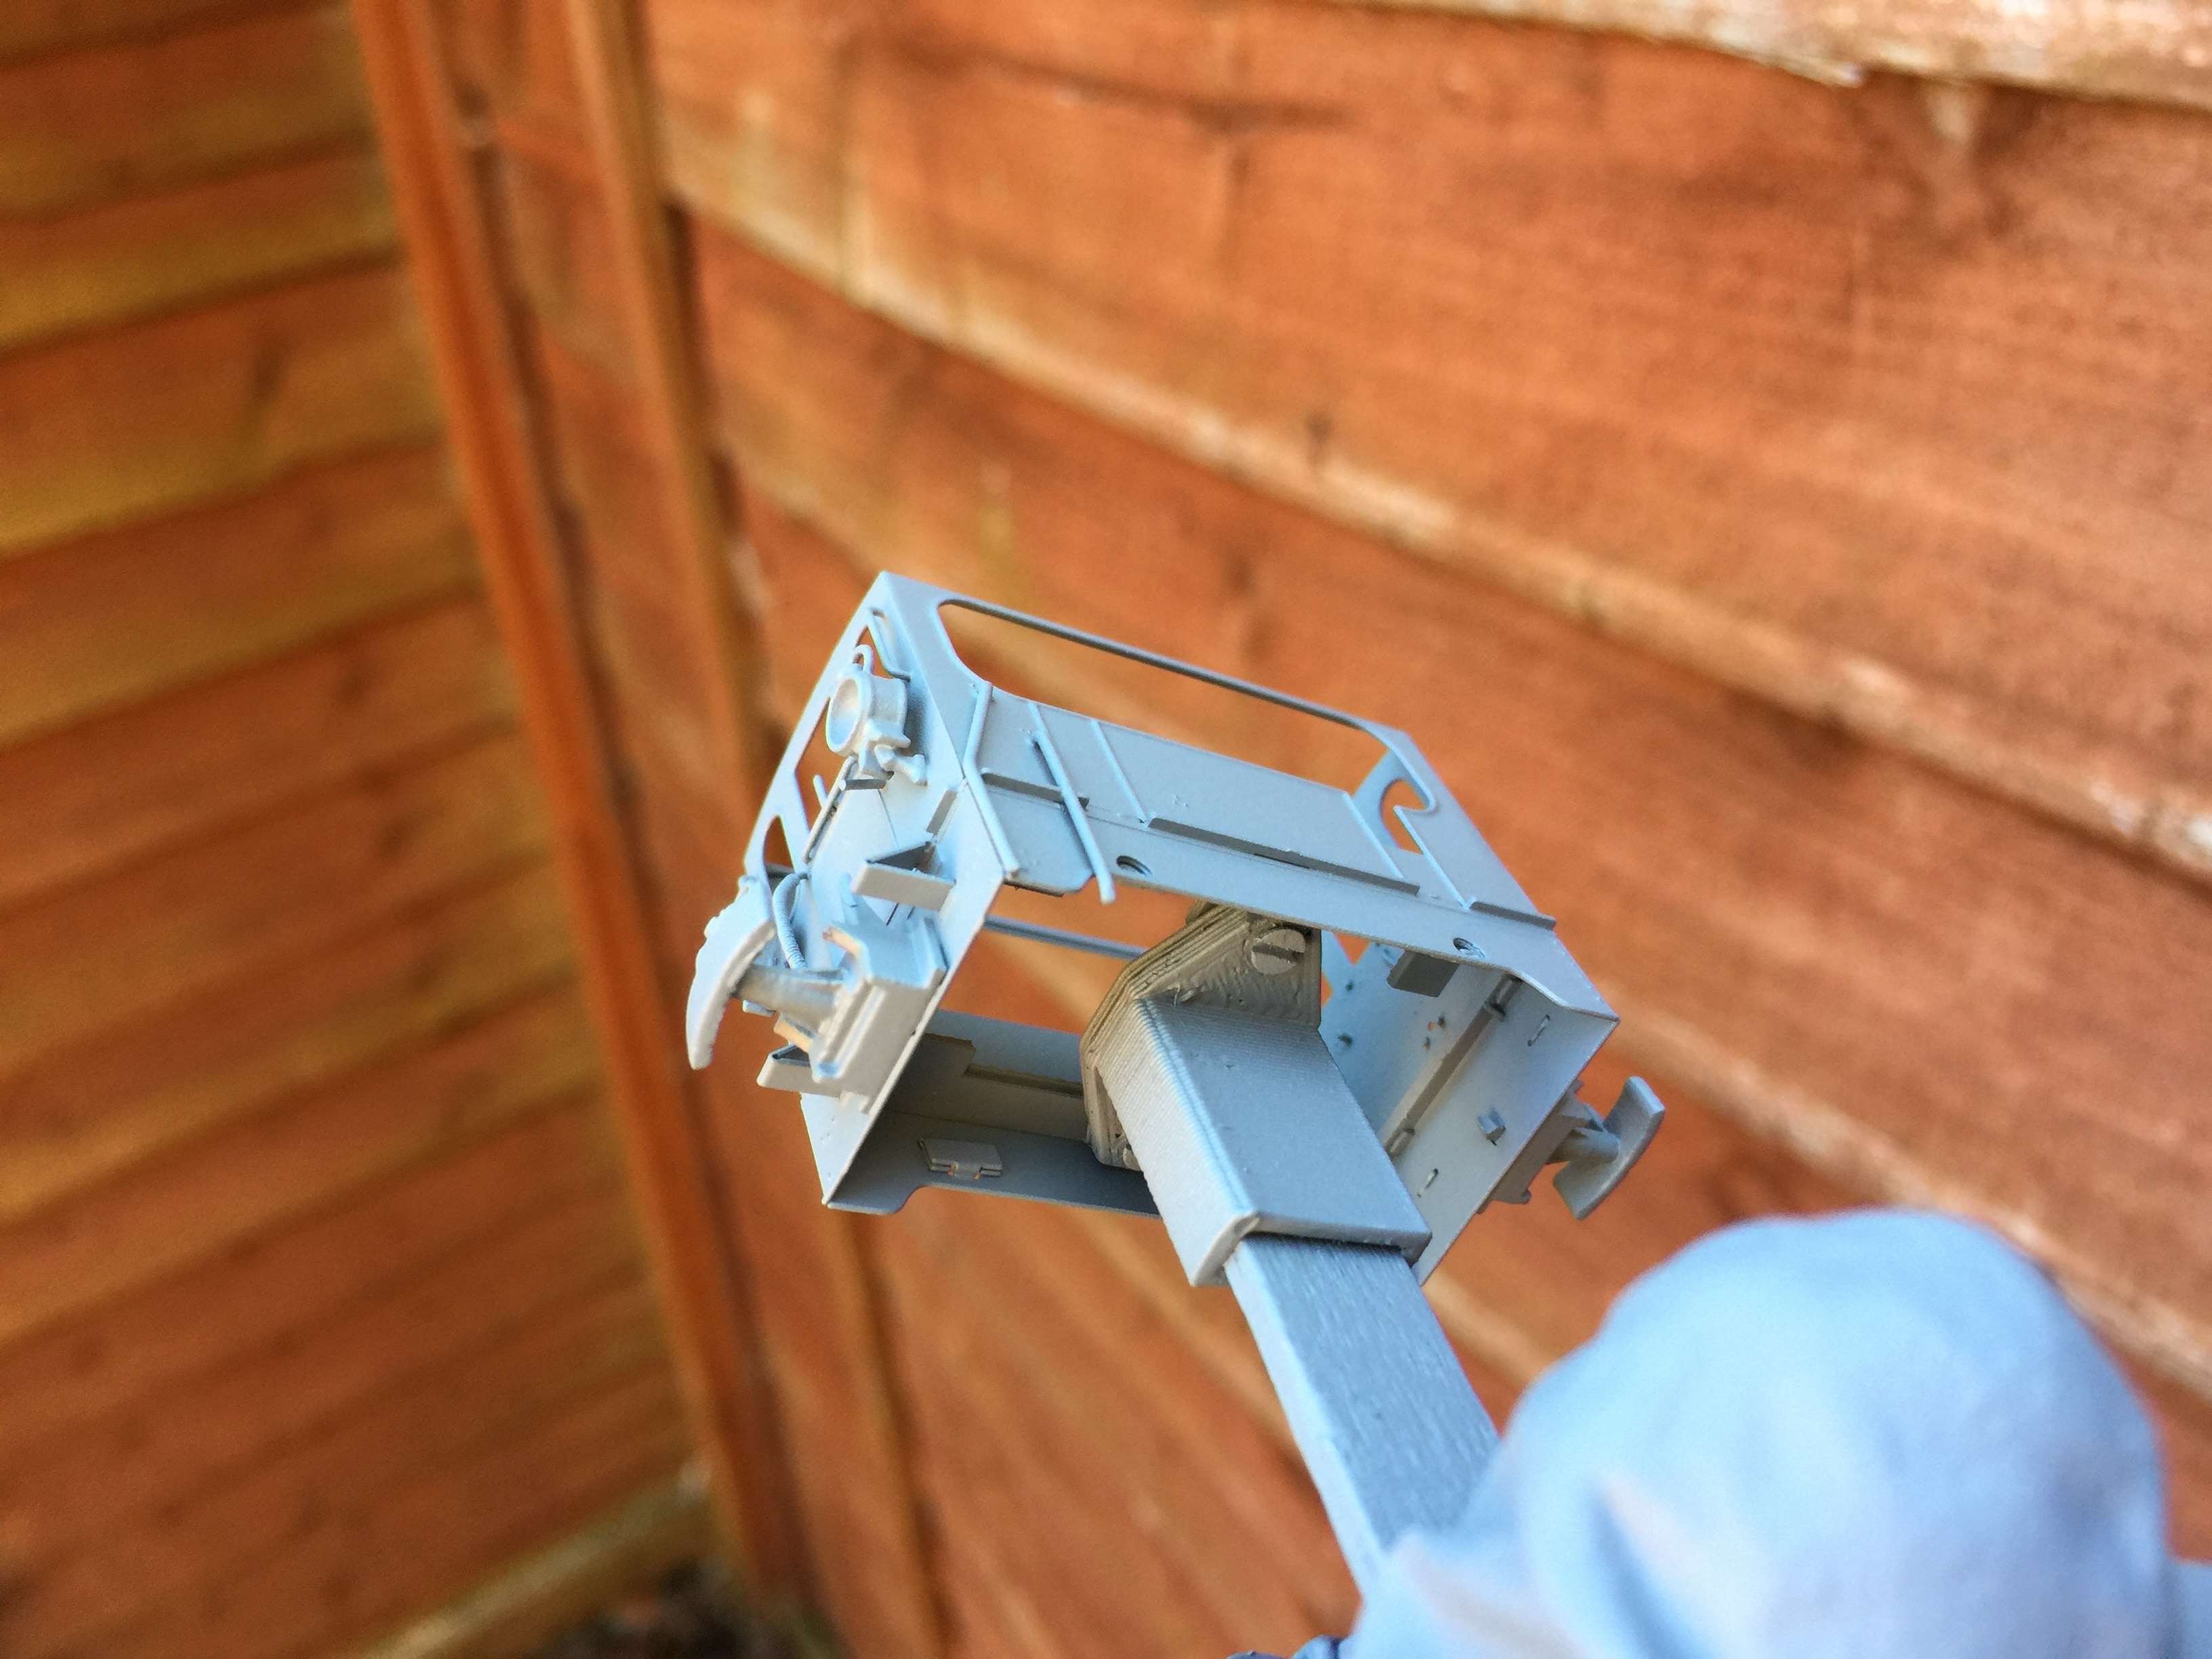
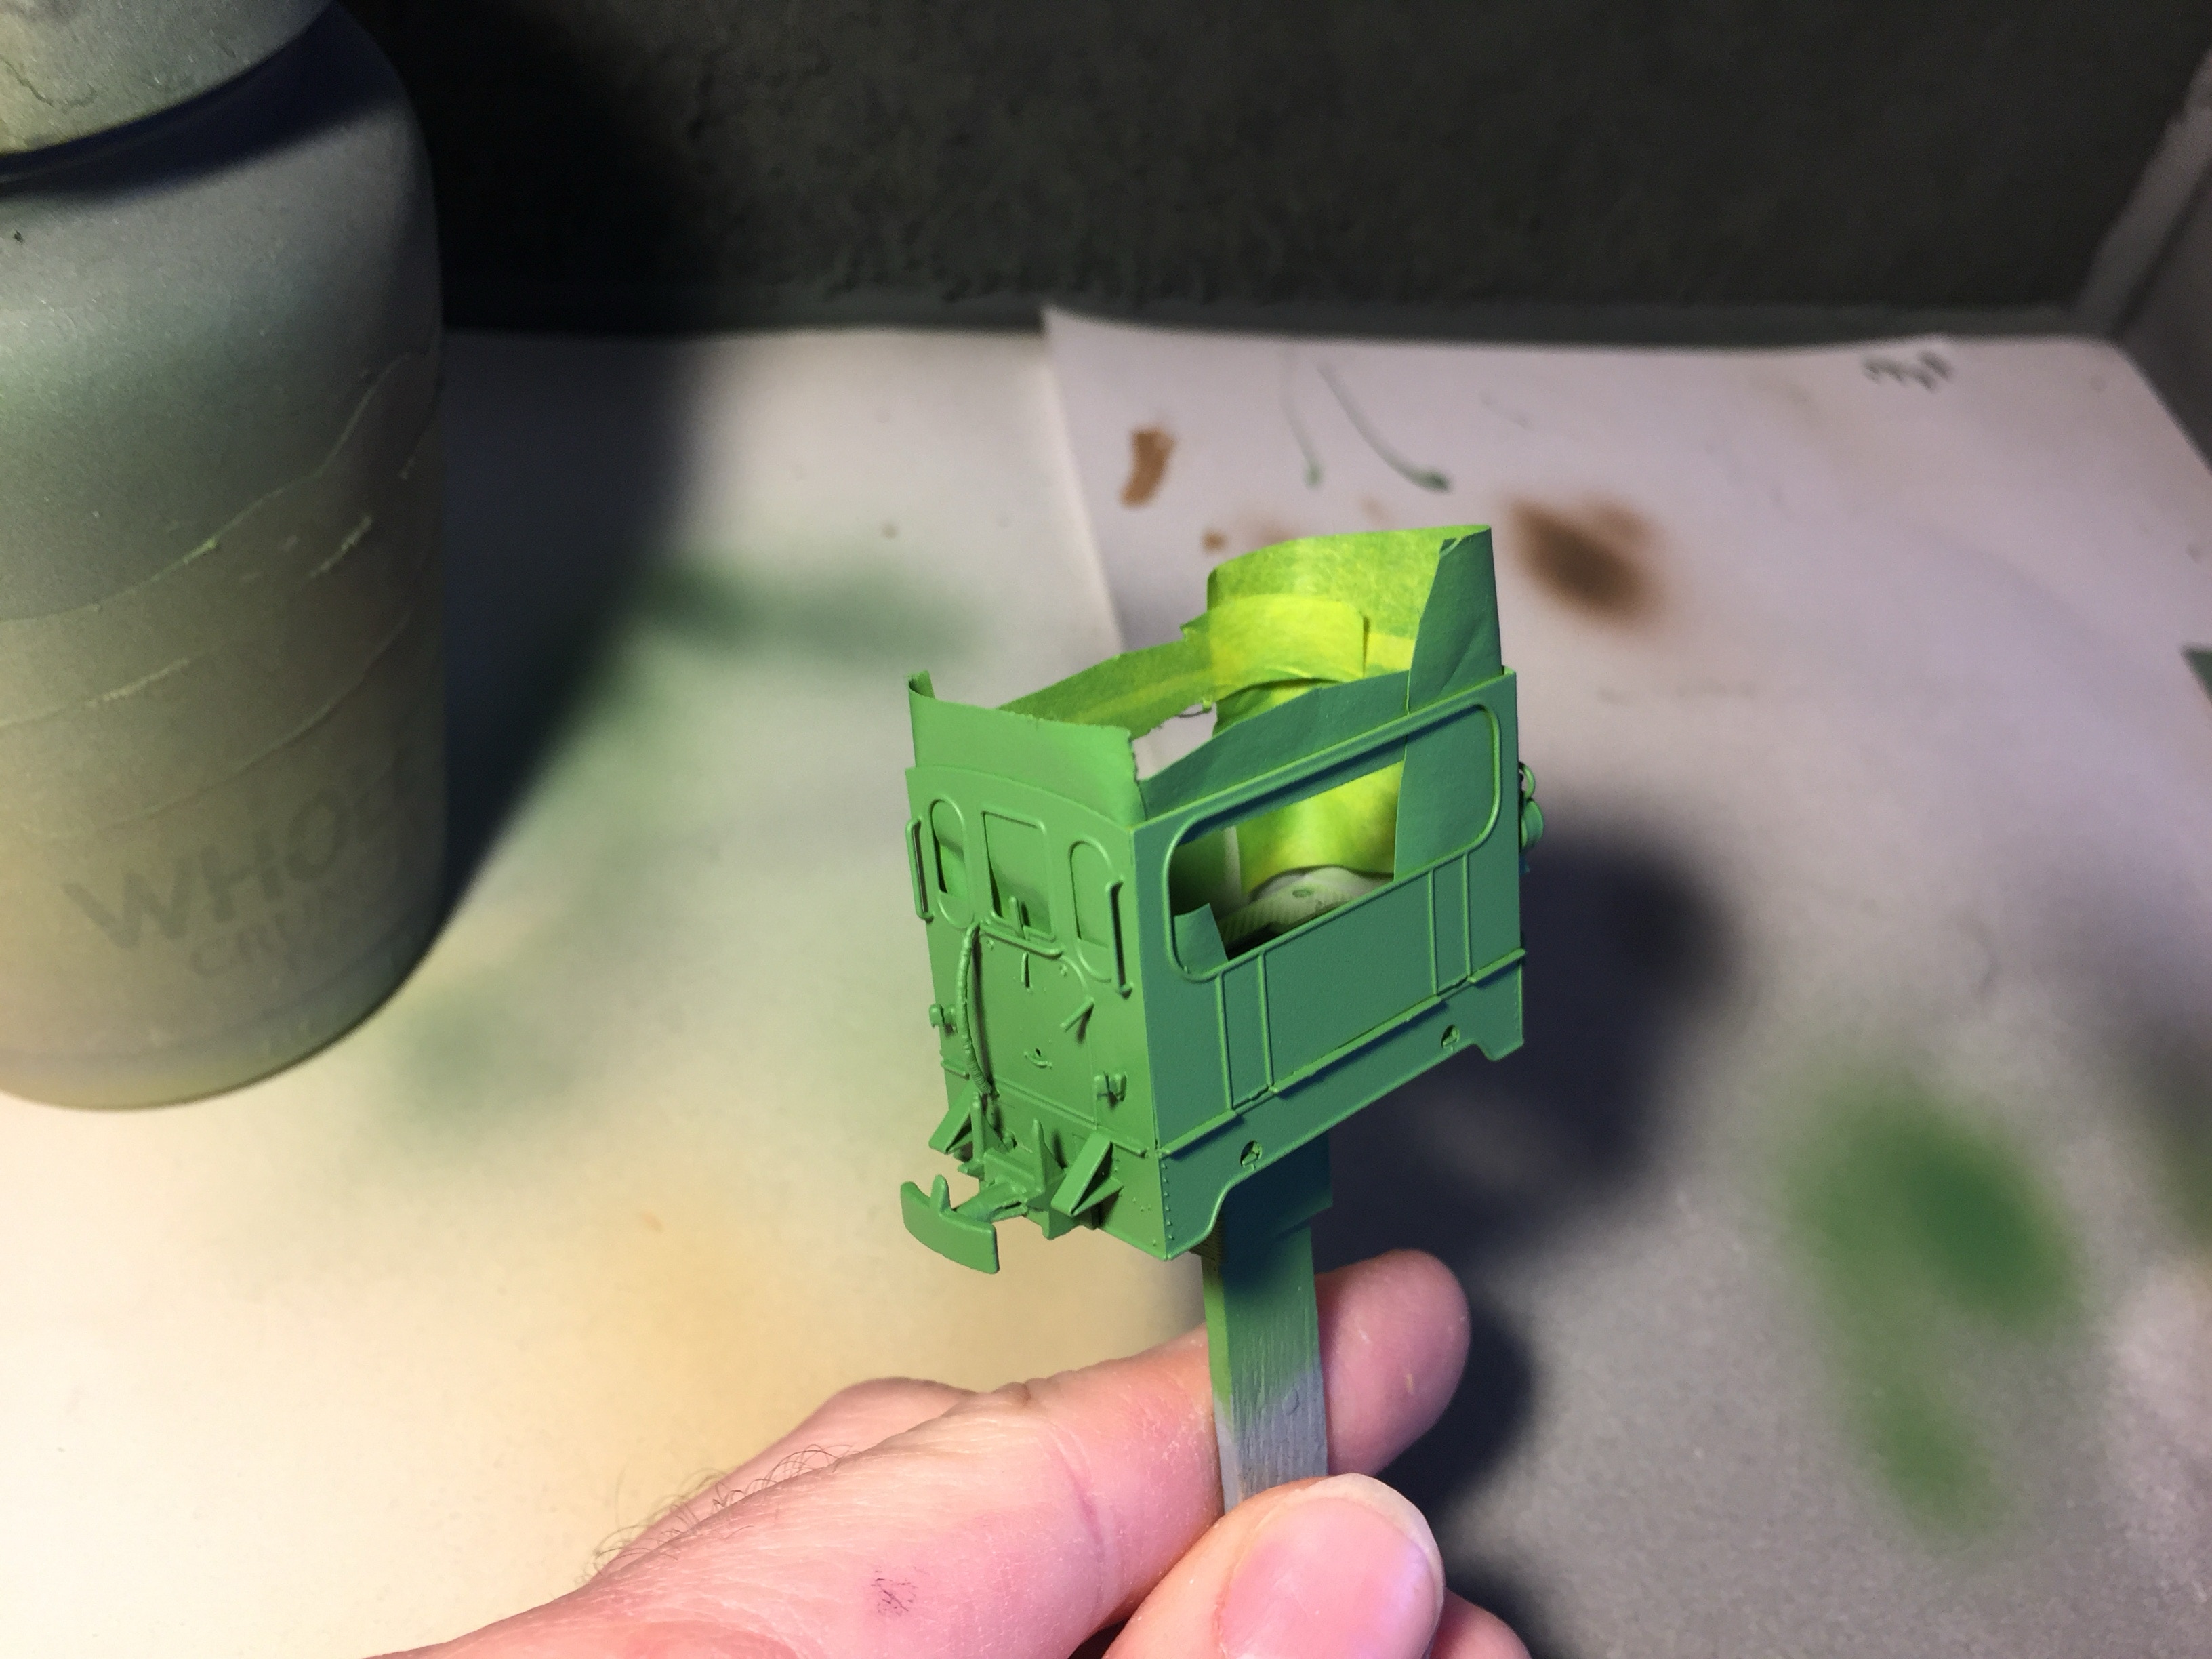
Plak na het drogen de binnenkant af met maskeertape (bijvoorbeeld van Tamiya) en verf het groen. Het is niet nodig de onderste helft (alles onder de lijn van de openingen aan de zijkant) van de binnenzijde en de bodem af te dekken, omdat deze zwart moet zijn. Ook hier geldt: in dunne lagen verven en spuit ook achter de lampen.
After drying, mask the inside with masking tape and paint it green. No need to mask the bottom half (anything below the side openings) or bottom, as they should be painted black. Also here: only thin layers and spray behind the lamps.
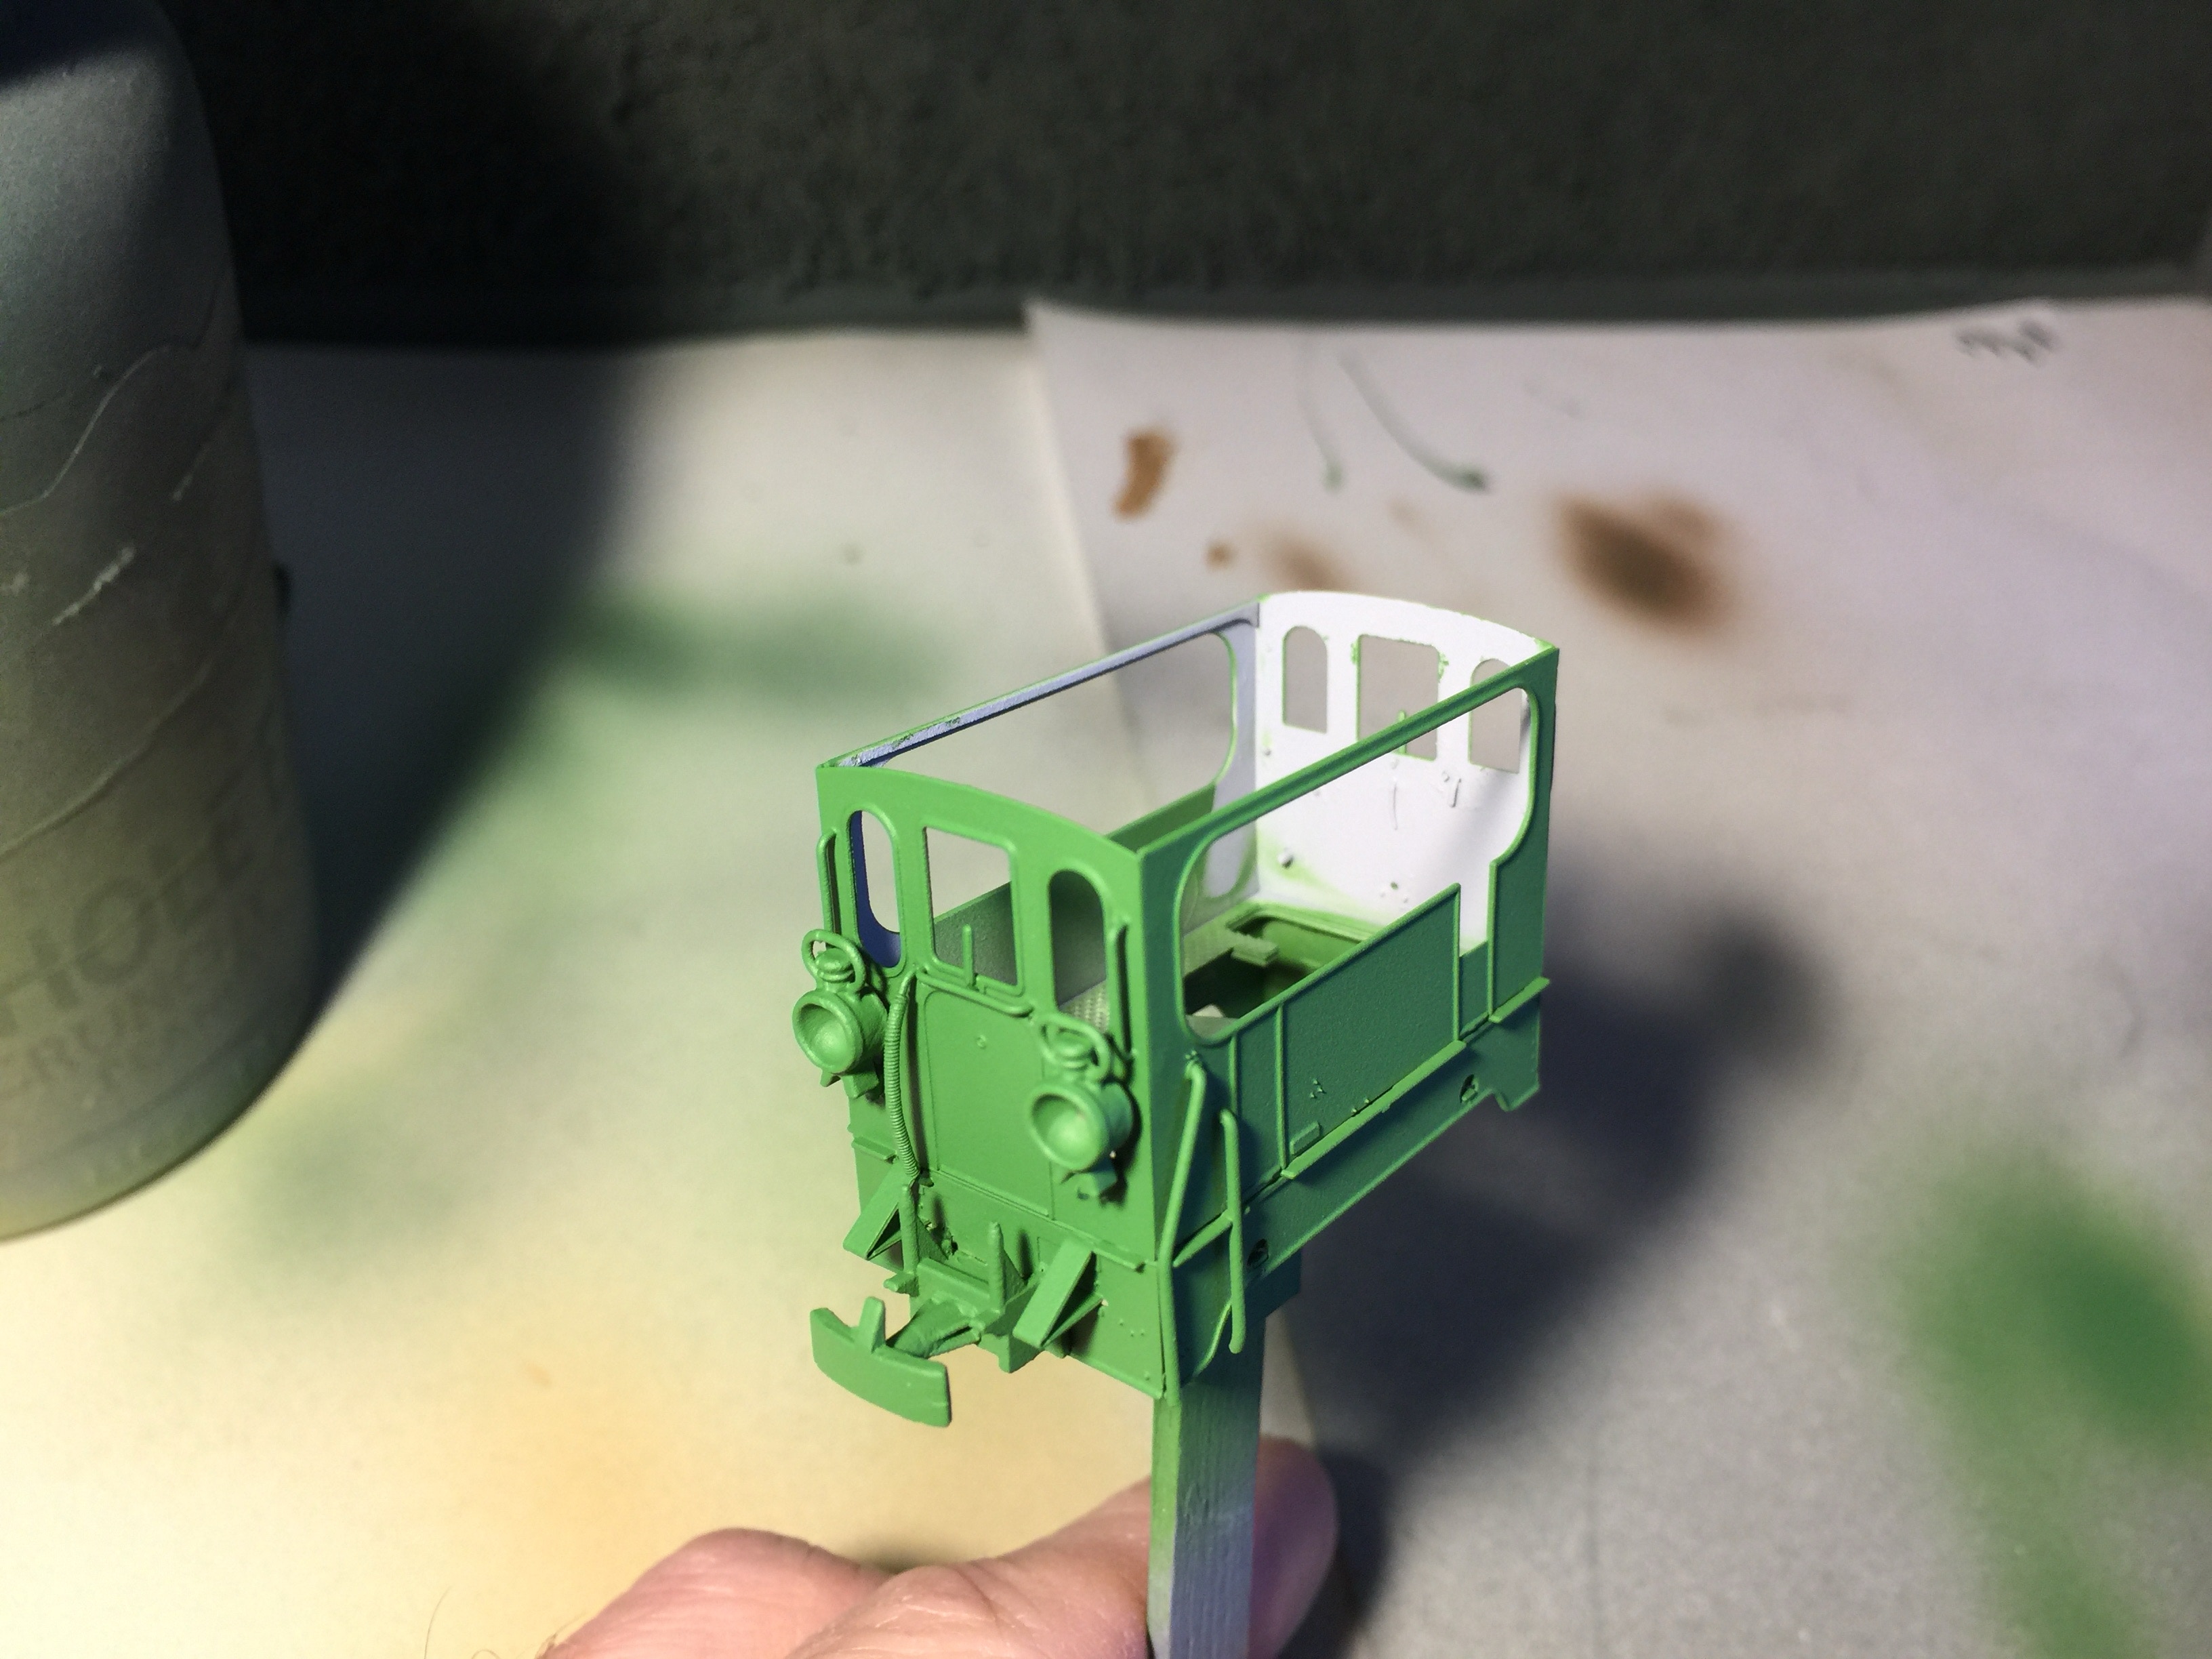
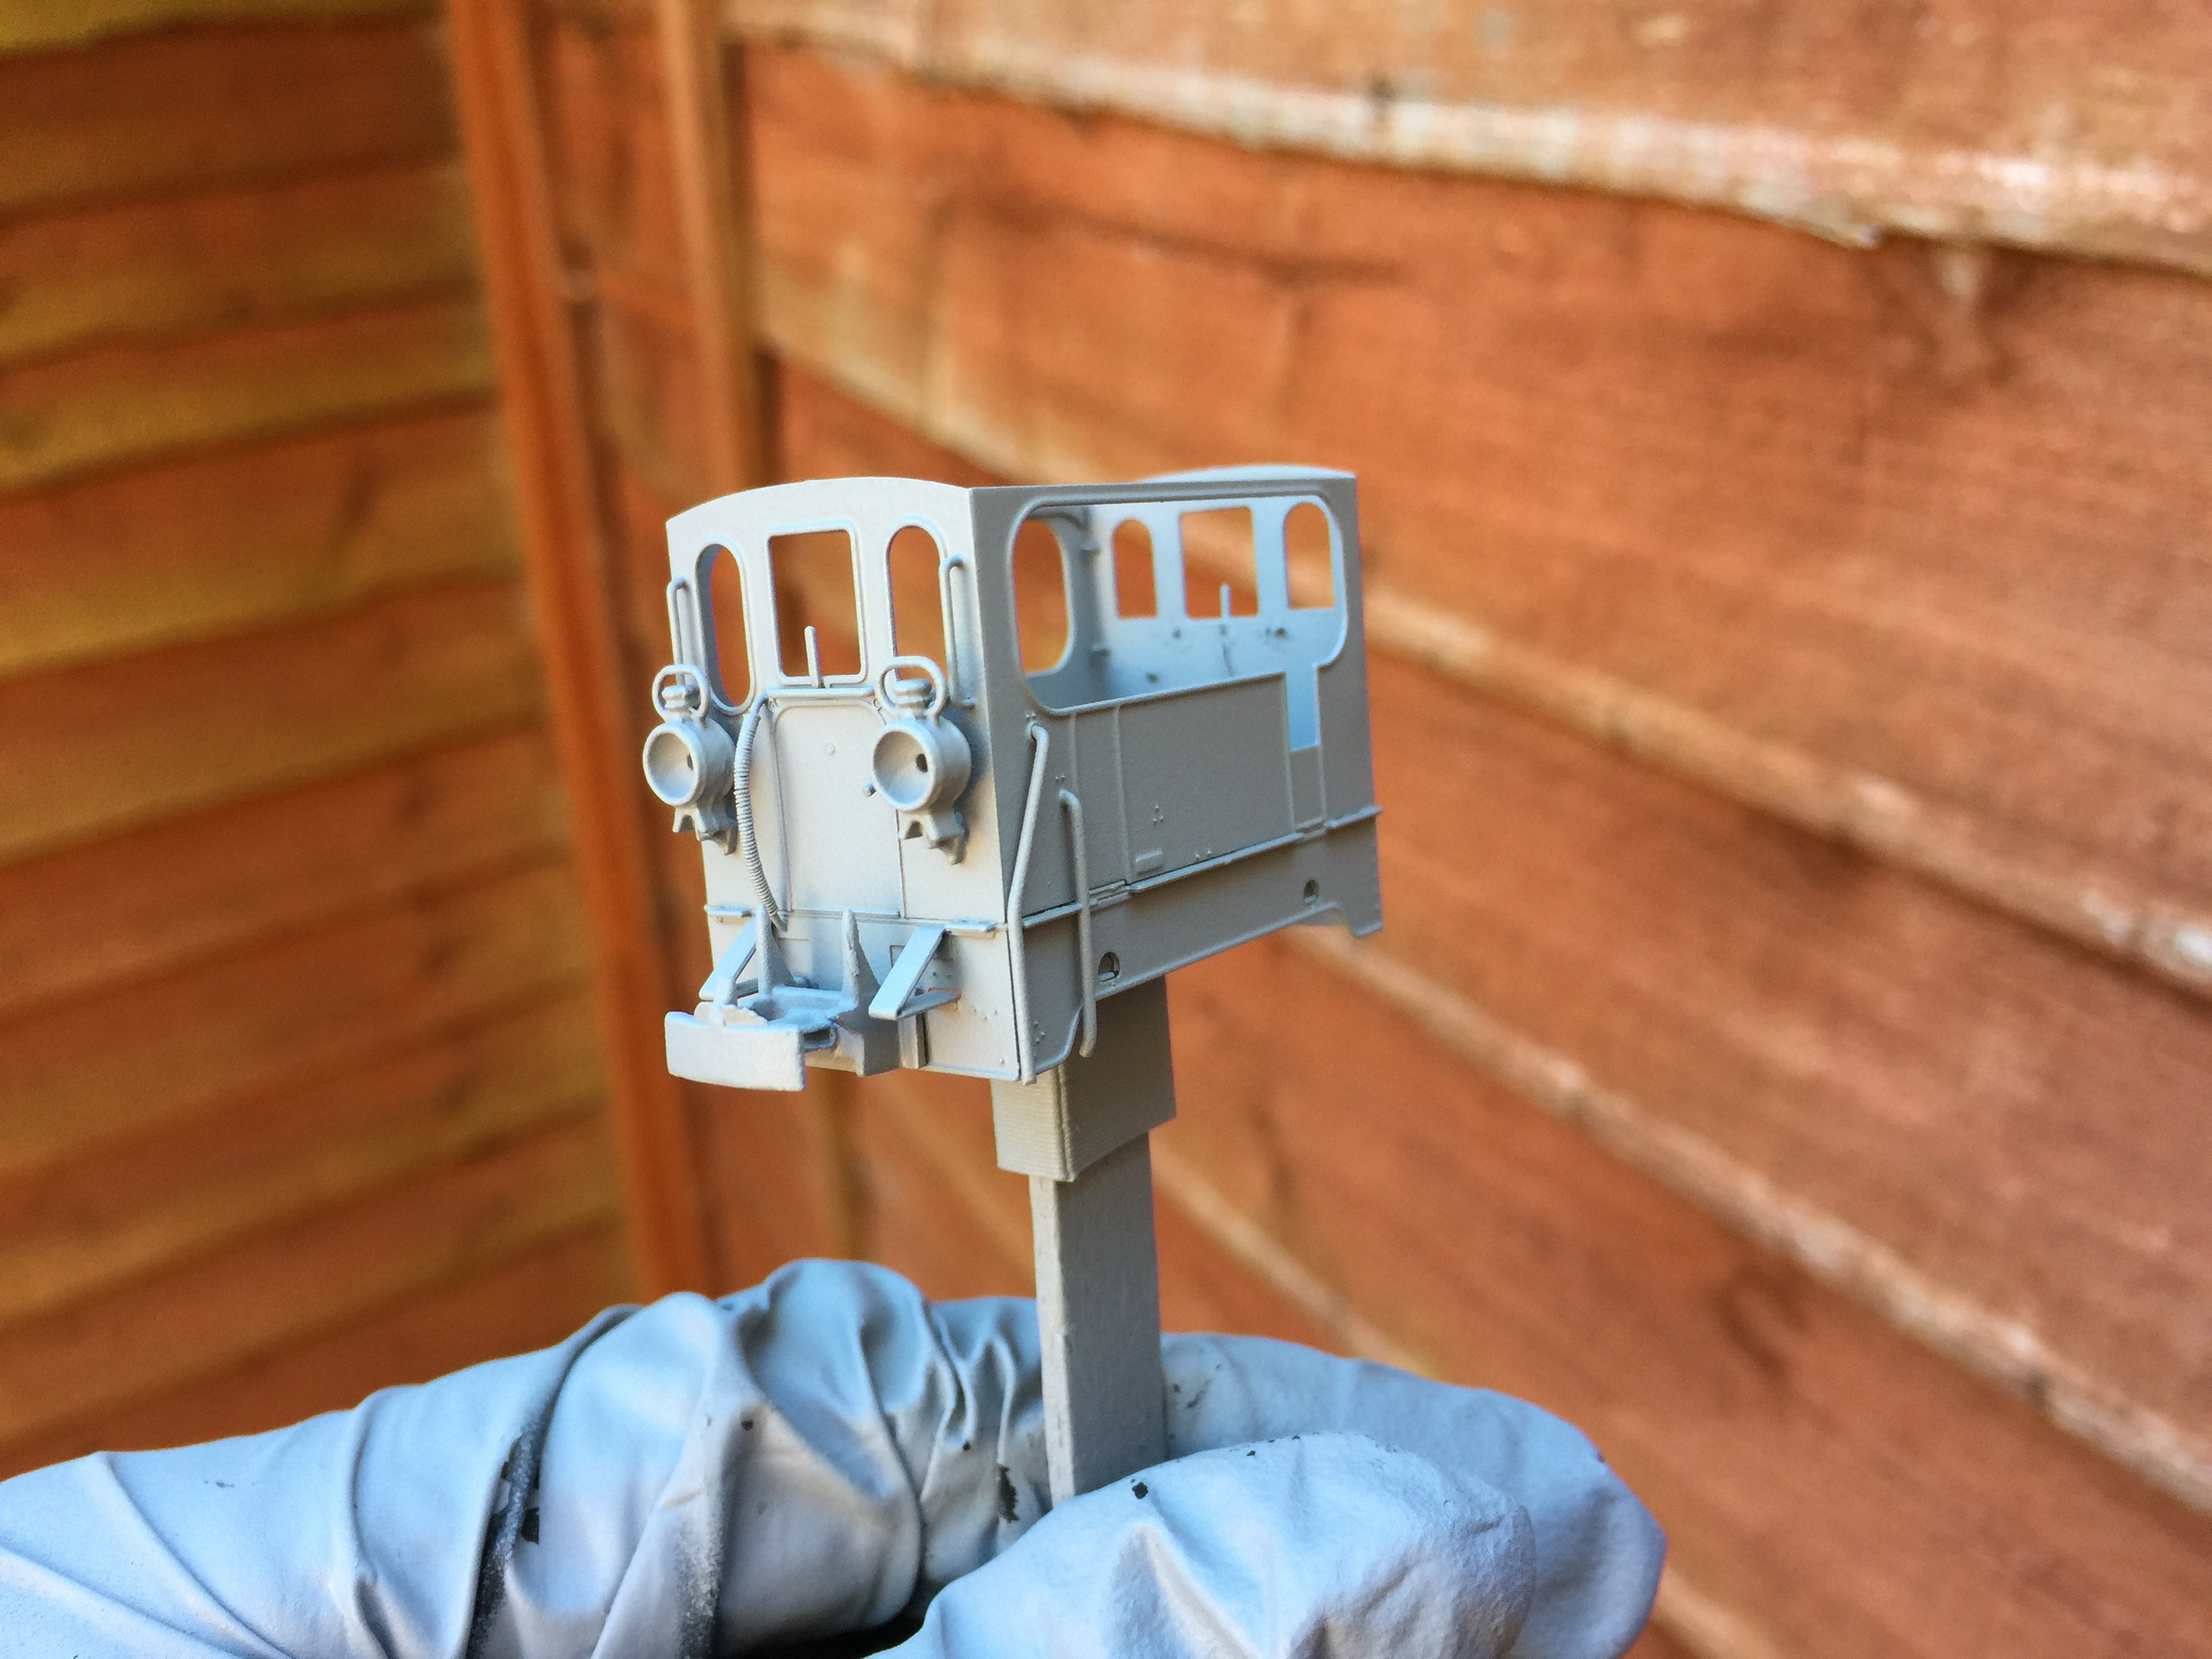
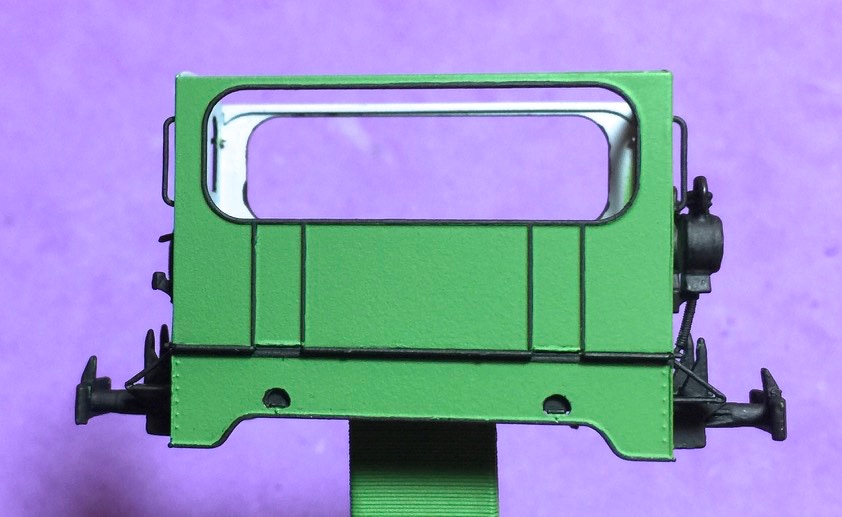
Laat het model een uur of zes drogen. Verf dan de binnenzijde van de lampen wit met een penseel. Het zal niet goed dekken, dus je moet een paar lagen doen. Je kunt ondertussen andere delen van de kast verven en later weer een laagje wit doen. Bijvoorbeeld het onderste gedeelte van de binnenzijde zwart verven.
Let the model dry for about 6 hours. Then use a brush to paint the lamps white. It will not cover well, so you’ll have to do a few more layers. You can continue with other parts of the model, while the white paint dries. For example, you can paint the bottom half of the inside black.

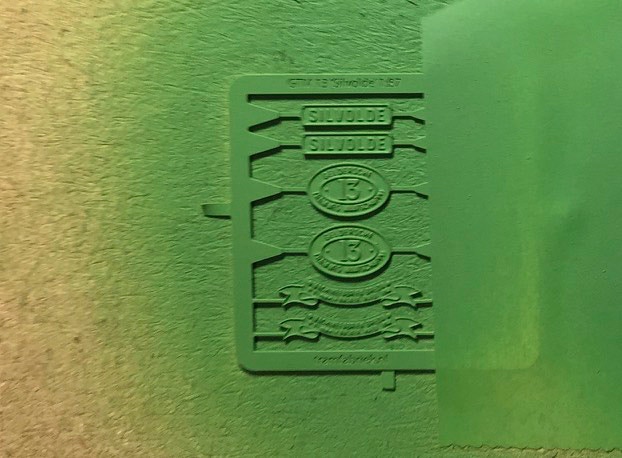
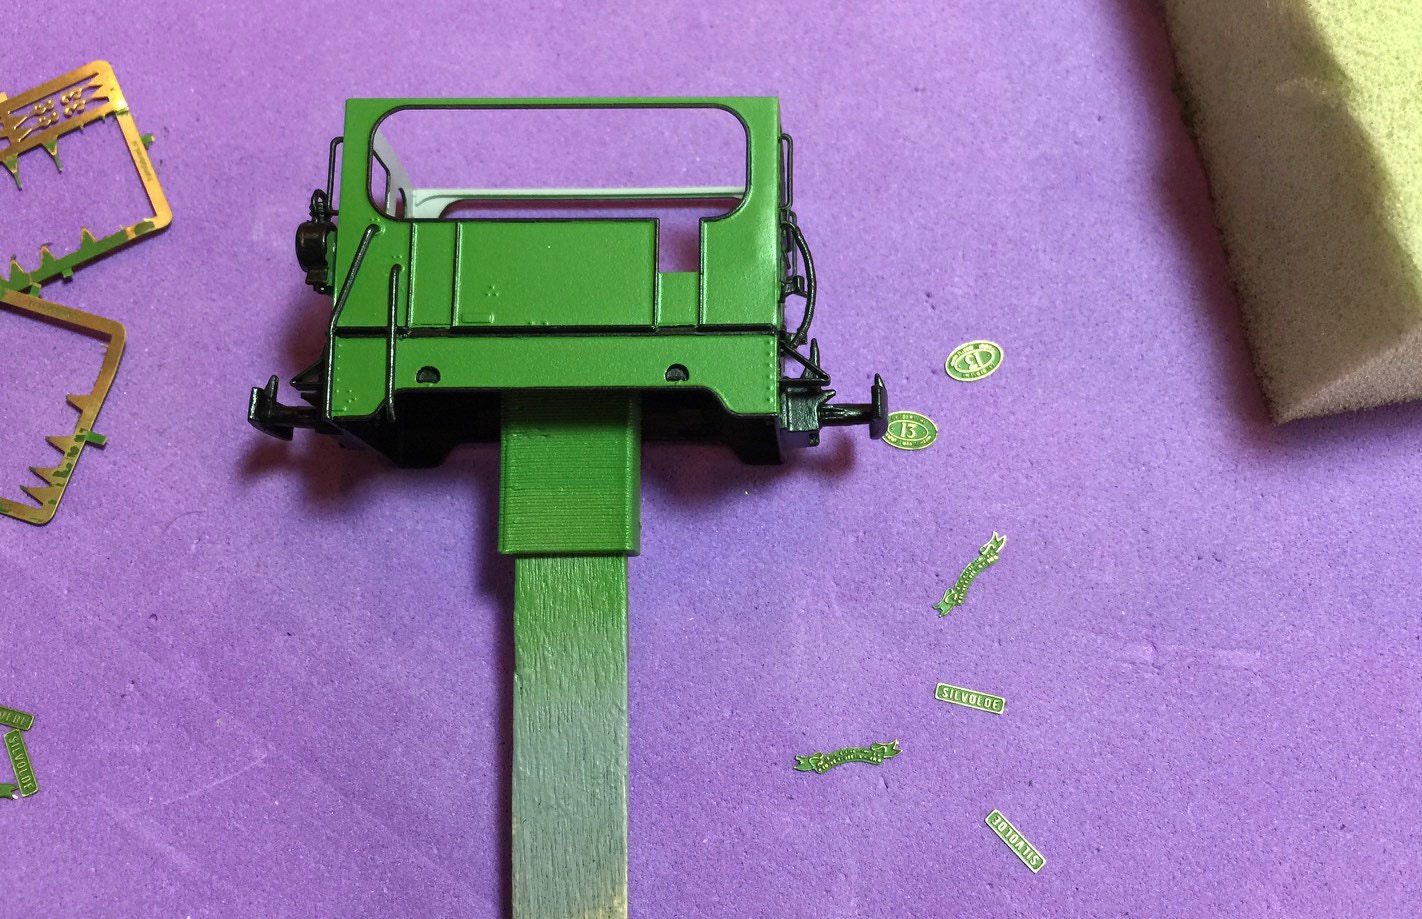
De messing schildjes moeten dezelfde kleur krijgen als de kast, maar dit zonder grondverf. Plak de nummertjes af, zodat ze blank blijven. Laat het een dag drogen, dan schuur de toplaag er weer af met fijn schuurpapier (hier korrel 1500)
The brass plates get the same colour as the tram, but without a primer. Mask the numbers, so they don’t get painted. Leave it a day to dry, then rub off the higher laying paint with a fine sandpaper (here grade 1500).
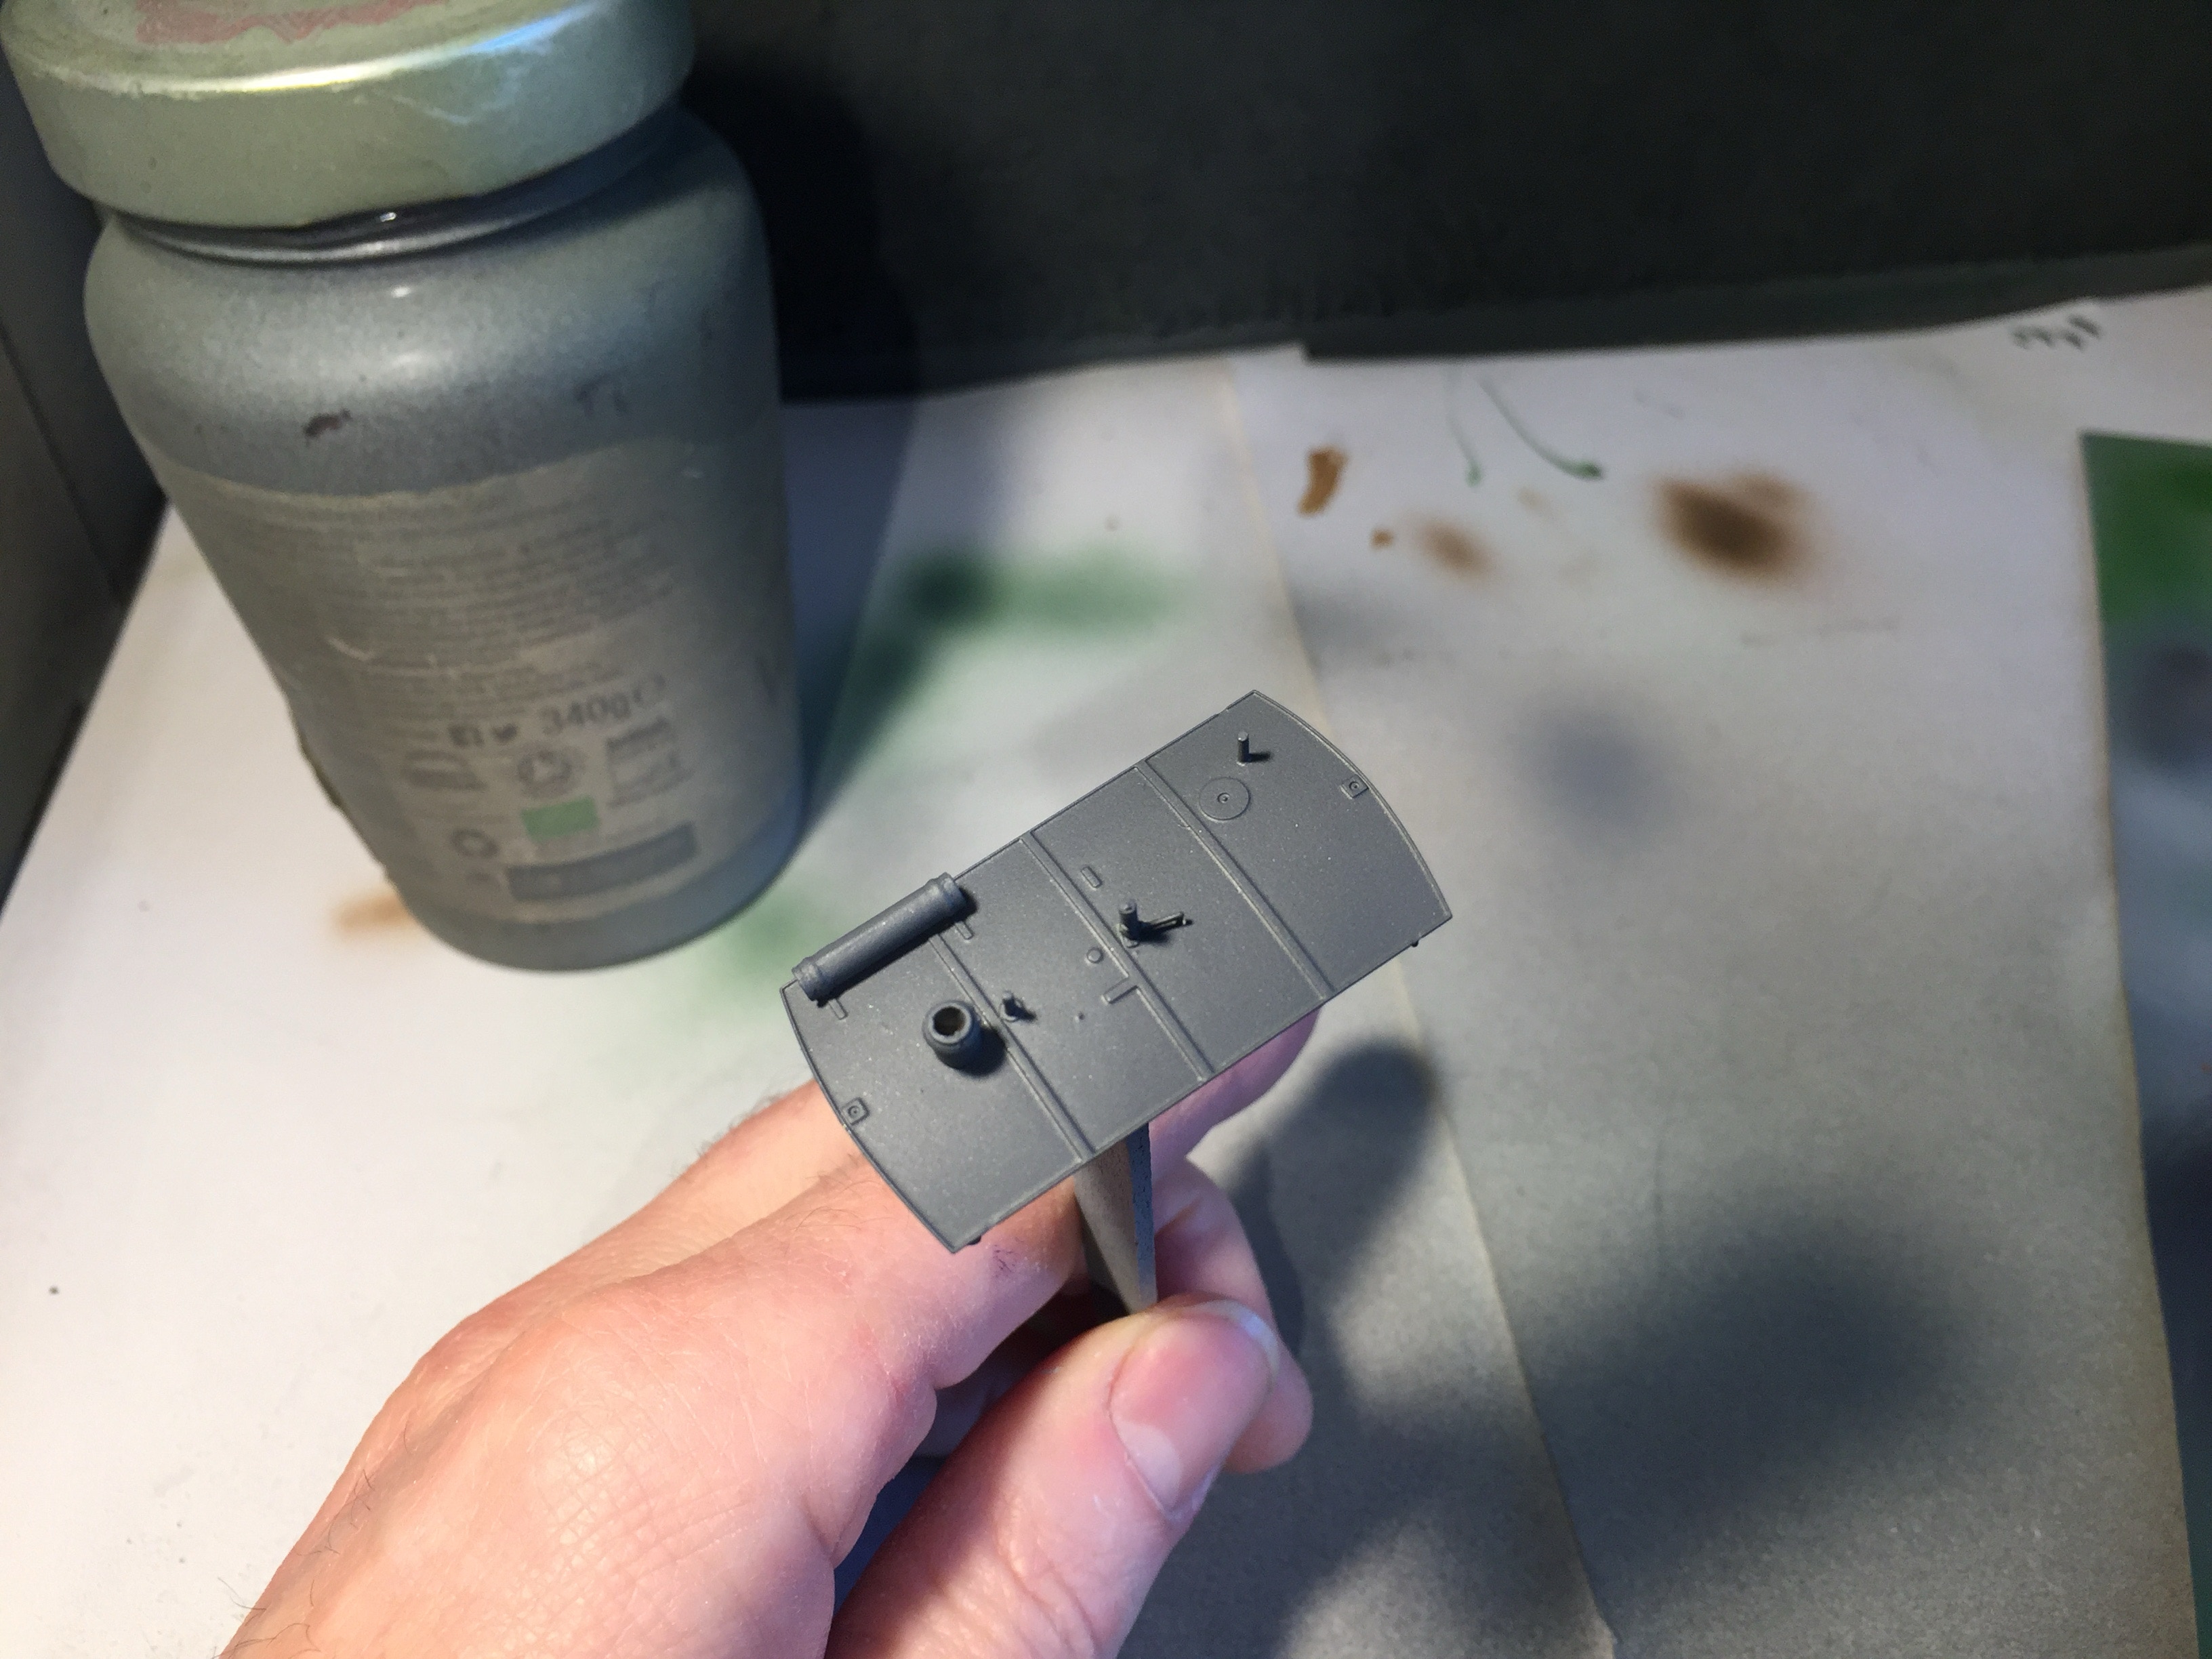
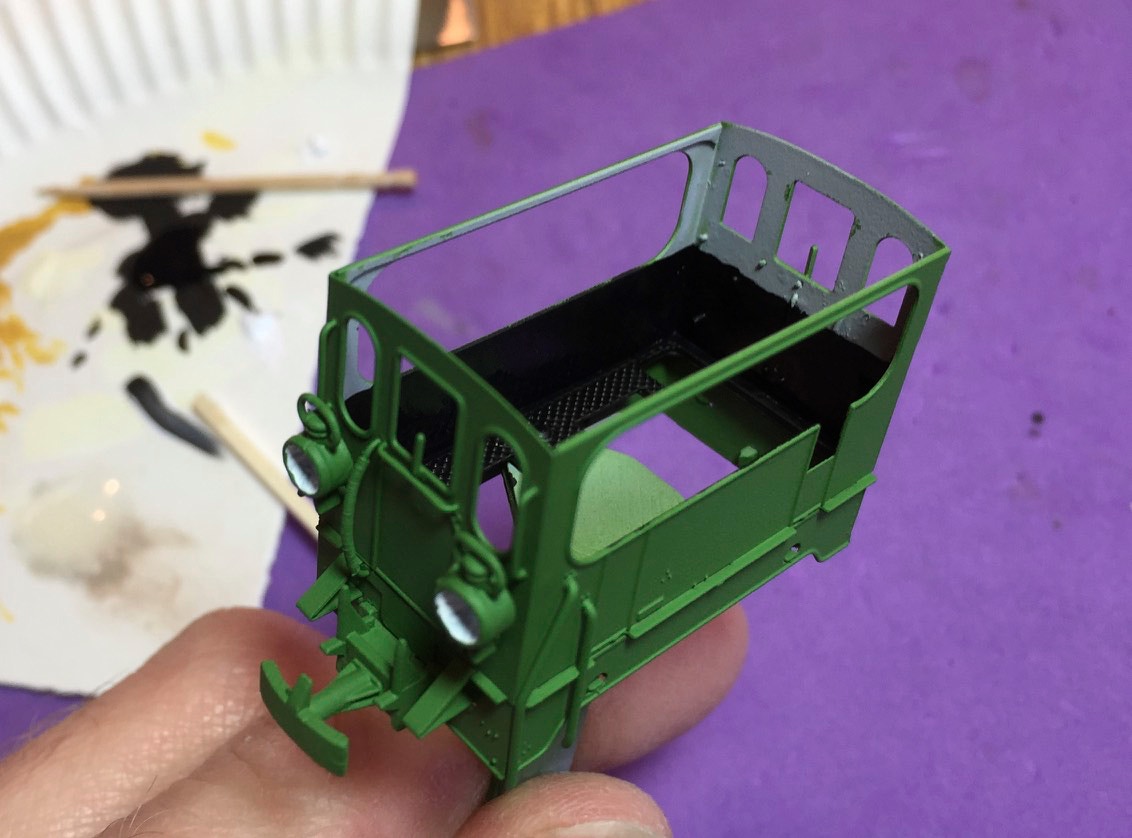
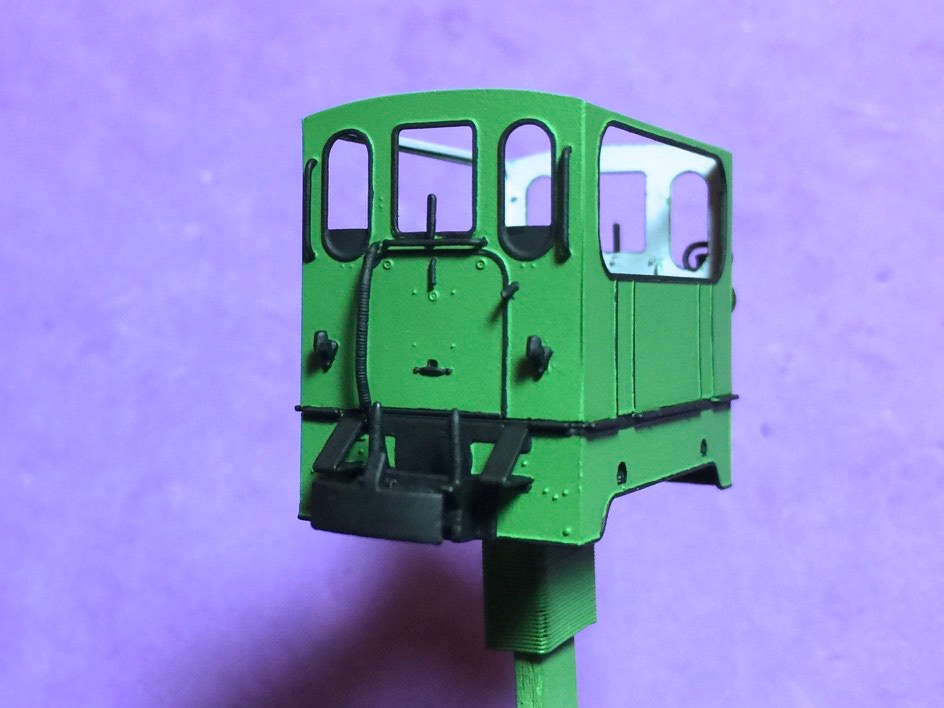
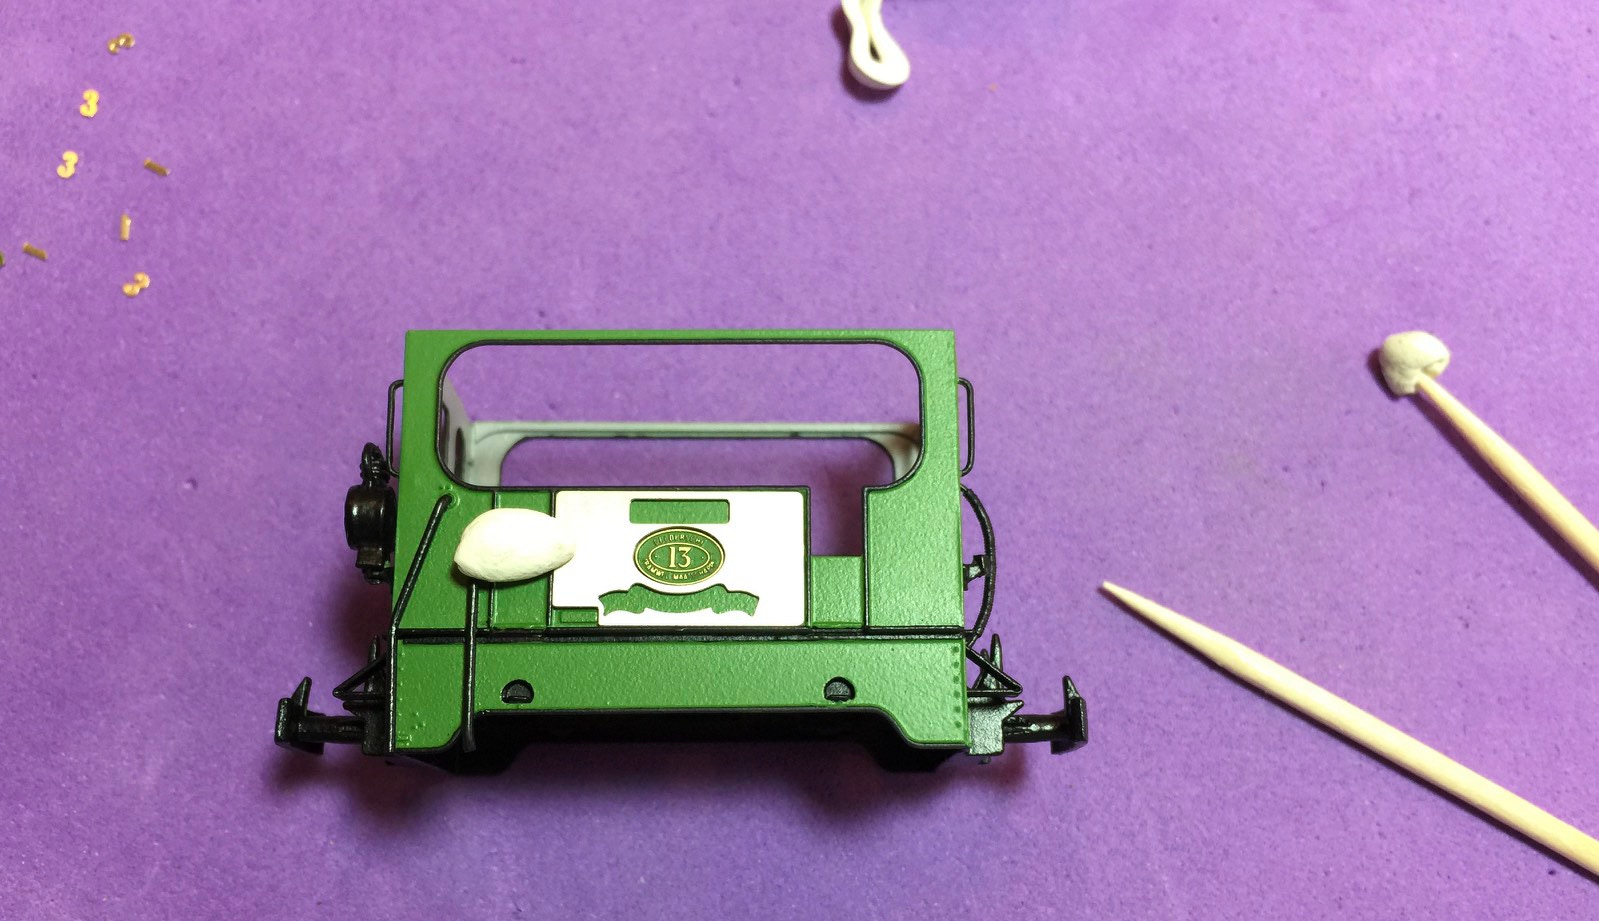
Verf de onderdelen zwart, zoals op het plaatje. Zie dat ik ook veel “fouten” maak. Niet erg, die worden straks weer hersteld.
Paint the black details, as seen on the picture. Note that I also make a lot of “mistakes”. Don’t worry, they will be corrected later.
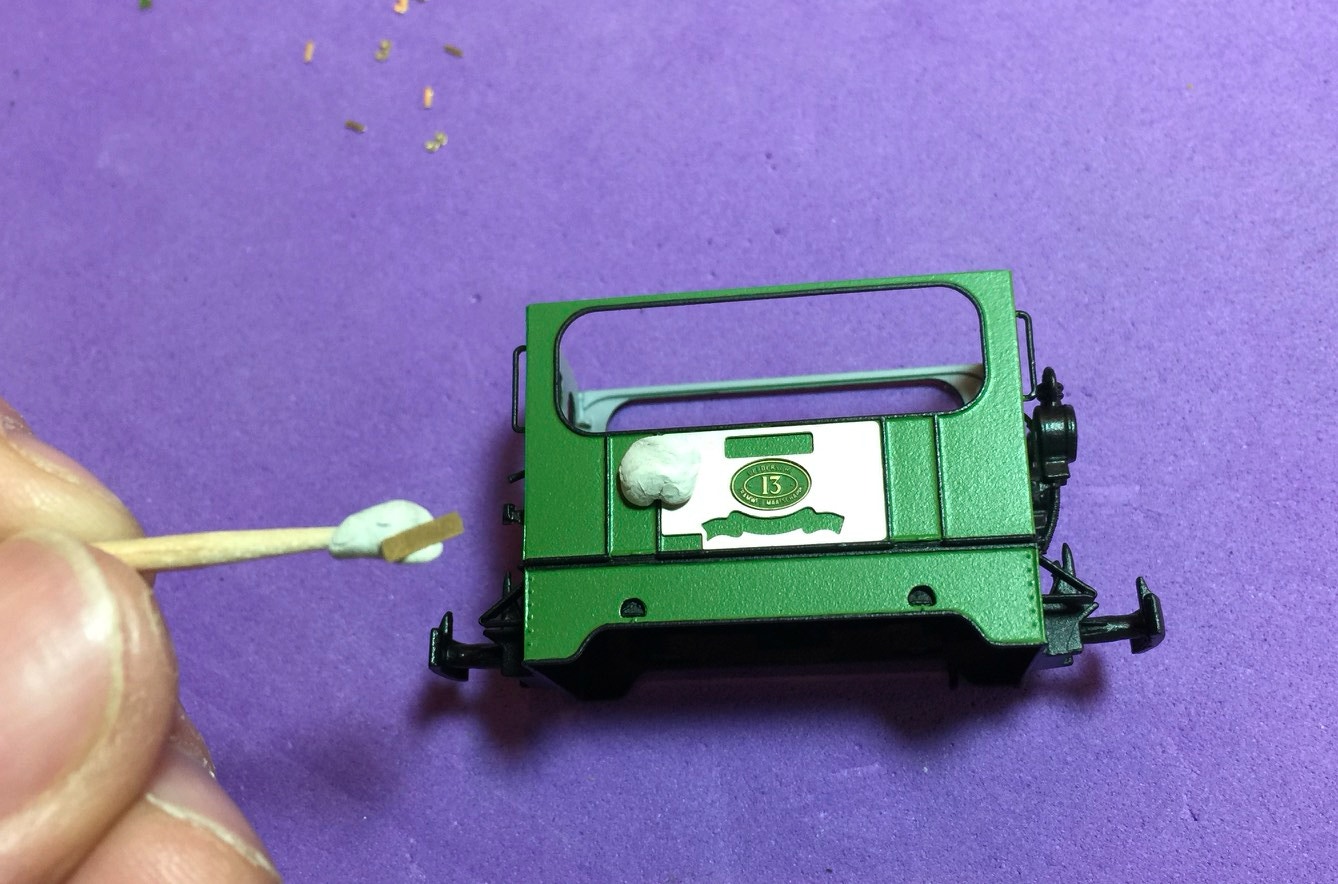
Met (water) verdunde groene verf, ga lichtjes over de foutjes. Hier bewijst Vallejo verf zijn kracht over Tamiya, want Tamiya wordt korrelig als je niet lang wacht tot het helemaal droog is. Bij Vallejo kun je er al meteen na een paar seconden weer overheen als het er droog uitziet. Heb je teveel groen geverfd, ga je er weer met verdund zwart overheen. Net zo lang tot dat je tevreden bent.
With (water) thinned green paint you go lightly over the mistakes. Here is Vallejo showing why it is my preferred choice of paint. Tamiya will crumble when you don’t wait (very) long. Vallejo paint allows you to put on another layer already after a few seconds, when the paint looks dry. If you’ve painted too much green, then used thinned black again and alternate these colours until you are happy.
Wanneer het helemaal geverfd is, maak het model stofvrij en spuit het met een satijnen of matte verf. Hier is belangrijk het volgende recept te volgen: één dunne laag, dan 15 minuten drogen, dan nog een dunne laag en tot de volgende dag laten drogen. Spuit je te dik, dan is de kans groot dat je witte uitslag op het model krijgt.
When the model is completely painted, remove all dust and spray it with a satin or matt lacquer. Here it is very important to follow the following instructions: one thin layer, then let it dry for 15 minutes, then another thin layer. When you would spray too thick, there is a big chance a white stain will appear.
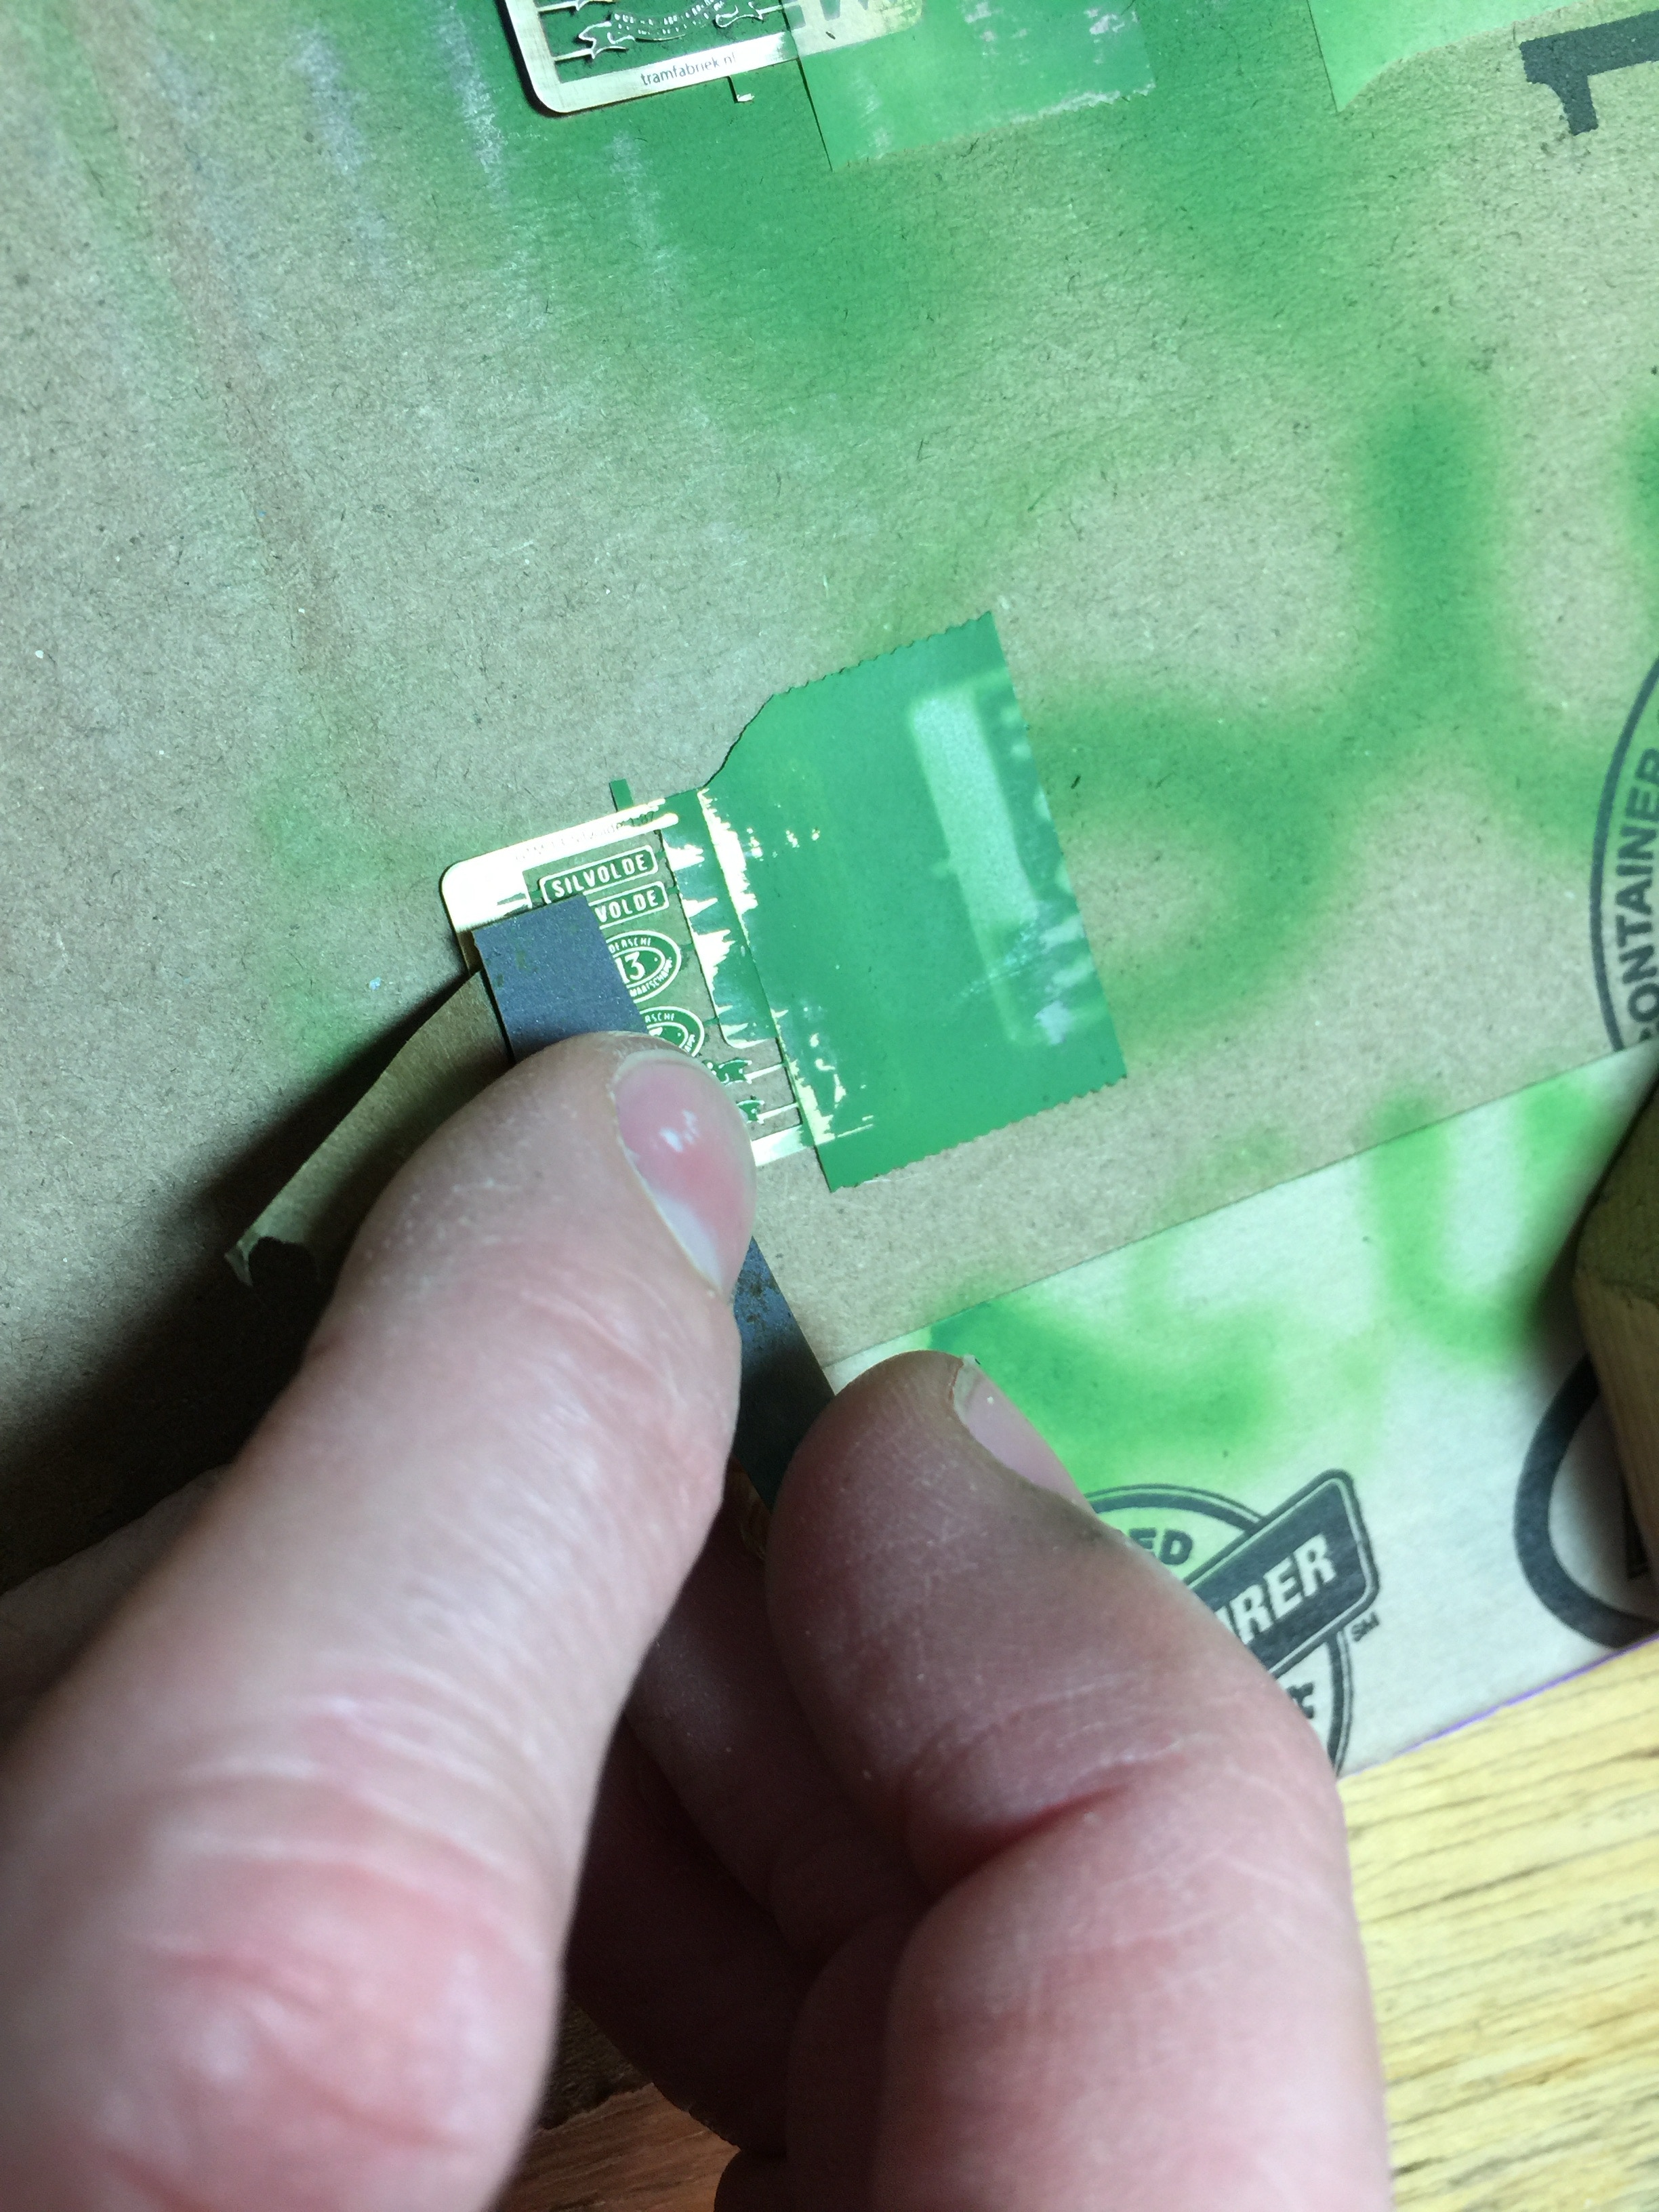
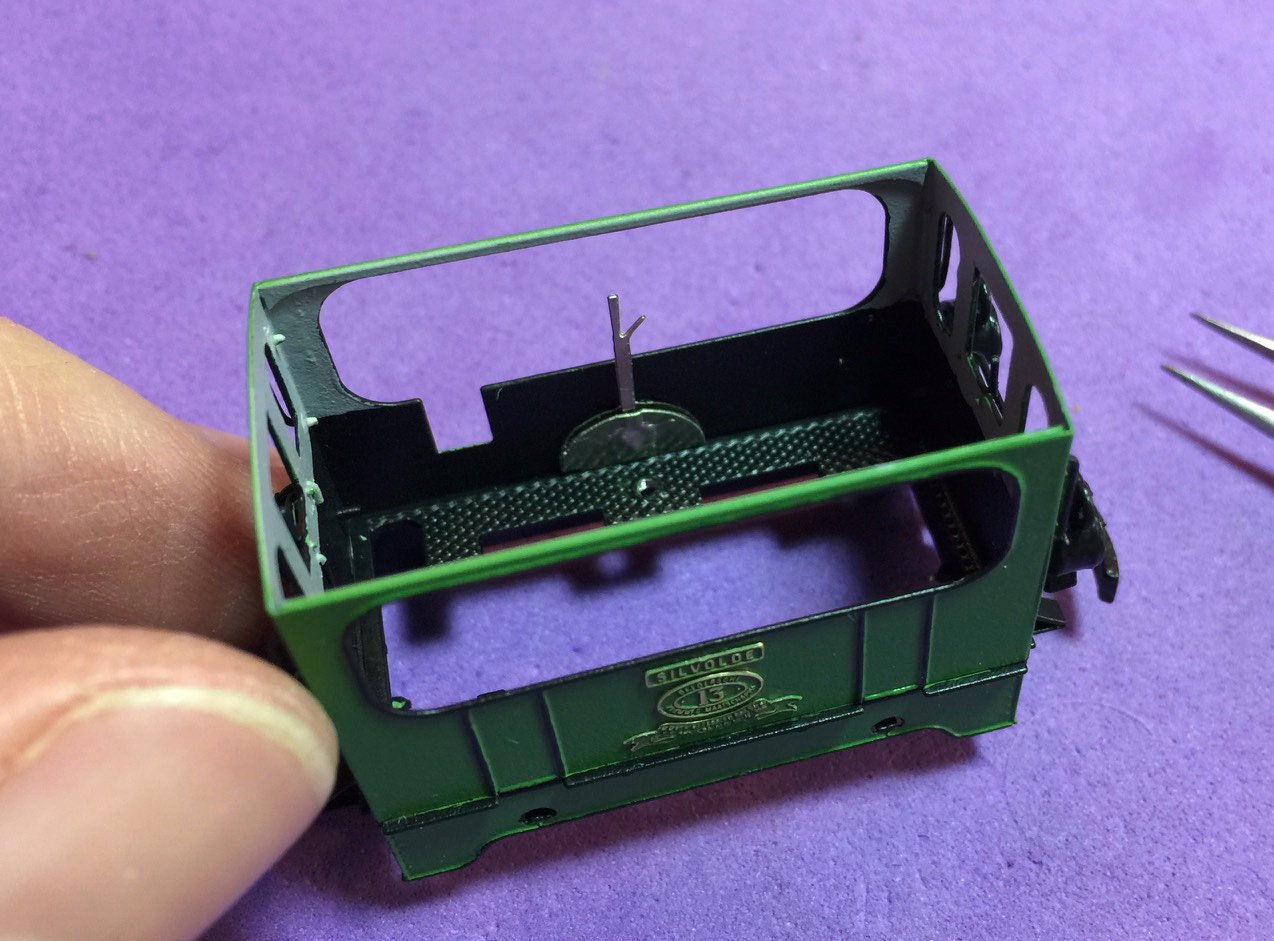
MESSING PLATEN BEVESTIGEN
Na voldoende droging van de laklaag, kunnen de platen bevestigd worden. Knip de onderdelen met een fijne, scherpe schaar van de tabjes af. Let op dat er ook verf aan de zijkant van de platen is gekomen. Op een foto wordt dit duidelijk, dus ik schuur dat ook weg. Als je denkt dat dit heel priegelig werk is, dan heb je het juist.
ATTACHING THE BRASS PLATES
After the lacquer has dried, you can fit the plates. Cut the parts with a fine, sharp pair of scissors. Note that there is paint on the sides of the plates. You can clearly see this on a picture, so get rid of that. If you think this seems to be very fiddly work, you are right.

Gebruik het meegeleverde malletje (11) om de bordjes op de juiste plek te bevestigen. Een stukje Buddy/BluTack kan gebruikt worden om de mal niet te laten verschuiven. Dit materiaal kan ook handig zijn om de bordjes vast te houden en te bevestigen, maar ik vind het een pincet betrouwbaarder. Gebruik Kristal Klear of houtlijm voor het bevestigen en strijk het uit, zodat de lijm er niet onderuit loopt als je het aandrukt. Voorkom drama door geen secondenlijm te gebruiken!
Use the supplied jig (11) to fit the brass plates on the right place. A piece of BluTack can be helpful to keep the jig in place. This material can also be handy to hold and fit the plates, but I find a pair of tweezers more reliable. Use Kristal Klear or PVA to glue the items. Do make sure to have it really, really thin, so no glue will be come out on the sides when you push them in place. Prevent disaster by not using super glue!
Om de nummers aan de voorkant te bevestigen, zet ik het model vast tussen wat verpakkingsschuim en blokken metaal.
To fit the numbers on the front, I hold the model in place by placing it between foam and blocks of metal.

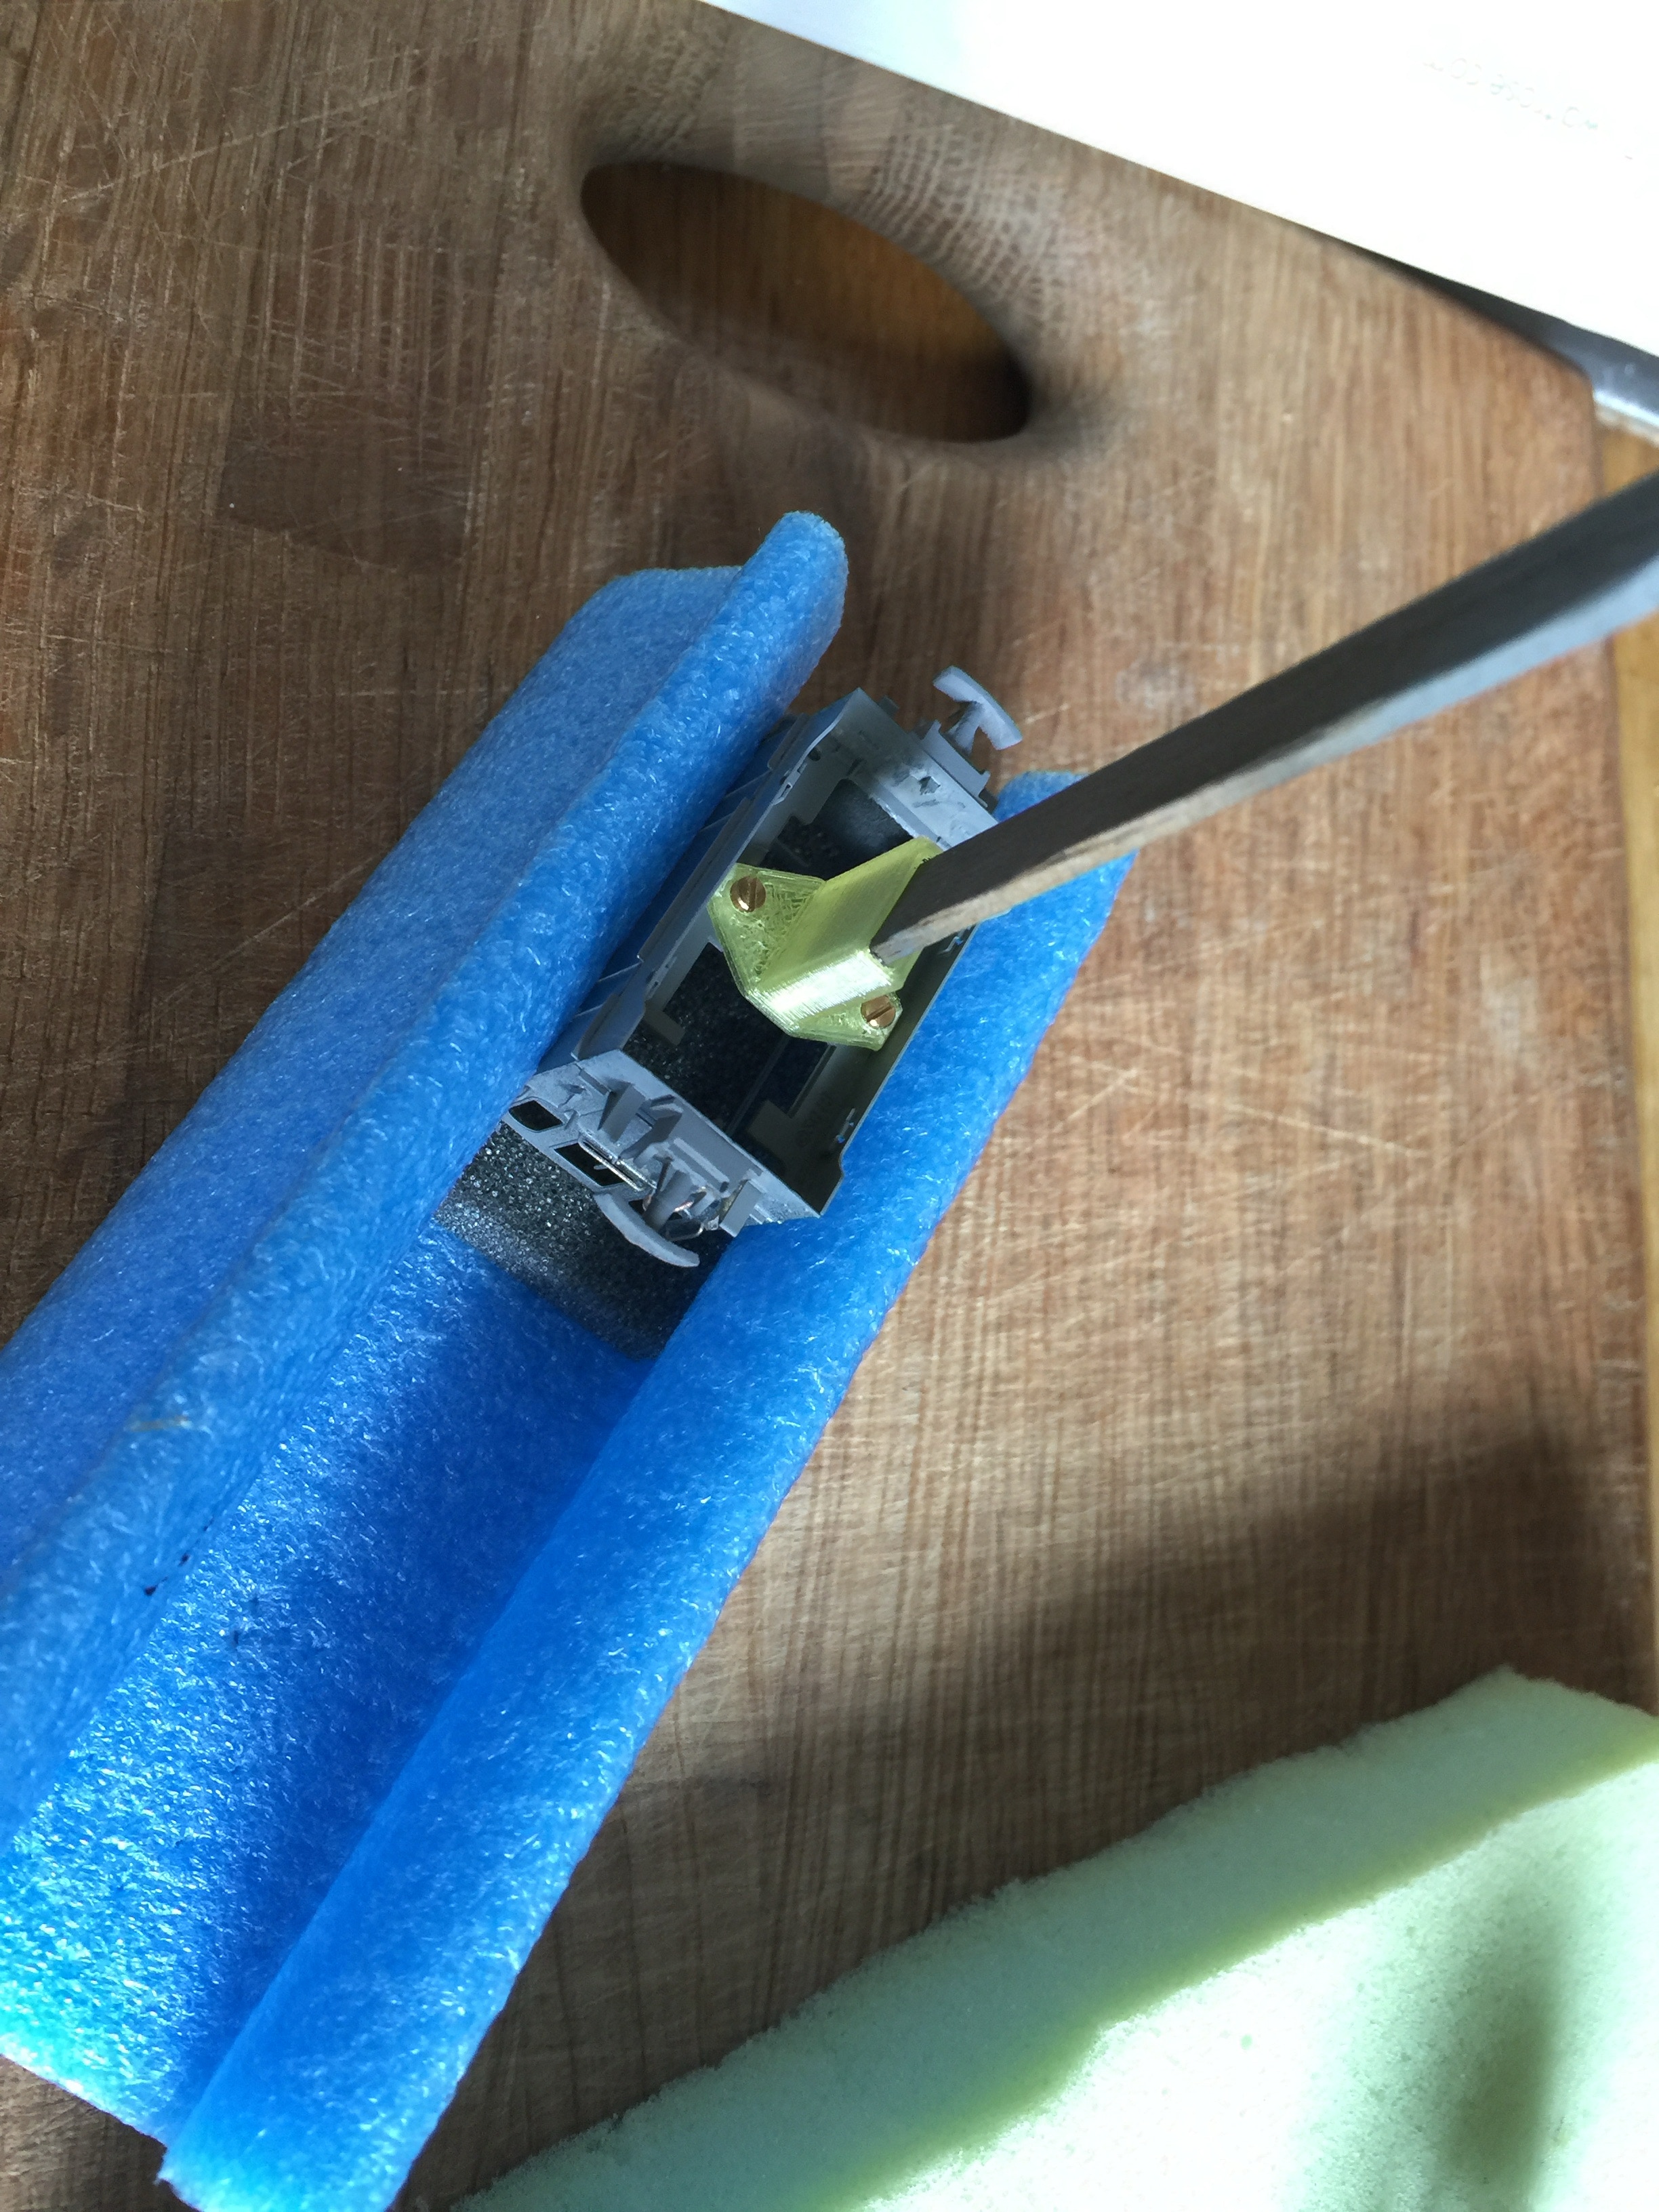
RICHTINGSHENDEL
De richtingshendel (13) bestaat uit twee onderdelen: het draaisysteem en de hendel. Met een flinke tang, vouw een halve cirkel van de cirkel, met de opstaande onderdelen aan de binnenkant. Hier komt de hendel binnen in. Knijp dan het draaisysteem (de twee halve cirkels) helemaal plat op de hendel, zodat je de contouren van de hendel krijgt te zien en de hendel stroef beweegt. Test dat de hendel beide kanten op beweegt en op de plaats blijft staan waarin je ‘m zet. Lijm ‘m dan met secondenlijm vast tegen de linkerzijkant (van de vooruitrijrichting), met de handgreep voor de rem naar voren wijzend.
POLE REVERSER
The Pole reverser (13) consists of two parts: the pivoting system and the lever. With strong pliers, fold the circle to two halves, with the embossed parts on the inside. Put the circular part of the lever between the two circles and with the pliers, squeeze all parts that can be pressed, so the contours of the lever and pivoting circle are embossed. Squeeze the whole thing until the lever is held in place by friction. Test to see if it works, moving back and forth, staying in the place you move it. The glue on the left panel (of the forward direction of driving) with super glue. The break handle should point forward.
Bijna klaar! Nog een paar dingetjes.
Almost ready! Only a few things.
•