


UK based
Prices for UK customers are shown inc 20% VAT
Other countries, inc EU, prices shown are ex VAT.
Bouwhandleiding


KASTENLOK INDEX
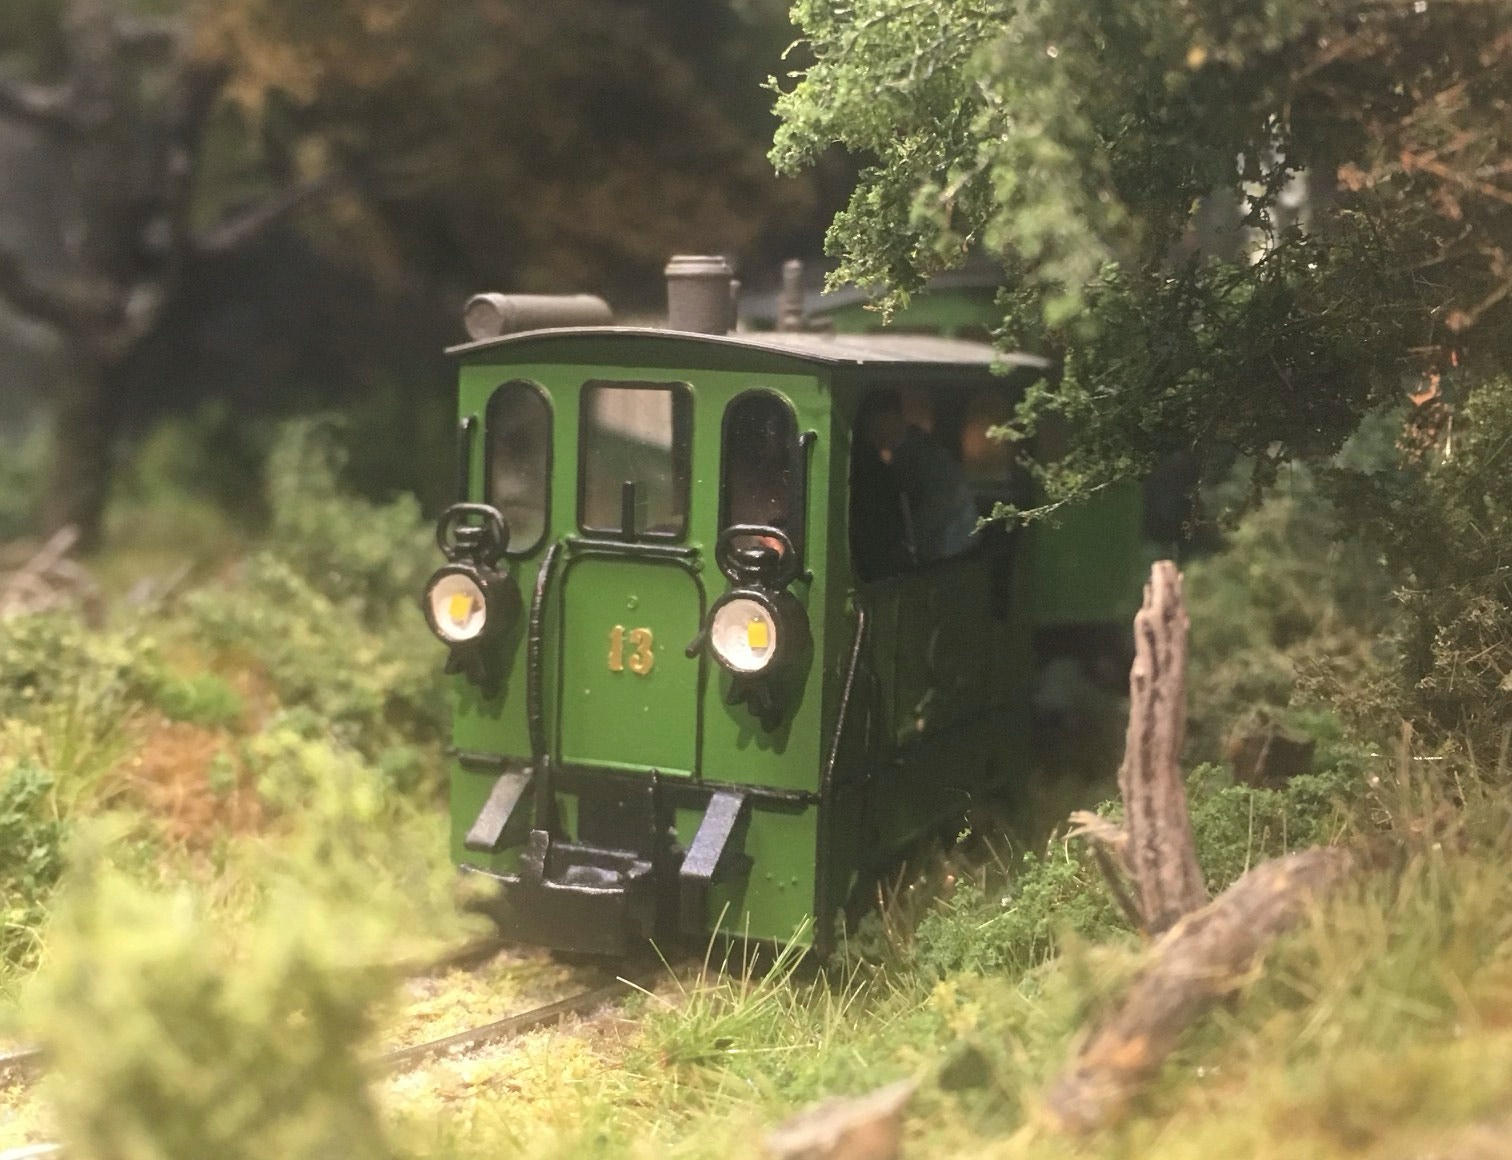
GTM 13 ‘Silvolde’


UK based
Prices for UK customers are shown inc 20% VAT
Other countries, inc EU, prices shown are ex VAT.
Bouwhandleiding
KASTENLOK INDEX
GTM 13 ‘Silvolde’
6. AFWERKING
6. FINISHING
LAMPEN
Meegeleverd met de kit zijn twee gemonteerde LED’s aan 0,15 lakdraad, een SMD weerstandje, een SMD gelijkrichter en een ultradun printplaatje. Knip een stukje (kleiner dan de lengte van een SMD) uit de printplaat, als onderbreking van de stroomdraad op de printplaat en soldeer de twee SMD’s.
LAMPS
Included in the kit are two LED, which are soldered on a 0.15 mm enamel shielded copper wire, one SMD resistor, one SMD diode and a small and ultra thin “print board”. Cut a piece (smaller than the length of a SMD) on each side of the print board, to interrupt the power connection. Solder the two SMD’s on the print board.
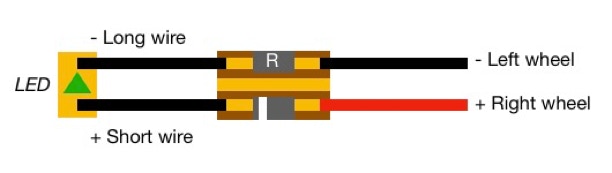
Let op dat de plus de korte draad heeft. Dit is in de electronica normaal de lange kabel, maar ik ben zo eenmaal begonnen. Het volgende model doe ik het wel goed.
Note that the plus is the short wire. Traditionally in electronics, the plus is the long wire, but I started doing it this way. The next model I’ll do it the correct way.
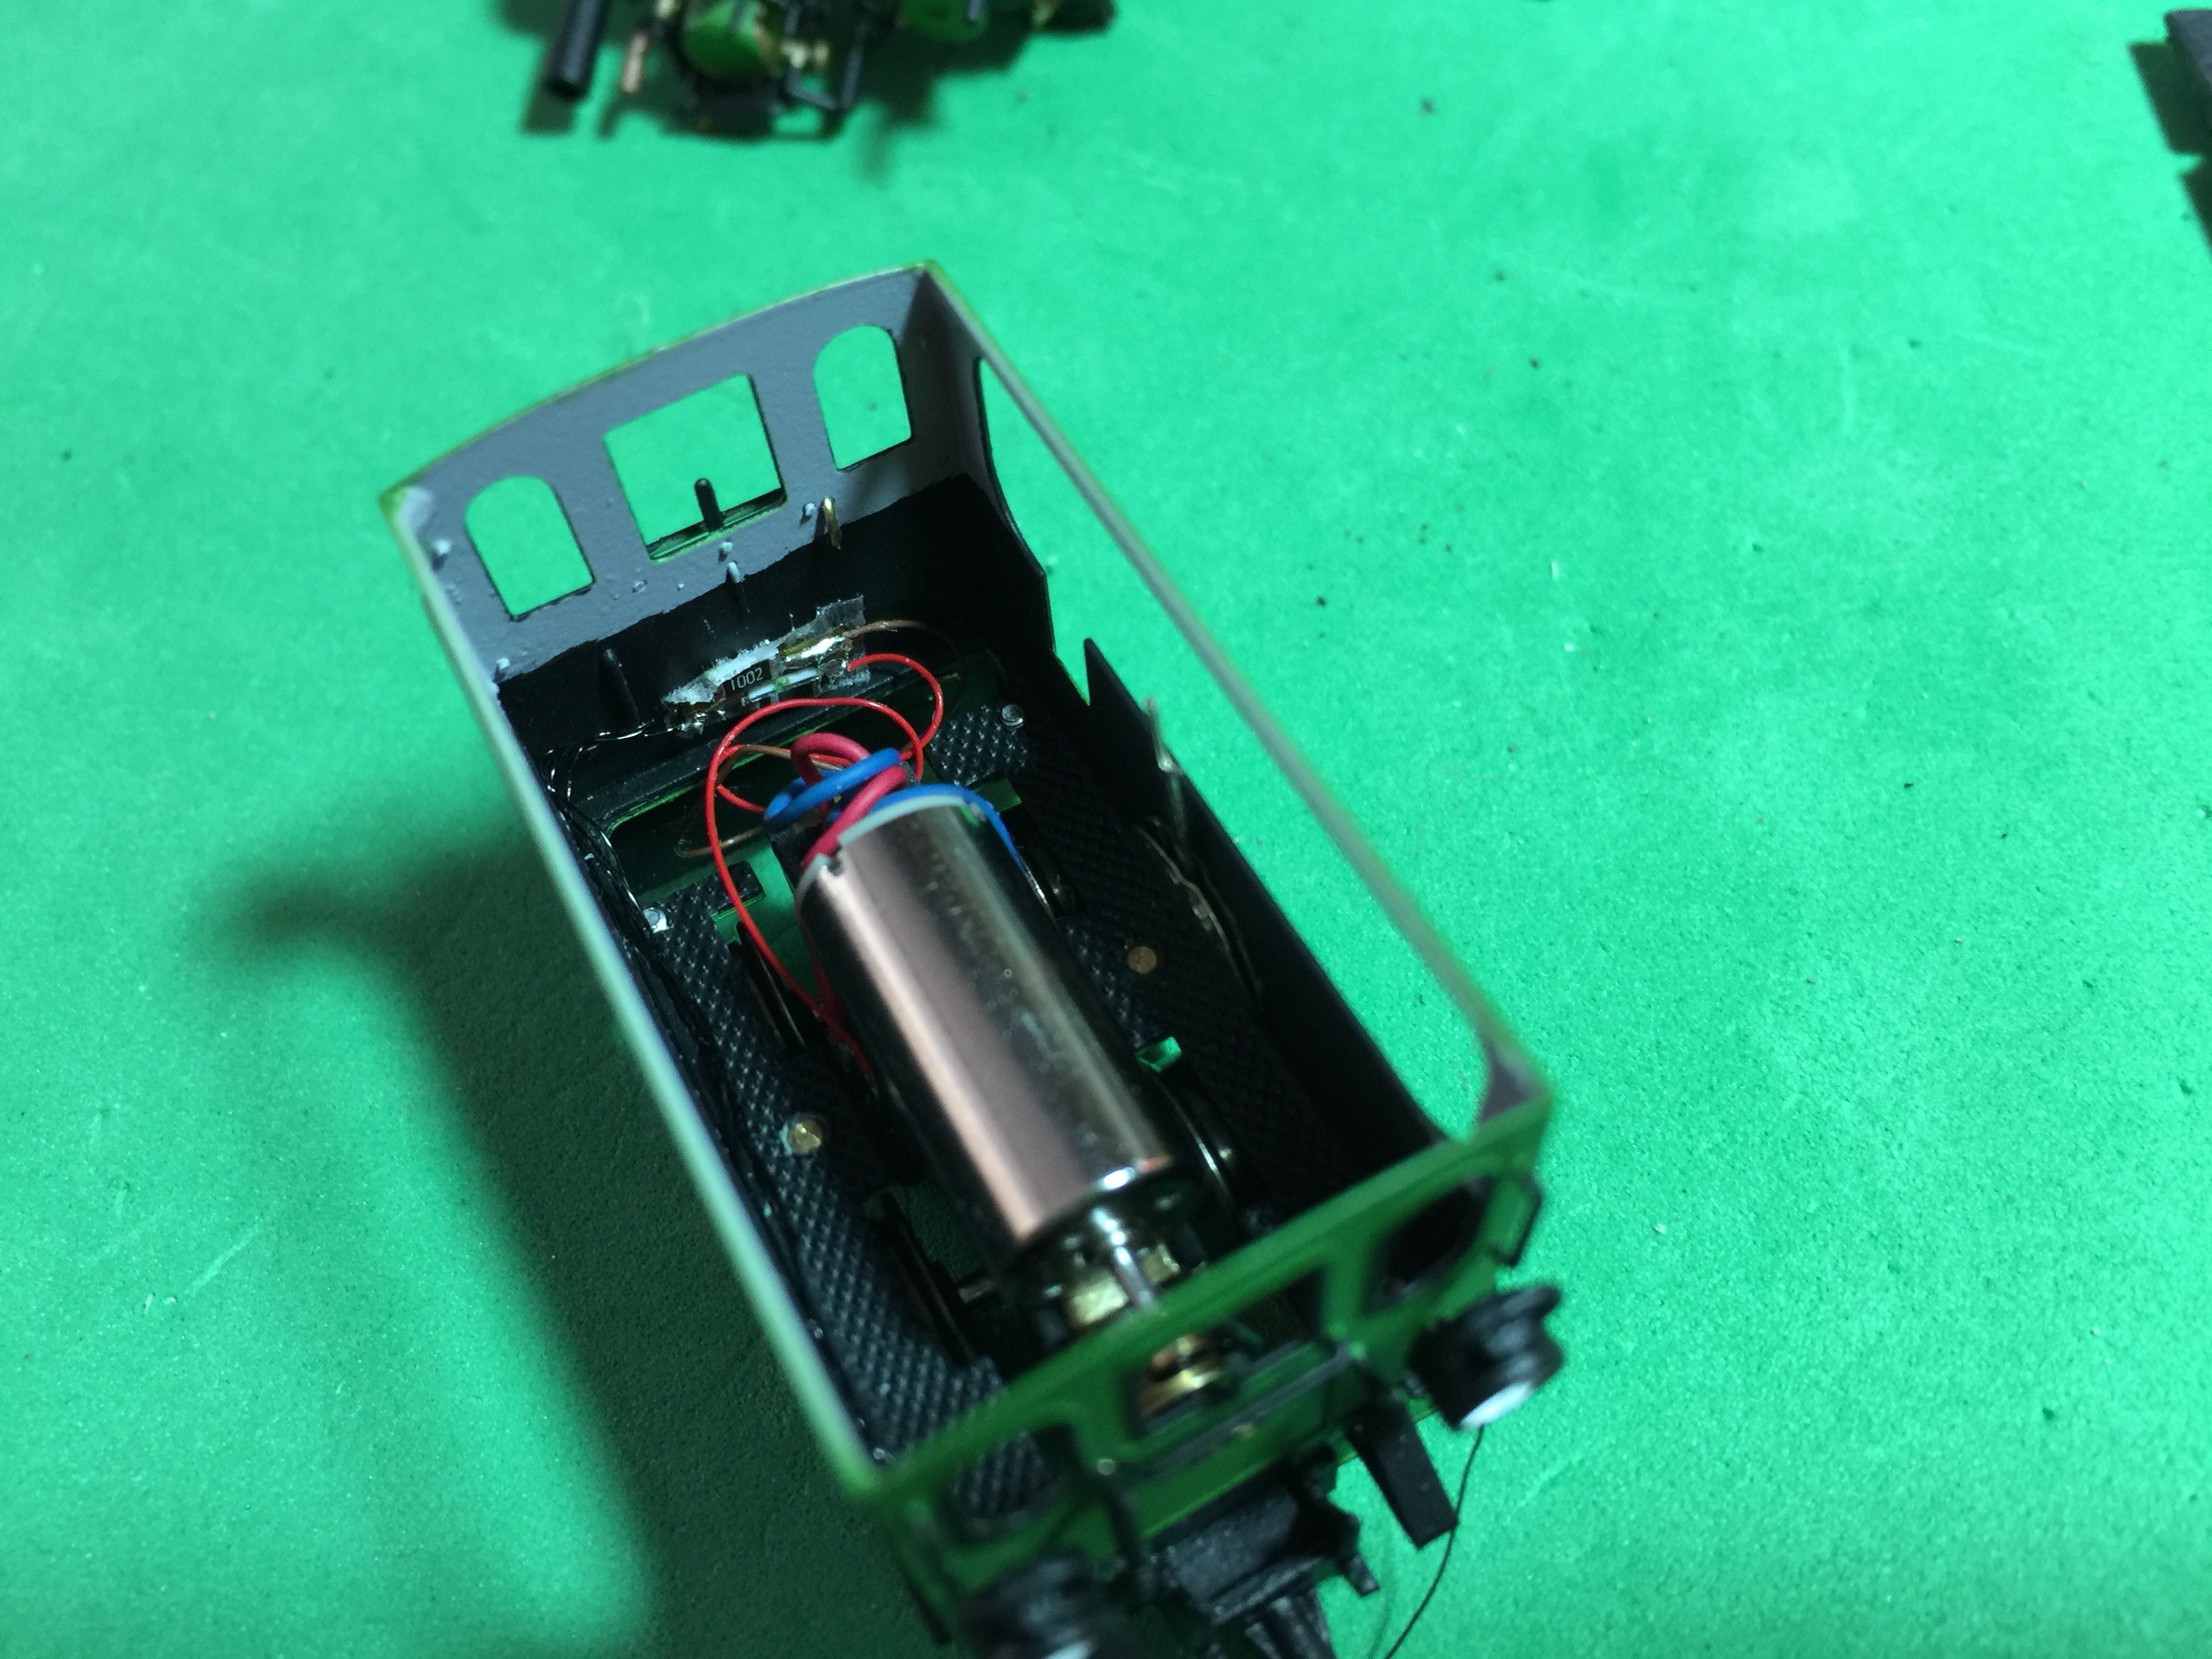
Besluit waar je de printplaat gaat bevestigen. Bij digitaal gebruik, kan het met dun dubbelzijdig plakband tegen de binnenkant van de achterwand van de kast aan, bij analoog gebruik kan hij achter de motor, op de aandrijving, worden bevestigd.
Decide where to fit the print board. With a digital motorised drive, stick it with thin double sided tape to the side panel on the inside of the tram. When running analog, you can fit it on the “backseat” of the drive, behind the motor.
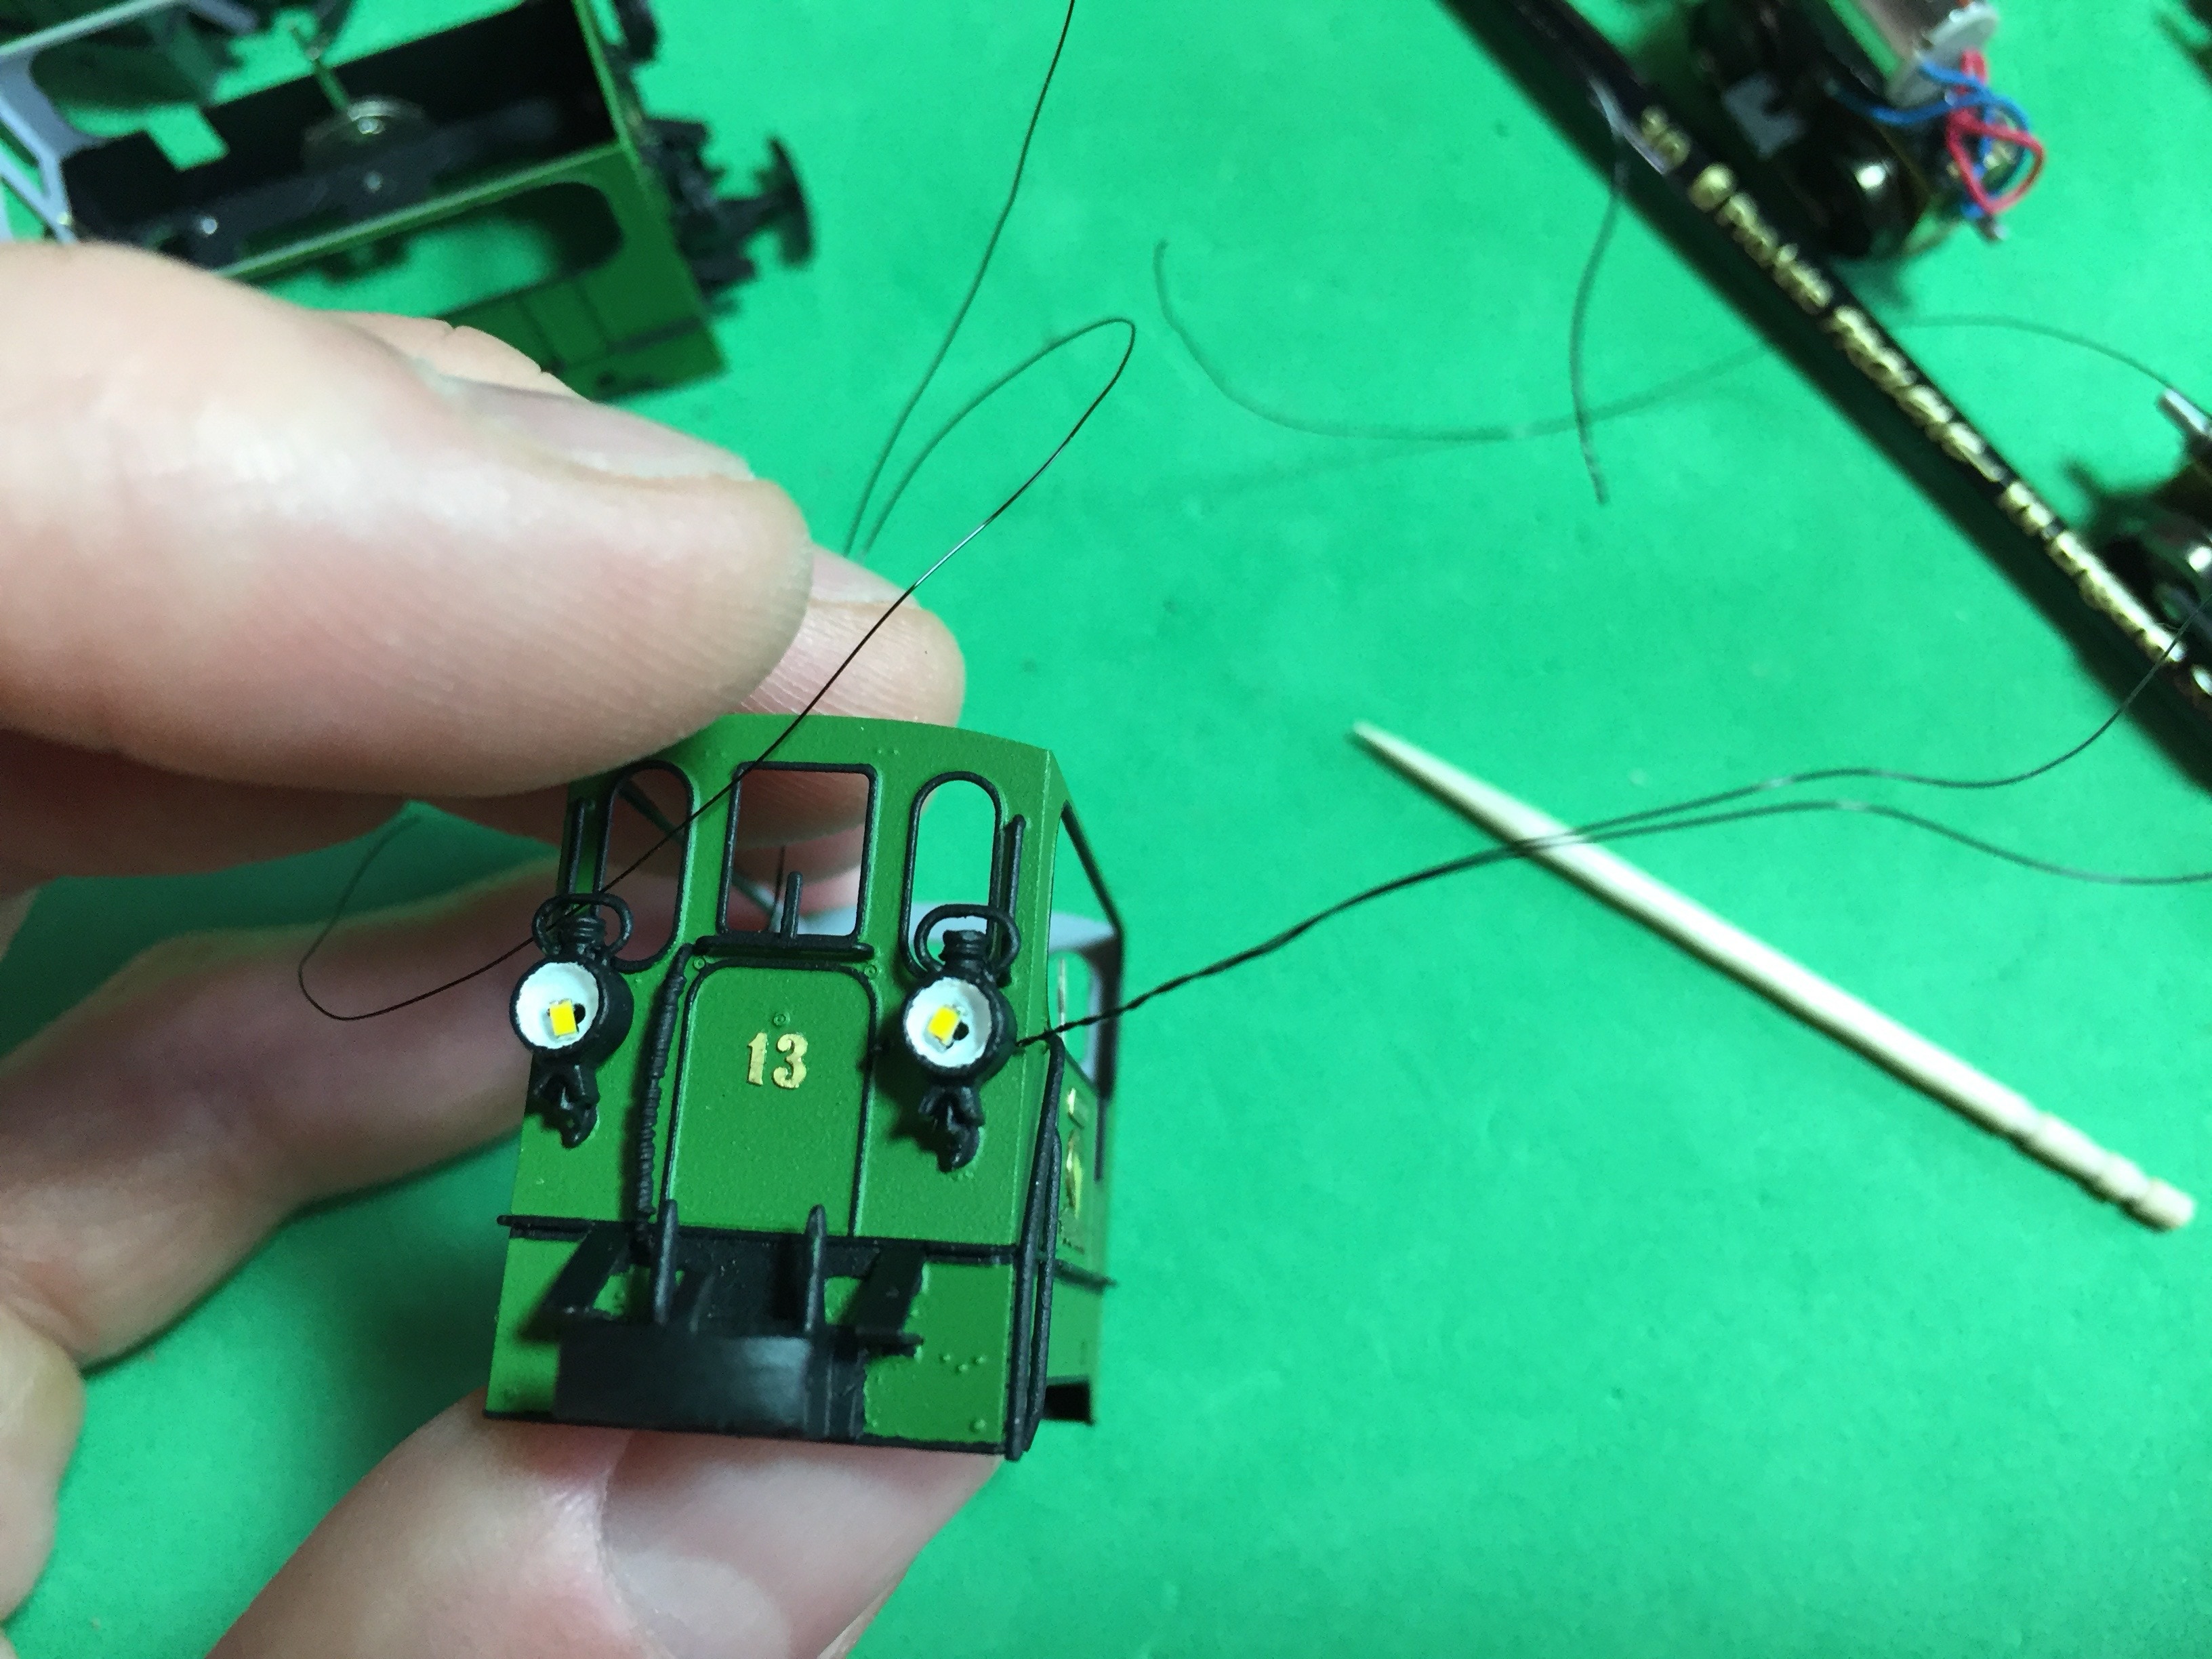
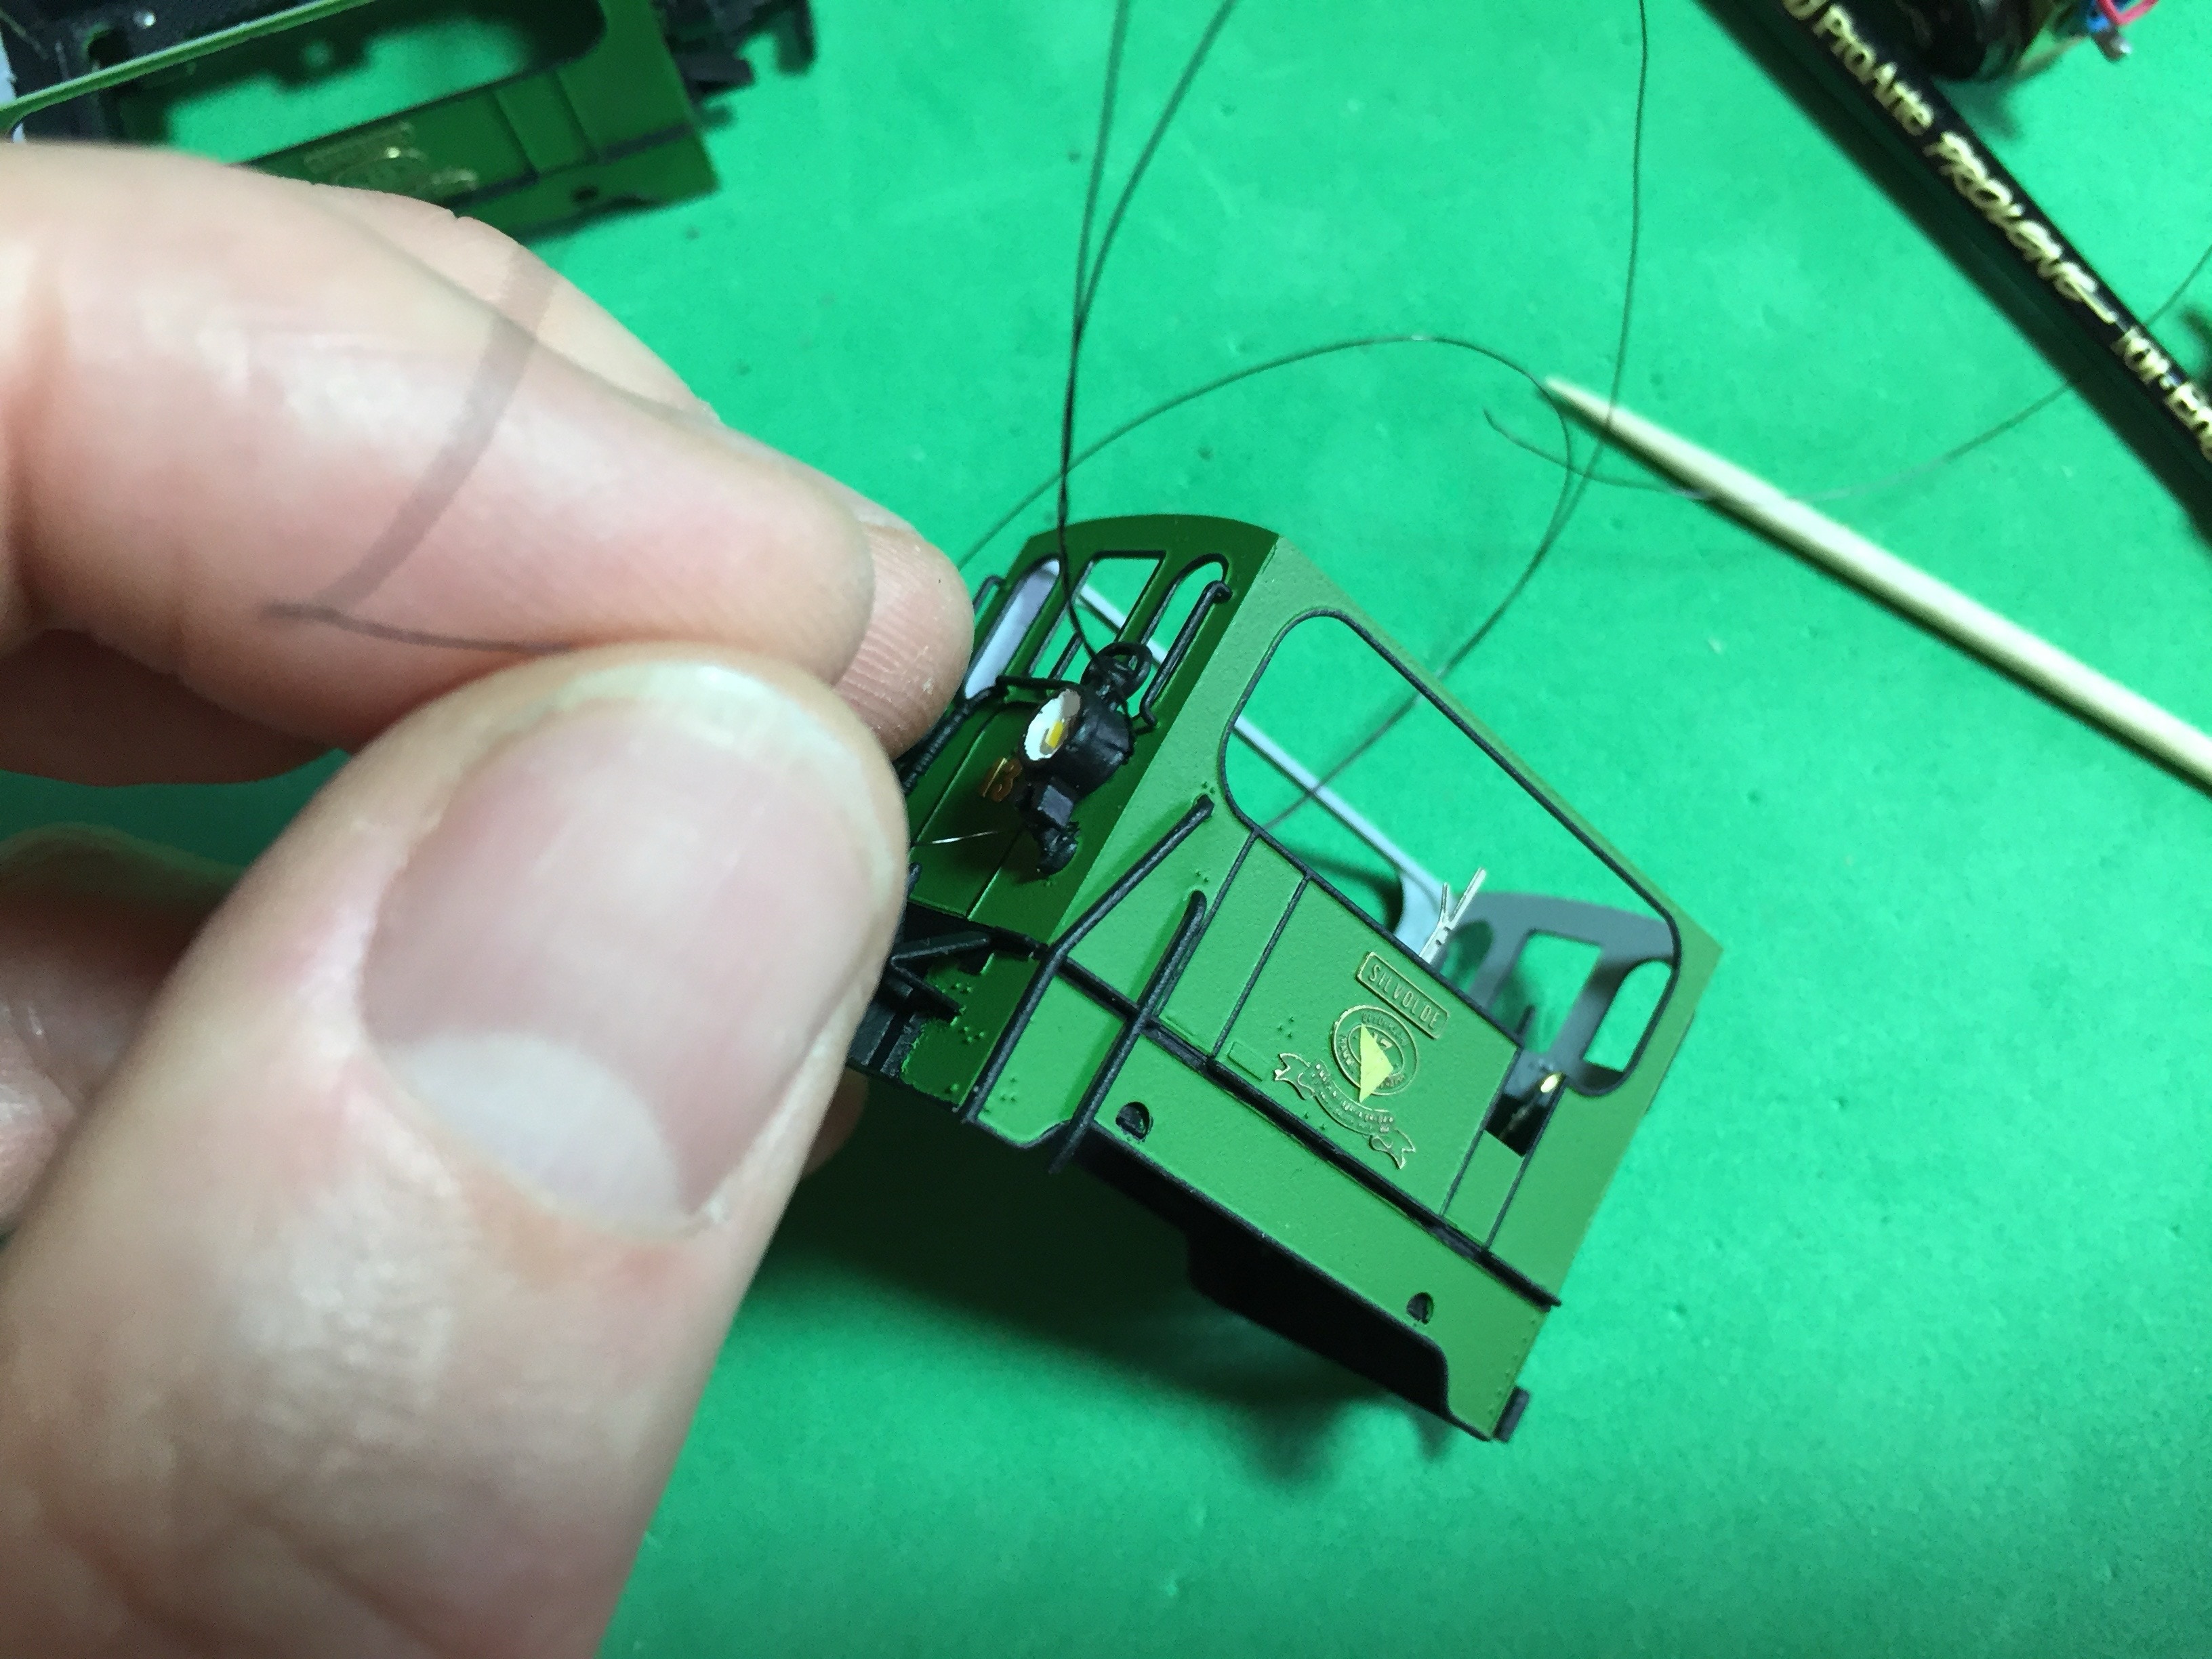
Frut de draadjes van de lampjes door de gaatjes van de lampen heen. De punt van een tandenstoker en een pincet met fijne punt kan hierbij zeker helpen. Trek ze eerst helemaal en alleen door de lampen heen. Dan de draadjes één voor één door de kast steken. Gaatje van binnenuit uitboren met een 0,4 mm handboortje als de verf het gaatje heeft gedicht.
Guide the wires of the lamps through the holes of the lamps. The point of a tooth pick and a pair of narrow tweezers can definitely help here. First, pull them carefully completely (and only) through the hole of the lamps. Then push the wires one after the other through the hole in the front wall. (Hand) drill the hole from the inside with a 0.4 mm drill if paint has covered the gap.
Knip de draadjes op de juiste lengte en sluit ze aan op de printplaat. Denk daarbij aan de servicemogelijkheden als je de motor er in en uit wilt halen. De lange draad is de min, de kort draad de plus. Maar het is altijd goed om dat te checken voordat je alles monteert en aansluit.
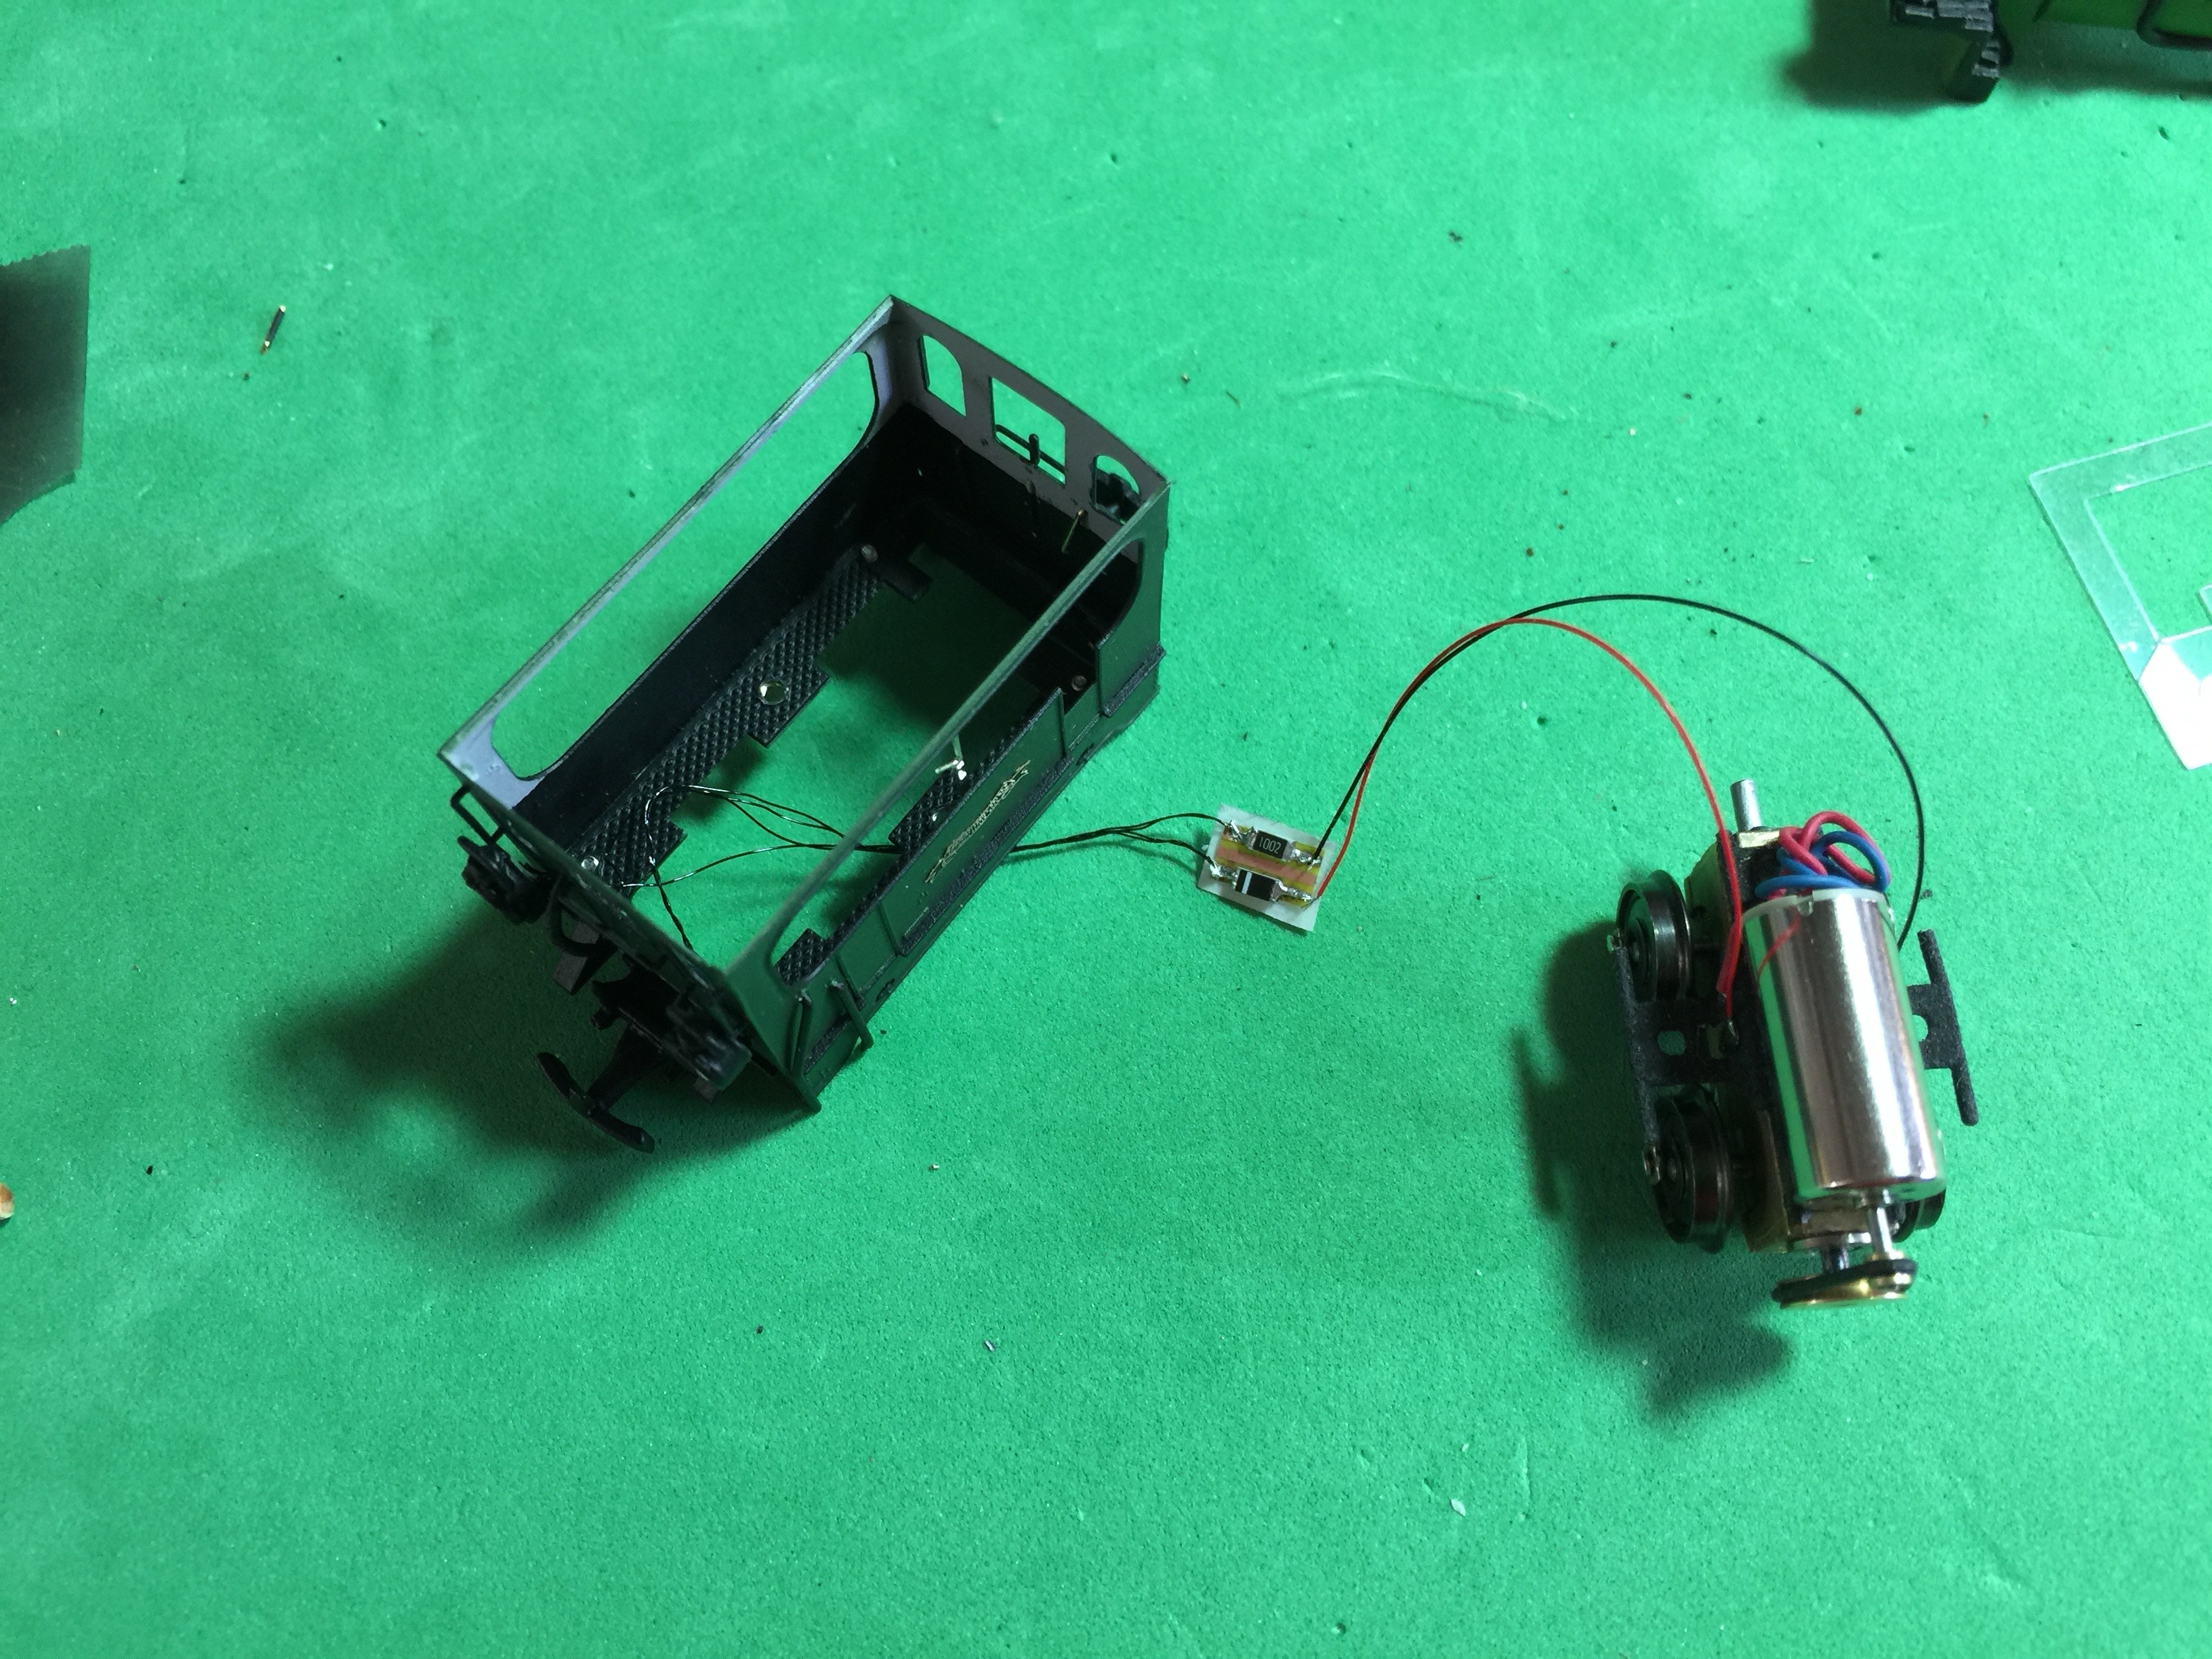
Cut the wires on the desired length and connect them to the print board. Keep in mind servicing possibilities when you want to remove the motor from the box. The long wire is minus, the long wire plus. But it is always good to check if the connection is good before you solder the wires and install the lot.
Test of de lampjes gaan branden als je vooruit rijdt. Zo niet dan moet je waarschijnlijk de draadjes van de LED’s omgekeerd aansluiten. Zet dan de lampjes recht met een pincet.
Haal de “glasschijven” voor de lampen uit het meegeleverde velletje. Doe dit niet met de punt van een pincet, maar met een plat gedeelte. Een deuk is makkelijk gemaakt. Bevestig ze door met de punt van een tandenstoker, in Kristal Klaar gedoopt, rond te draaien in het voorste gedeelte van de lampenhouder.
Test if the lights work when you move forward. If not, you might have to switch the wires to the LED’s. When it all works, check if the lamps are straight. Move them by twisting them carefully to adjust.
Remove the transparent discs from the supplied sheet. Don’t use the tip of the tweezers, but a flat part, as a dent in the discs is easily done. Dip the tip of a tooth pick in Kristal Klear and turn this around in the inside of the front of the lamp. Then fit the disc.
RAMEN
De uitsparingen van de ramen vallen over de uitstekende onderdelen heen. Druk wat puntjes Kristal Klear rondom de raamopeningen. Smeer het uit, zodat het transparante plaatje de lijm niet verspreidt.
Plaatje volgt: Raambevestiging.
Plaatje volgt: Raambevestiging.
WINDOWS
The window panes slide over the soldered parts. Push small dots of Kristal Klear around the window frames. Spread the glue, so it won’t flow on the, from outside, visible part of the windows.
GEWICHT
In principe rijdt het model goed met het gebouwde gewicht, maar je zou het meer gewicht willen geven. Een beetje meer kan nooit kwaad. Ik heb zelf aan de binnenzijde tegen de voor- en achterzijde een stukje lood geplakt (niet meegeleverd met de kit). Als je meer gewicht wilt, zul je het vrije interieur moeten opofferen en strookjes gewicht op de voetplaat leggen.
WEIGHT
The model will drive and pull a few carriages with the current weight, but it doesn’t hurt to add some to it. I’ve glued some lead (not supplied with the kit) on the inside of the front skirts. If you desire more weight, you’ll have to sacrifice part of the open interior and put strips of lead on the footplate.
MOTOR BEVESTIGEN
De Tramfabriek aandrijving is compleet gemonteerd, geolied en ingevet. Deze kan zo onder het model bevestigd worden. De koppelstangen zitten lichtelijk in de weg van de M1.6 schroef. Gebruik de kleinste platte schroevendraaier die je hebt, zodat je de koppelstangen niet buigt. Probeer eerst of de schroef er zo indraait. De bouwpakketten waar de onderdelen reeds losgeknipt zijn van het etsraamwerk hebben het schroefgat reeds voorbewerkt met een tapper. Zo niet, dan bij voorkeur met een M1.6 tapper een schroefdraad maken of het gat een heel klein beetje uitruimen met een ronde vijl zodat de schroef zijn eigen schroefdraad draait.
FITTING THE MOTOR
A Tramfabriek motorised drive is completely built, oiled and greased. It can directly be mounted with the two brass M1.6 screws under the tram. The coupling rods are a bit in the way of the screws, so use the smallest screw driver you’ve got to avoid bending the coupling rods. Before mounting the drive, first check if the screws go straight in the designated hole. The kits with parts that already have been cut from the fret already have the holes pre-drilled with a tapping tool. If you have a kit with the parts on a fret, you have to drill a hole with a M1.6 tapping tool. Or widen the gap with a slim, round file to widen the hole, so a screw will create its own thread.
Plaatje volgt: vastschroeven van motor met kleine schroevendraaier.
DAK BEVESTIGEN
De hoekjes aan de onderzijde van het dak zijn reeds krommend gebogen. Nu hoef je ze alleen maar precies af te stellen met een punttangetje. Als je al gepast hebt voor het verven, kan het zijn dat het wat strakker zit. Dat kan precies goed zijn om het dak klemmend vast te laten zitten, maar kan ook iets teveel zijn, zodat de verf er direct af geschraapt wordt. Een beetje “slijtage” in de hoeken is te accepteren. Wil je het dak vaker er af halen om de binnenzijde van de tram te kunnen bewonderen, dan zou ik ‘m zo los zetten dat je ‘m er makkelijk afhaalt. En er dan een gewoonte van maken het model aan de schorten op de pakken en niet aan het dak vast te houden……..
FITTING THE ROOF
The corners of the bottom side of the roof have been curved, in one of the earlier chapters of these instructions. Now you only might have to bend them slightly to fit the roof. If you tested the fitting of the roof before painting, the space might be tighter now because of the added layer of the paint. It could just as well be perfect now, as it might have a nice, tight fit. But make sure it is not too tight, otherwise you scrape the paint off. A little bit of wear is expected on the inside, when you prefer a tight fit. If you want to remove the roof often to admire the inside of the tram, I would advise you to have a loose fit. In that case, make it a habit to lift the tram by holding it under the skirts, not on the sides of the roof…….
Plaatje volgt: binnenzijde hoek dak.
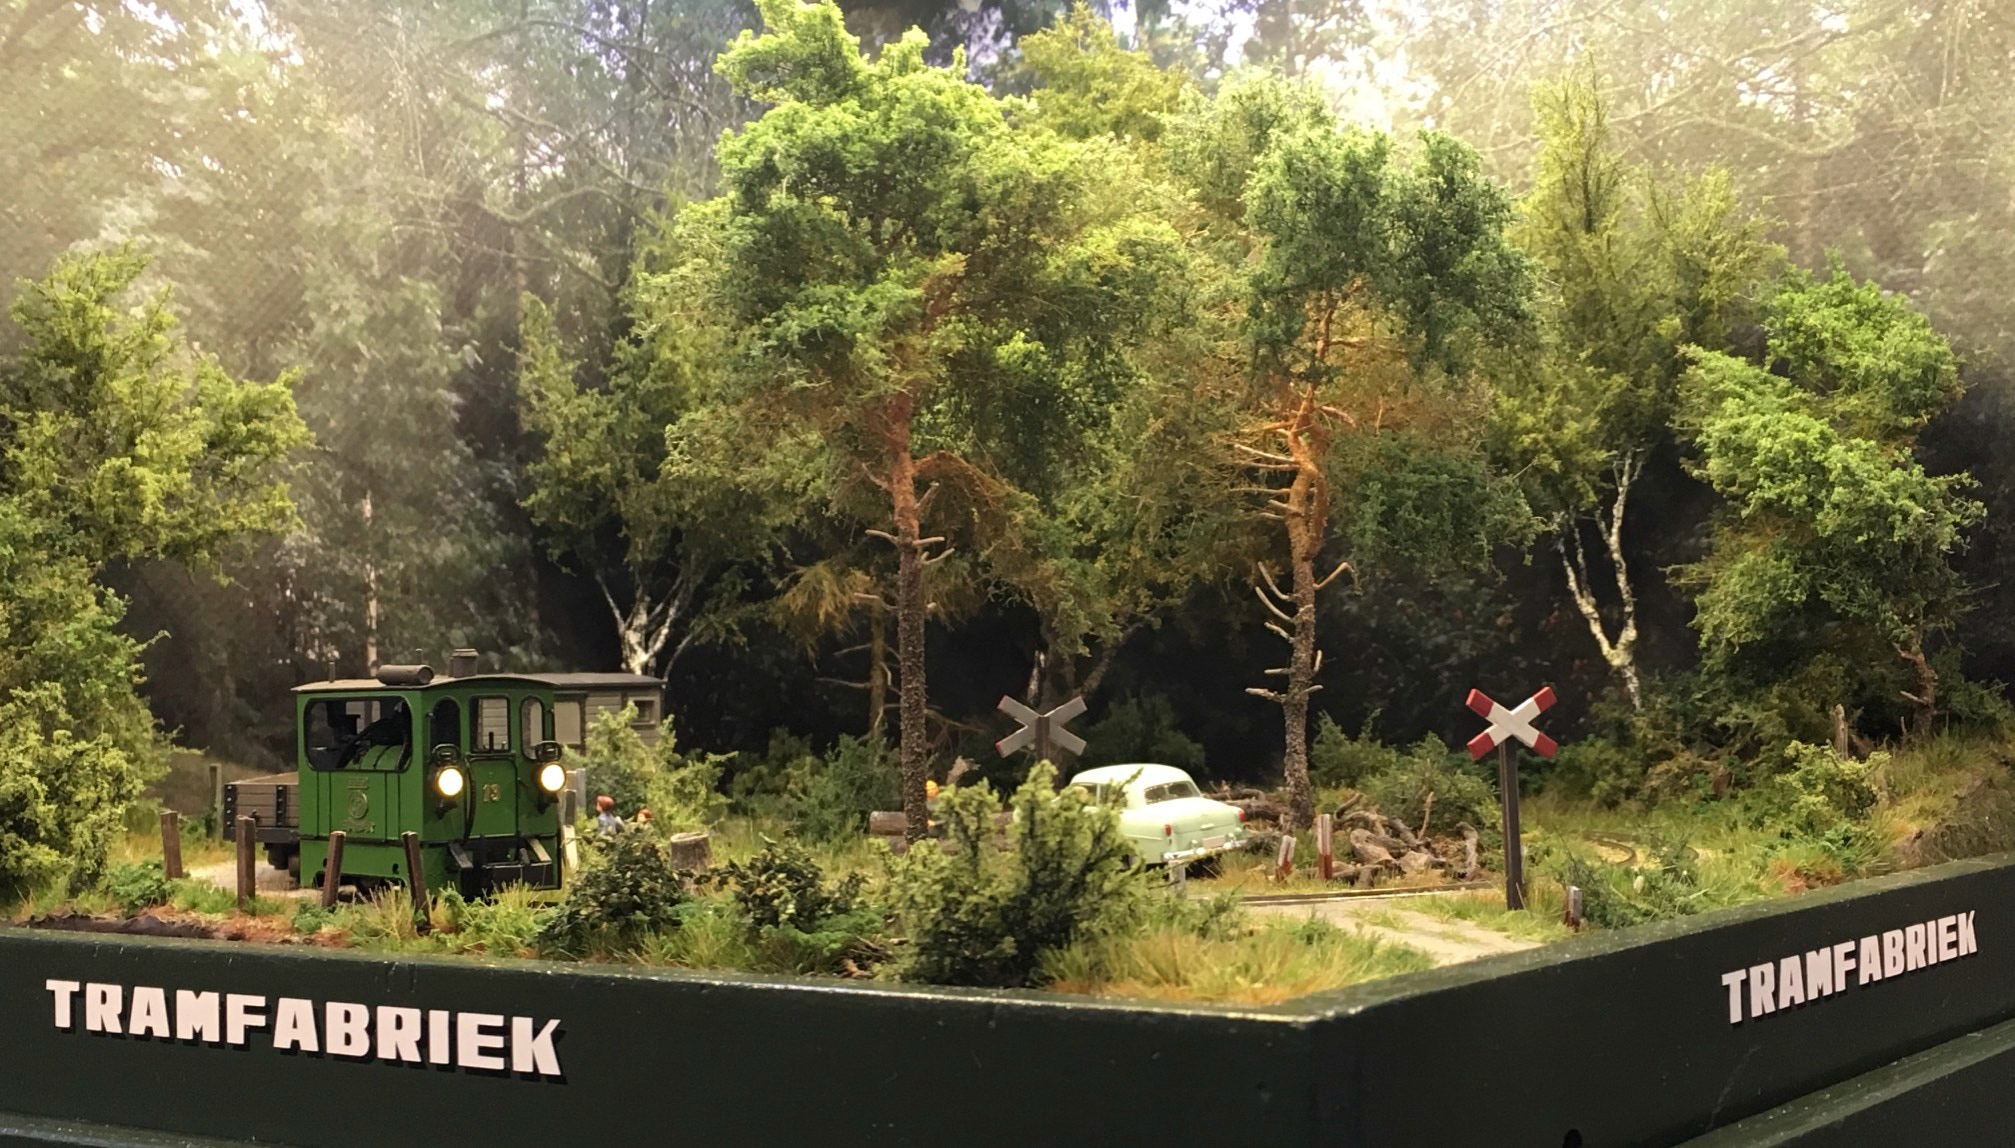
KLAAR!
Als het goed is heb je het project nu af. Mijn felicitaties! Ik wens je er veel plezier mee. En als het je bevallen is, hoop ik dat je weer uitkijkt naar een nieuw model van de Tramfabriek.
FINISHED!
If my calculations are correct, you have finished the model now. I congratulate you on a job well done! If you enjoyed it, I hope you are looking forward to a new model by the Tramfabriek.
Hier houdt het op.
It stops here.
•