UK based
Prices for UK customers are shown inc 20% VAT
Other countries, inc EU, prices shown are ex VAT.
Bouwhandleiding


KASTENLOK INDEX
GTM 13 ‘Silvolde’


UK based
Prices for UK customers are shown inc 20% VAT
Other countries, inc EU, prices shown are ex VAT.
Bouwhandleiding
KASTENLOK INDEX
GTM 13 ‘Silvolde’
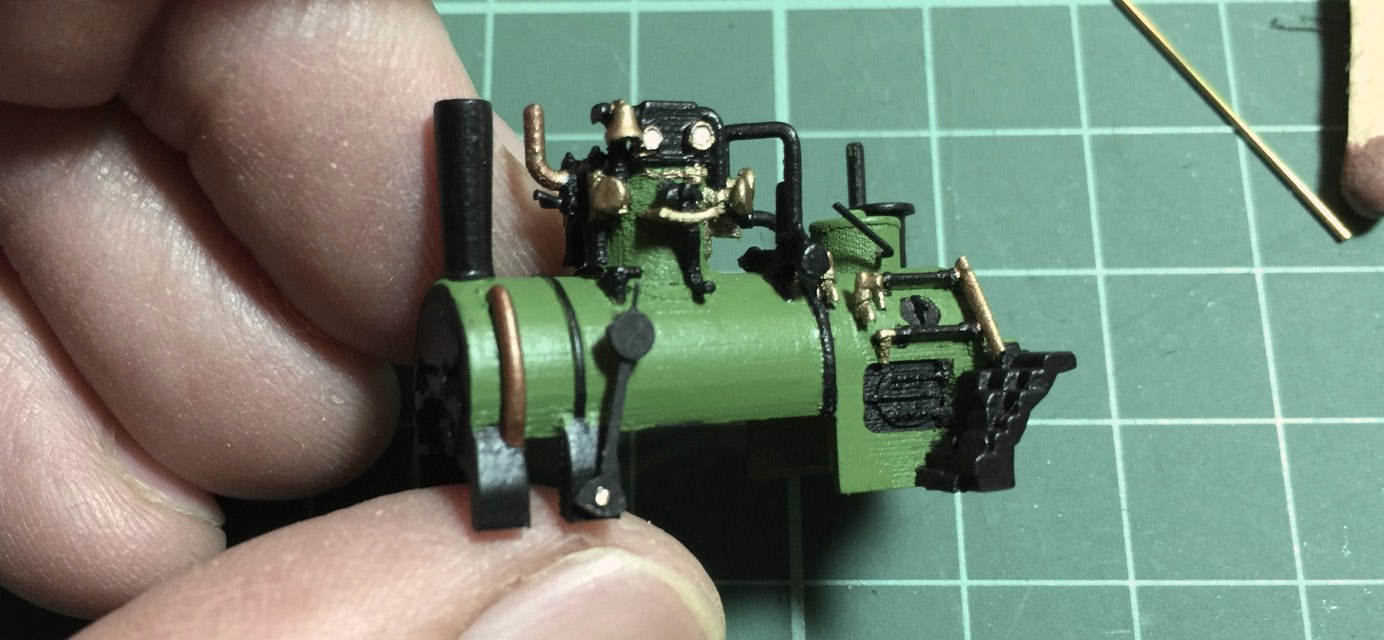
4. KETEL
4. BOILER
De ketel hoeft alleen maar licht geschuurd en dan geverfd worden. Dit kan tegelijkertijd met de kast gebeuren.
The boiler only needs to be lightly smoothened with sand paper and then painted. This can happen at the same time as the box of the tram.
De volgende onderdelen worden gebruikt in dit hoofdstuk:
The following parts will be used in this chapter:
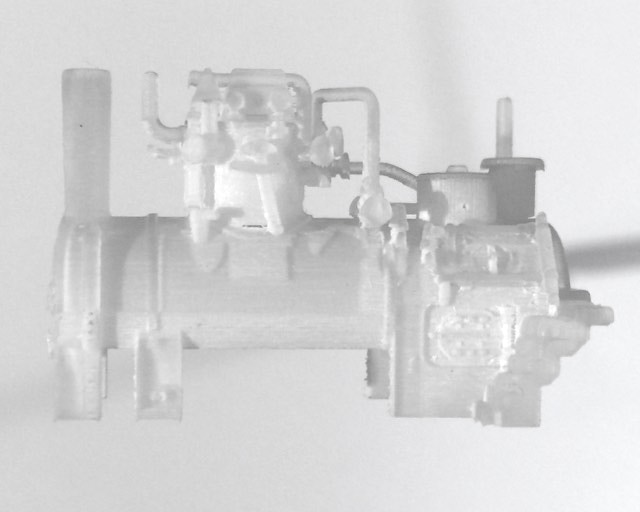
4. Ketel (3D print)
4. Boiler (3D print)
36. Handrem (nieuwzilver ets)
36. Hand brake (Nickel Silver etch)
40. 0,4 mm messing staafje (niet getoond)
40. 0.4 mm brass wire (not shown)
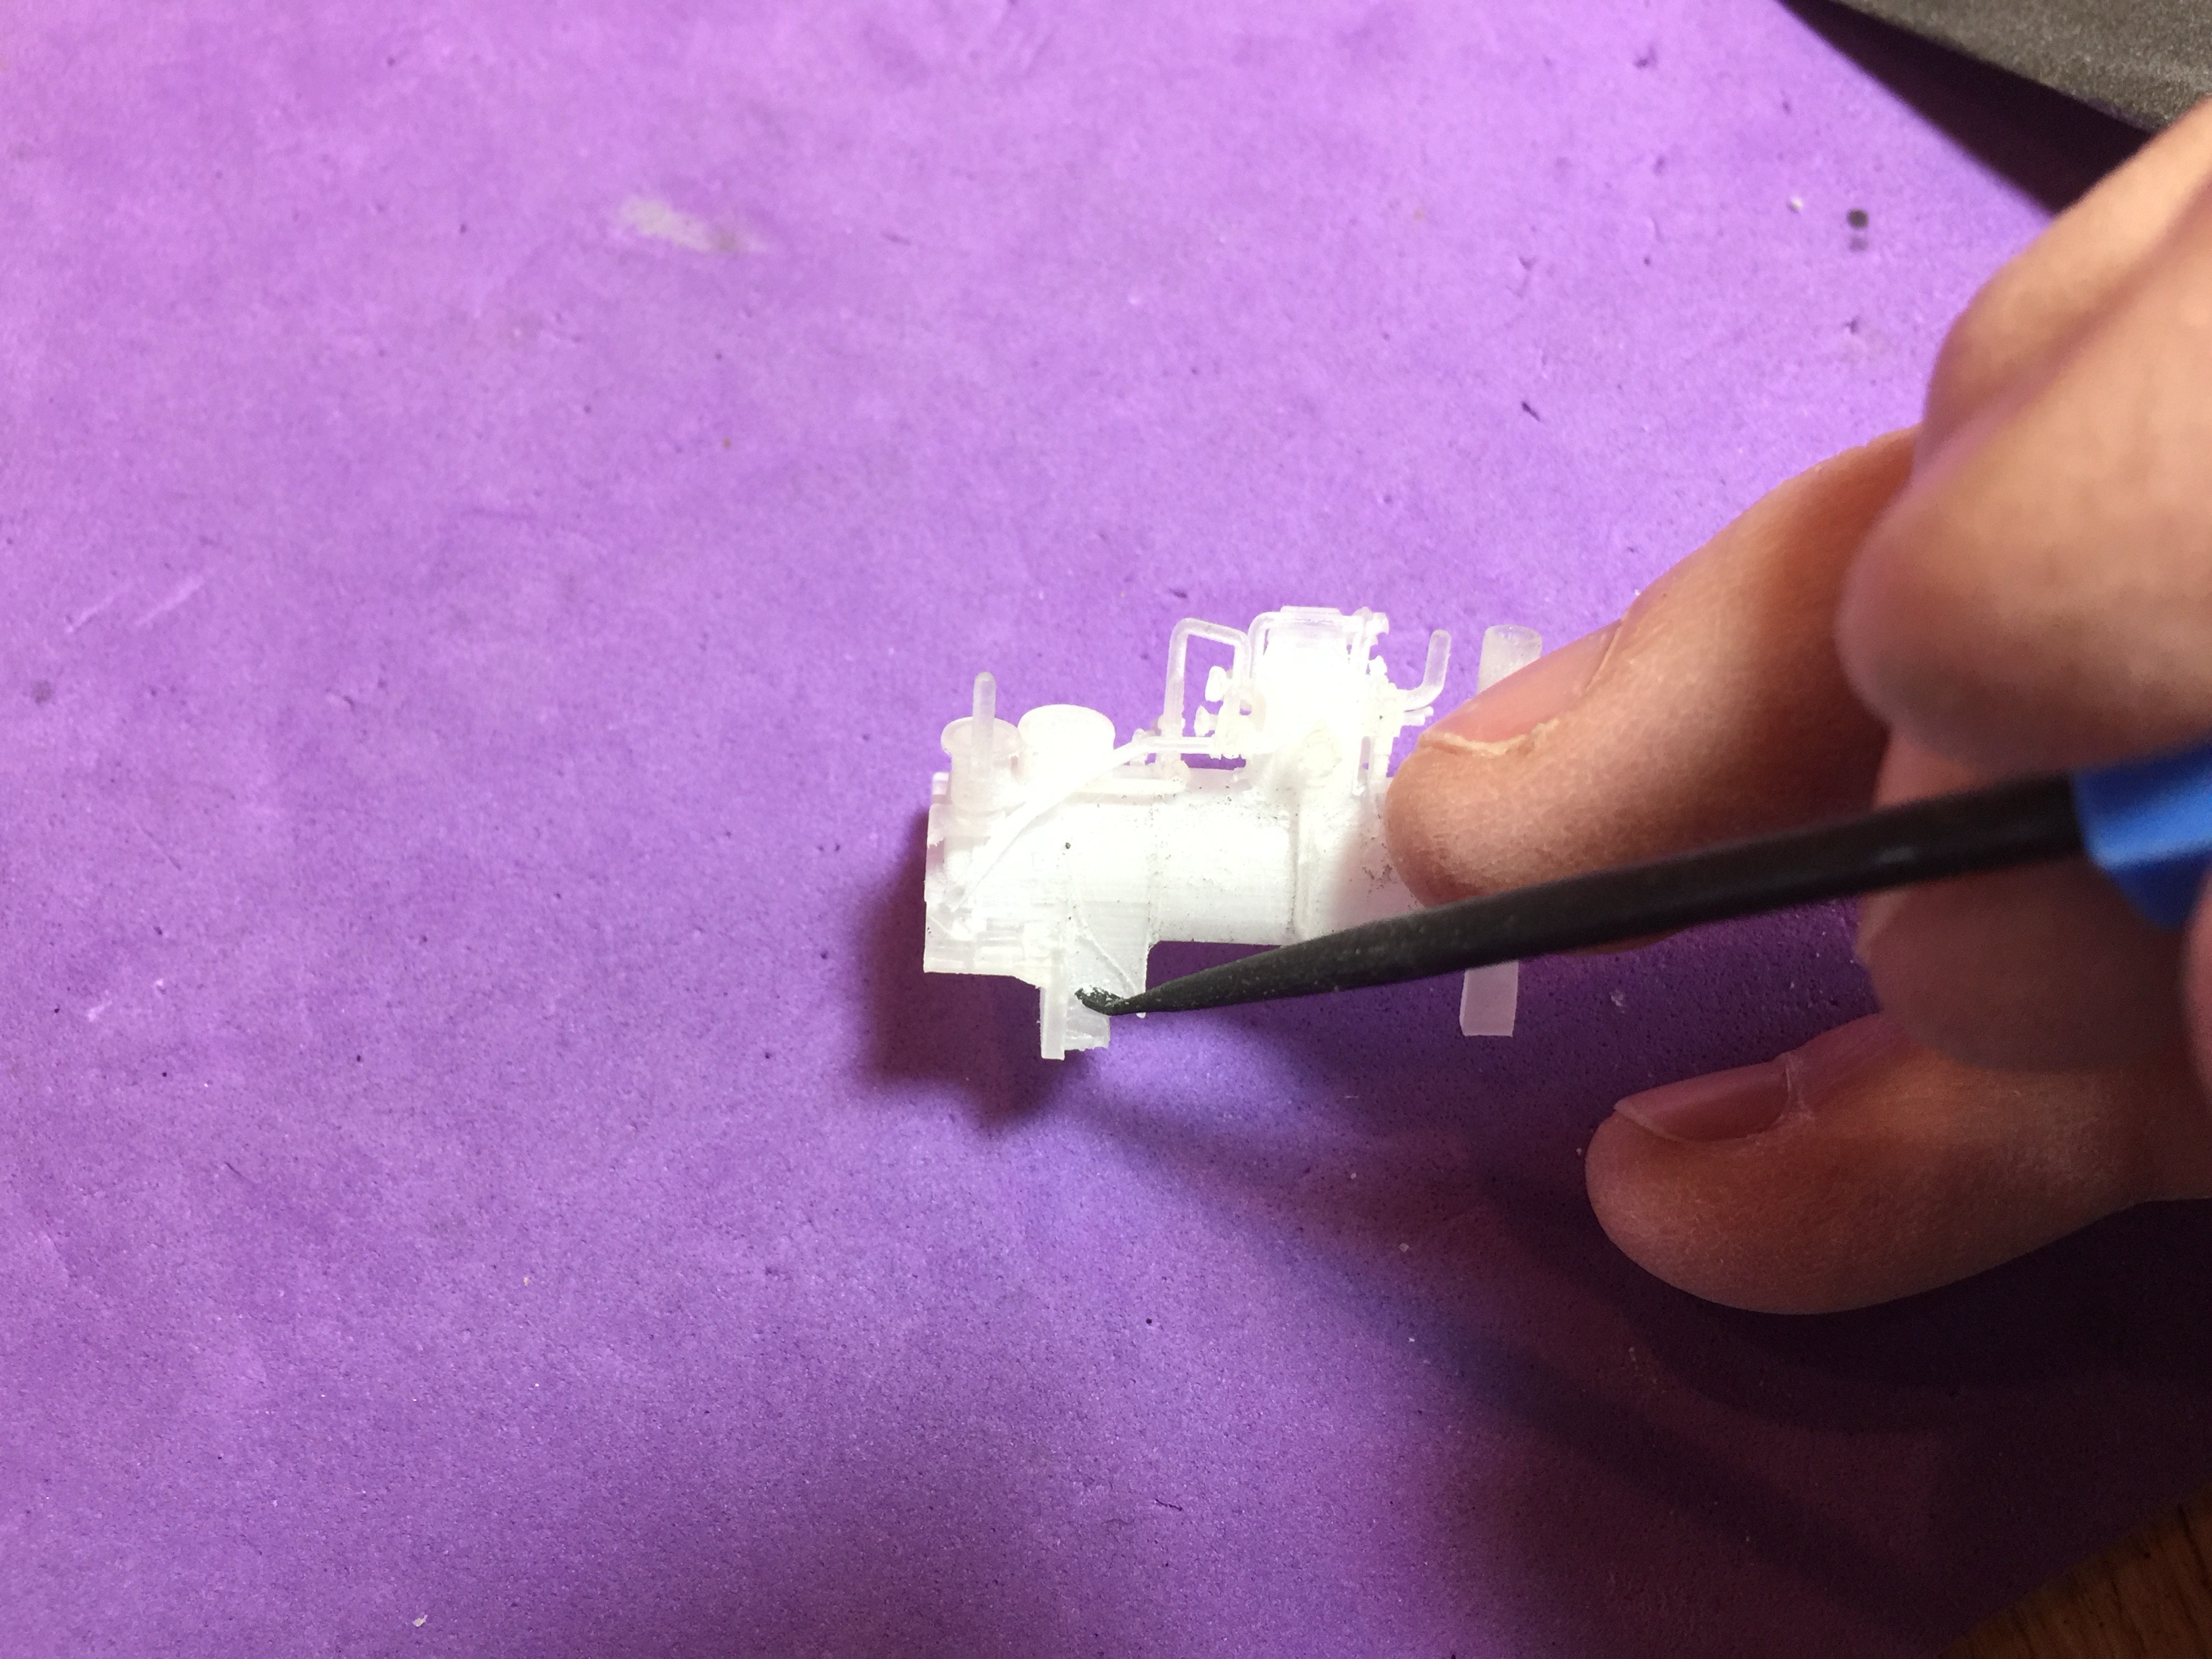
GLADMAKEN VAN DE KETEL
SMOOTHEN THE BOILER
Niet iedereen vindt het nodig de ketel te schuren, maar ik lever er schuurpapier bij om de eventuele ribbeltjes van de 3D print weg te werken. Ga hierbij zeer voorzichtig te werk, zodat er niet iets onverhoopt afbreekt. Eventueel kun je op sommige stukken schrapen, als de print te hard is of er een dikkere laag was op ligt. Het onderdeel is al ontvet, maar het kan zijn dat er nog wat was is achtergebleven.
Not everyone thinks it is necessary to smoothen the 3D print, but I do supply a piece of sand paper with the kit to remove possible printing lines. Do this very carefully, so to not brake any of the small, fragile parts. At some places you might need to scrape wax off. The item has been removed from all wax, but it might be possible some got stuck behind.
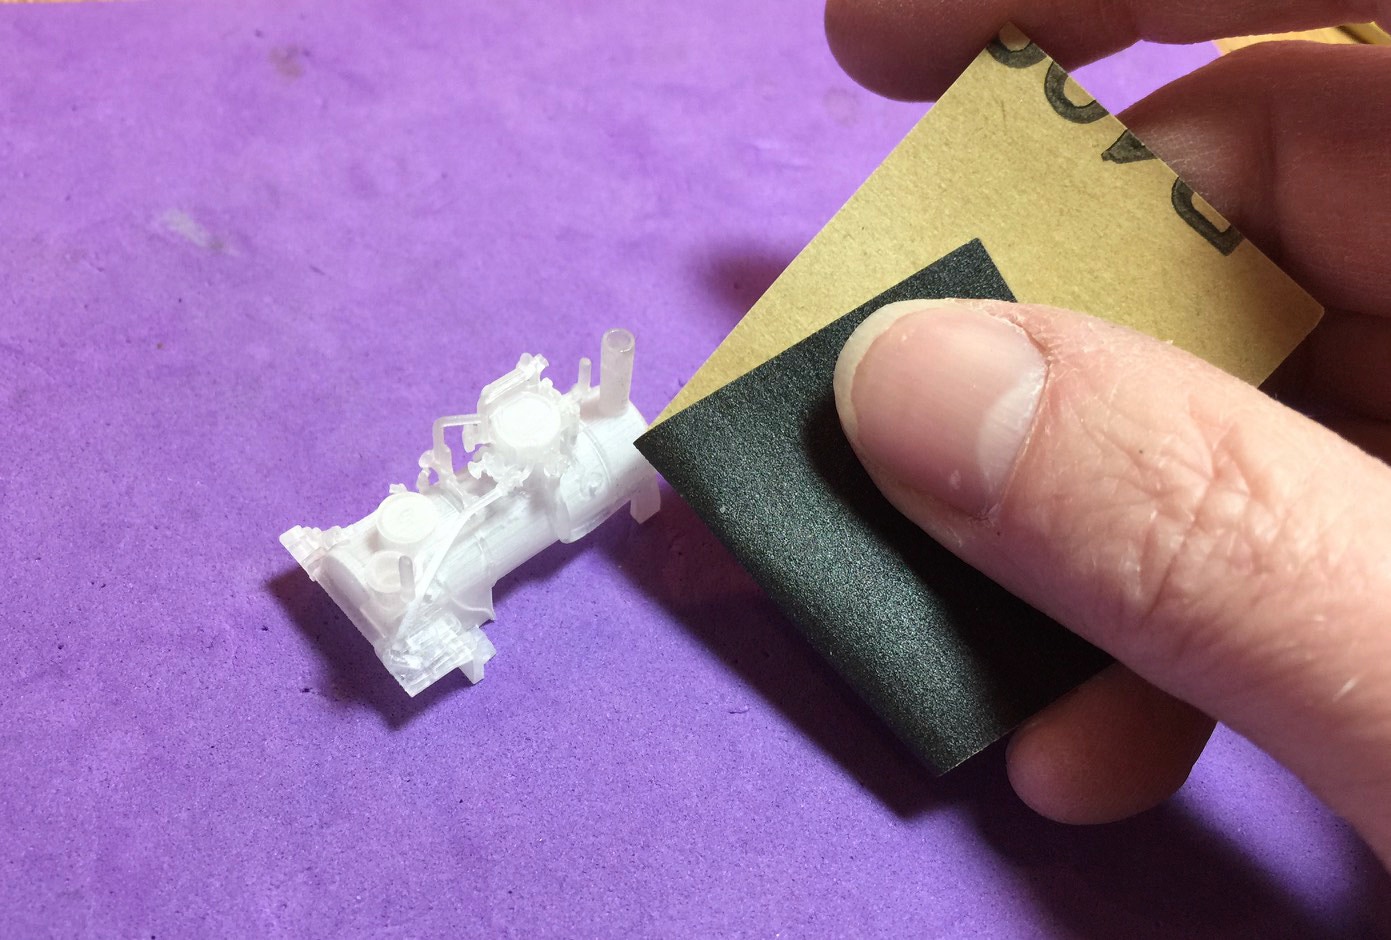
De ketel kan dan afgestoft worden met een kwast, waarna je een stokje in de dom steekt om het vast te kunnen houden tijden het verven. Hier heb ik een stukje plakband om een lucifer gedaan, zodat het stokje klem in de dom zit. Daarna spuiten met grondverf. Ik gebruik zelf Halfords Grey Primer.
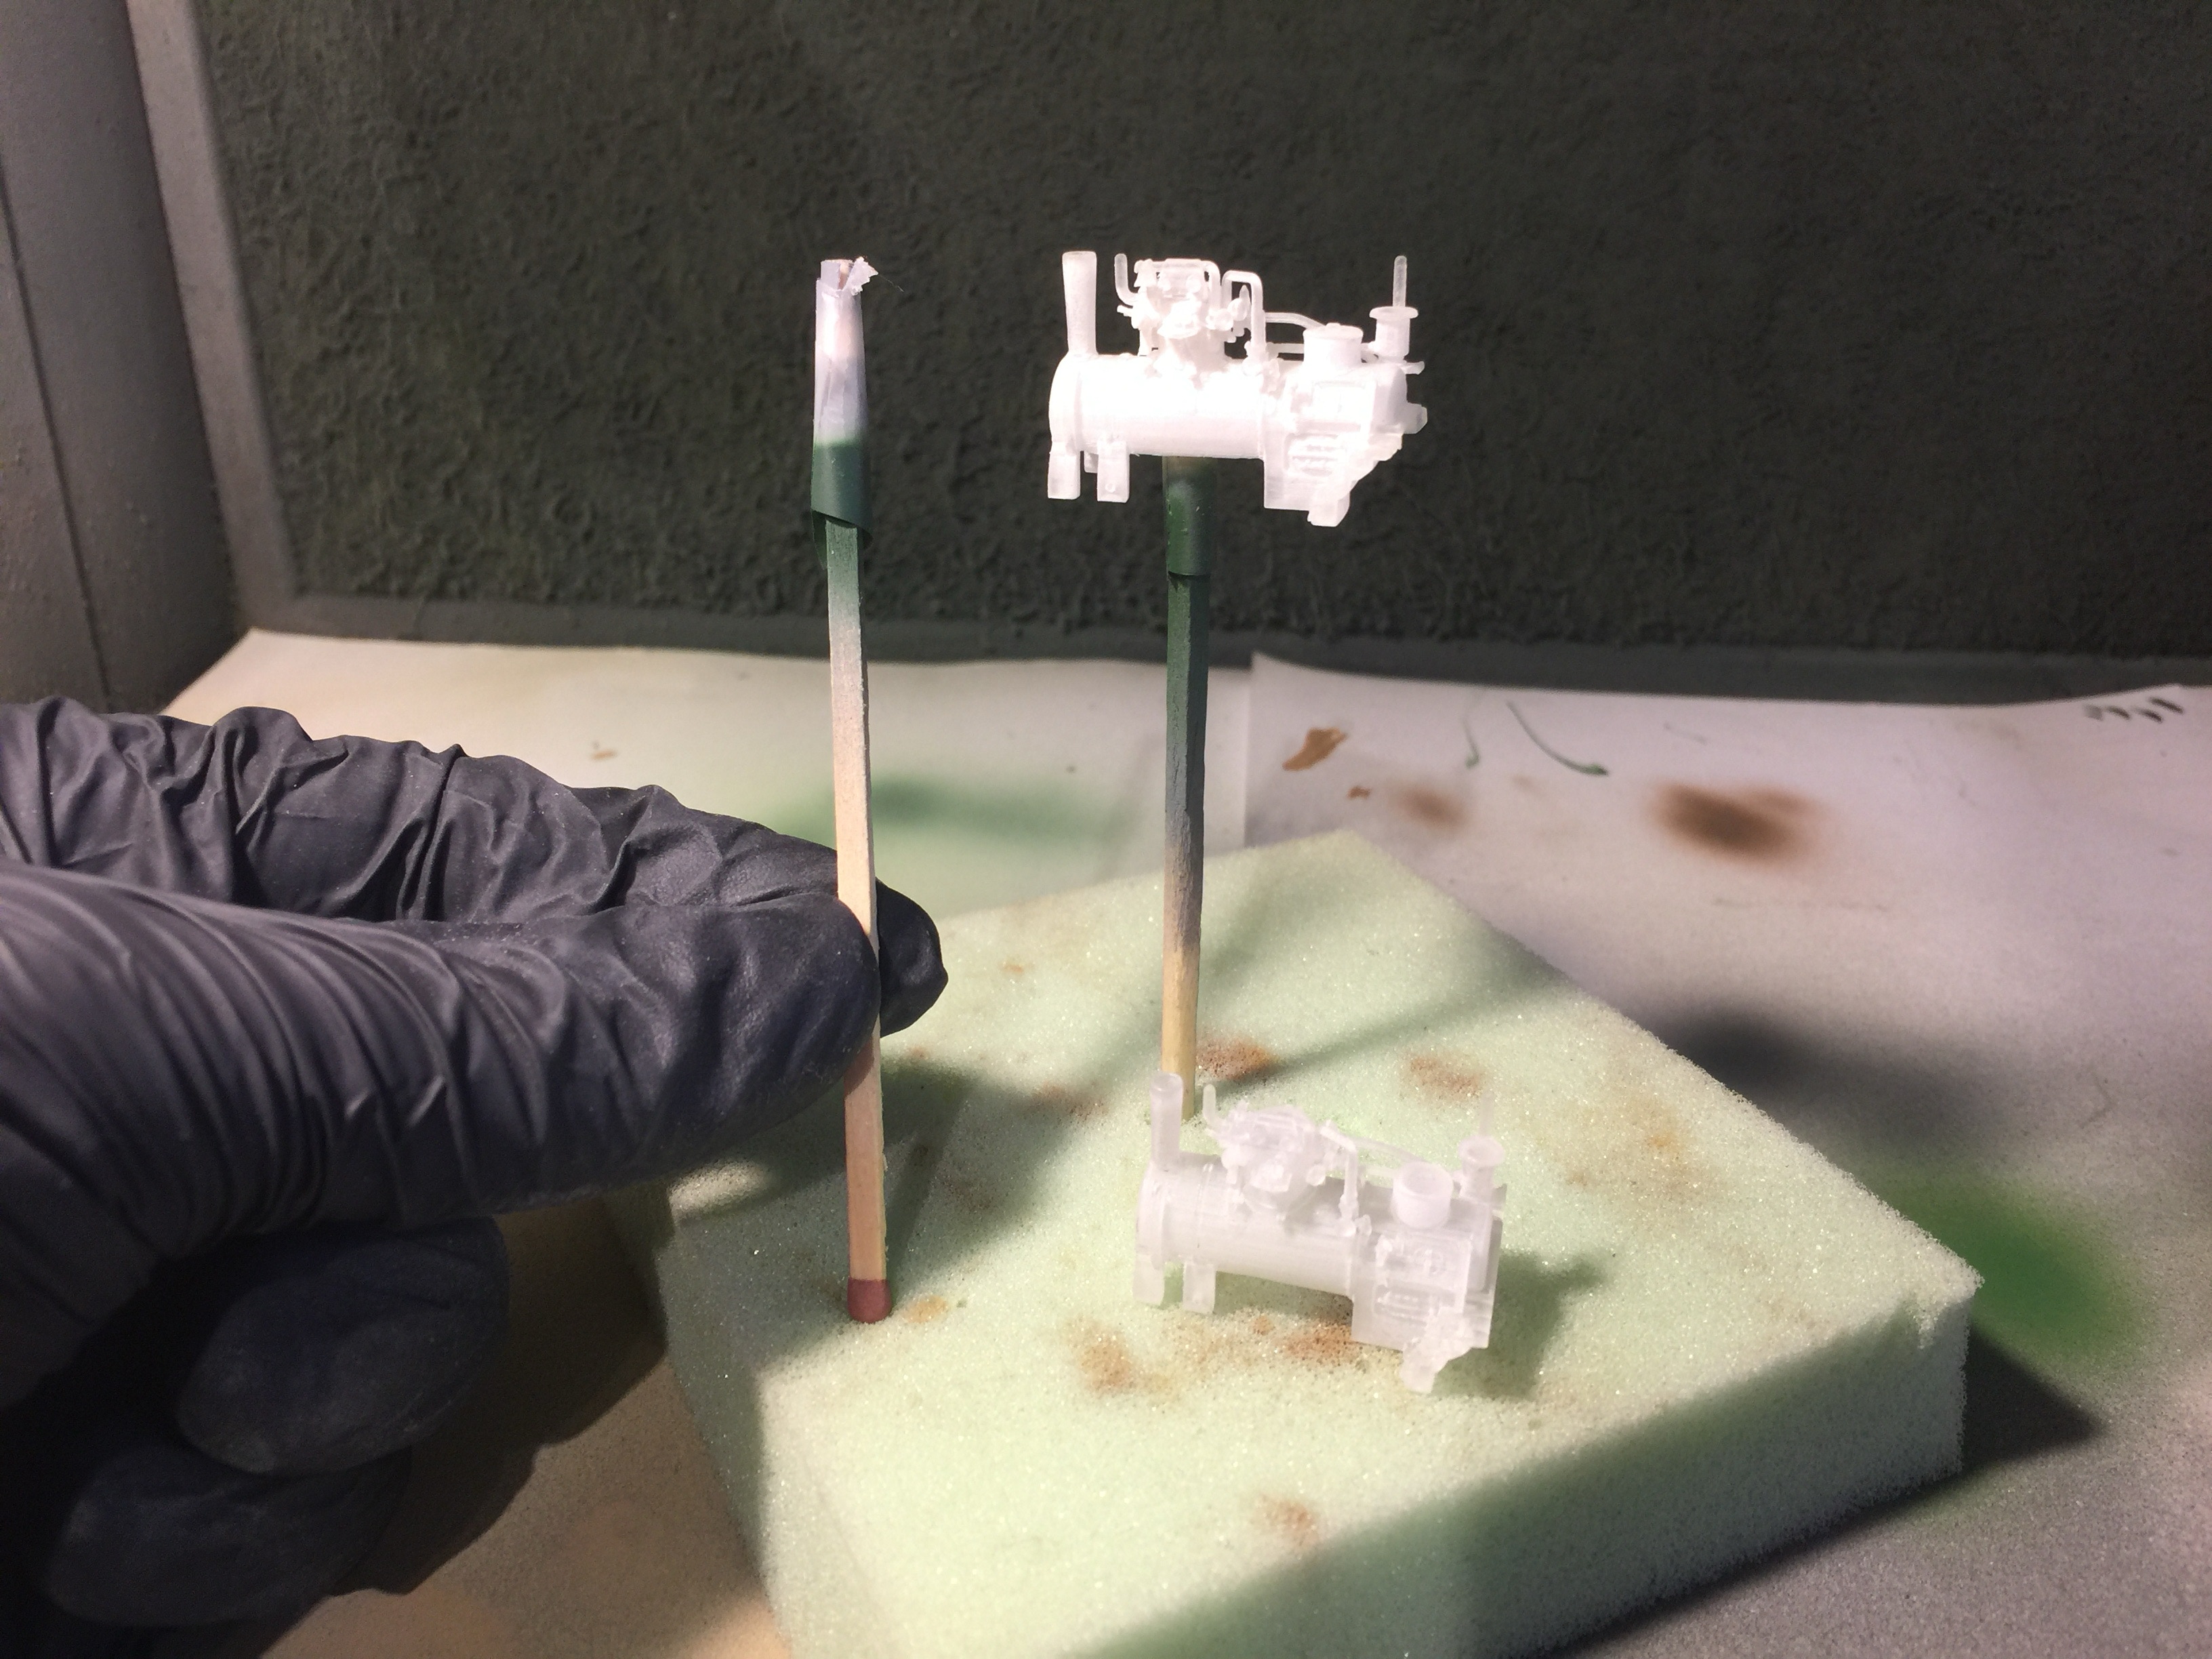
Dust the boiler off with a brush and put a stick under in the dome to hold the boiler during painting. Here I have put a piece of tape around the match stick, so it’s not moving inside the dome. The paint with primer. I used Halford’s Grey Primer.
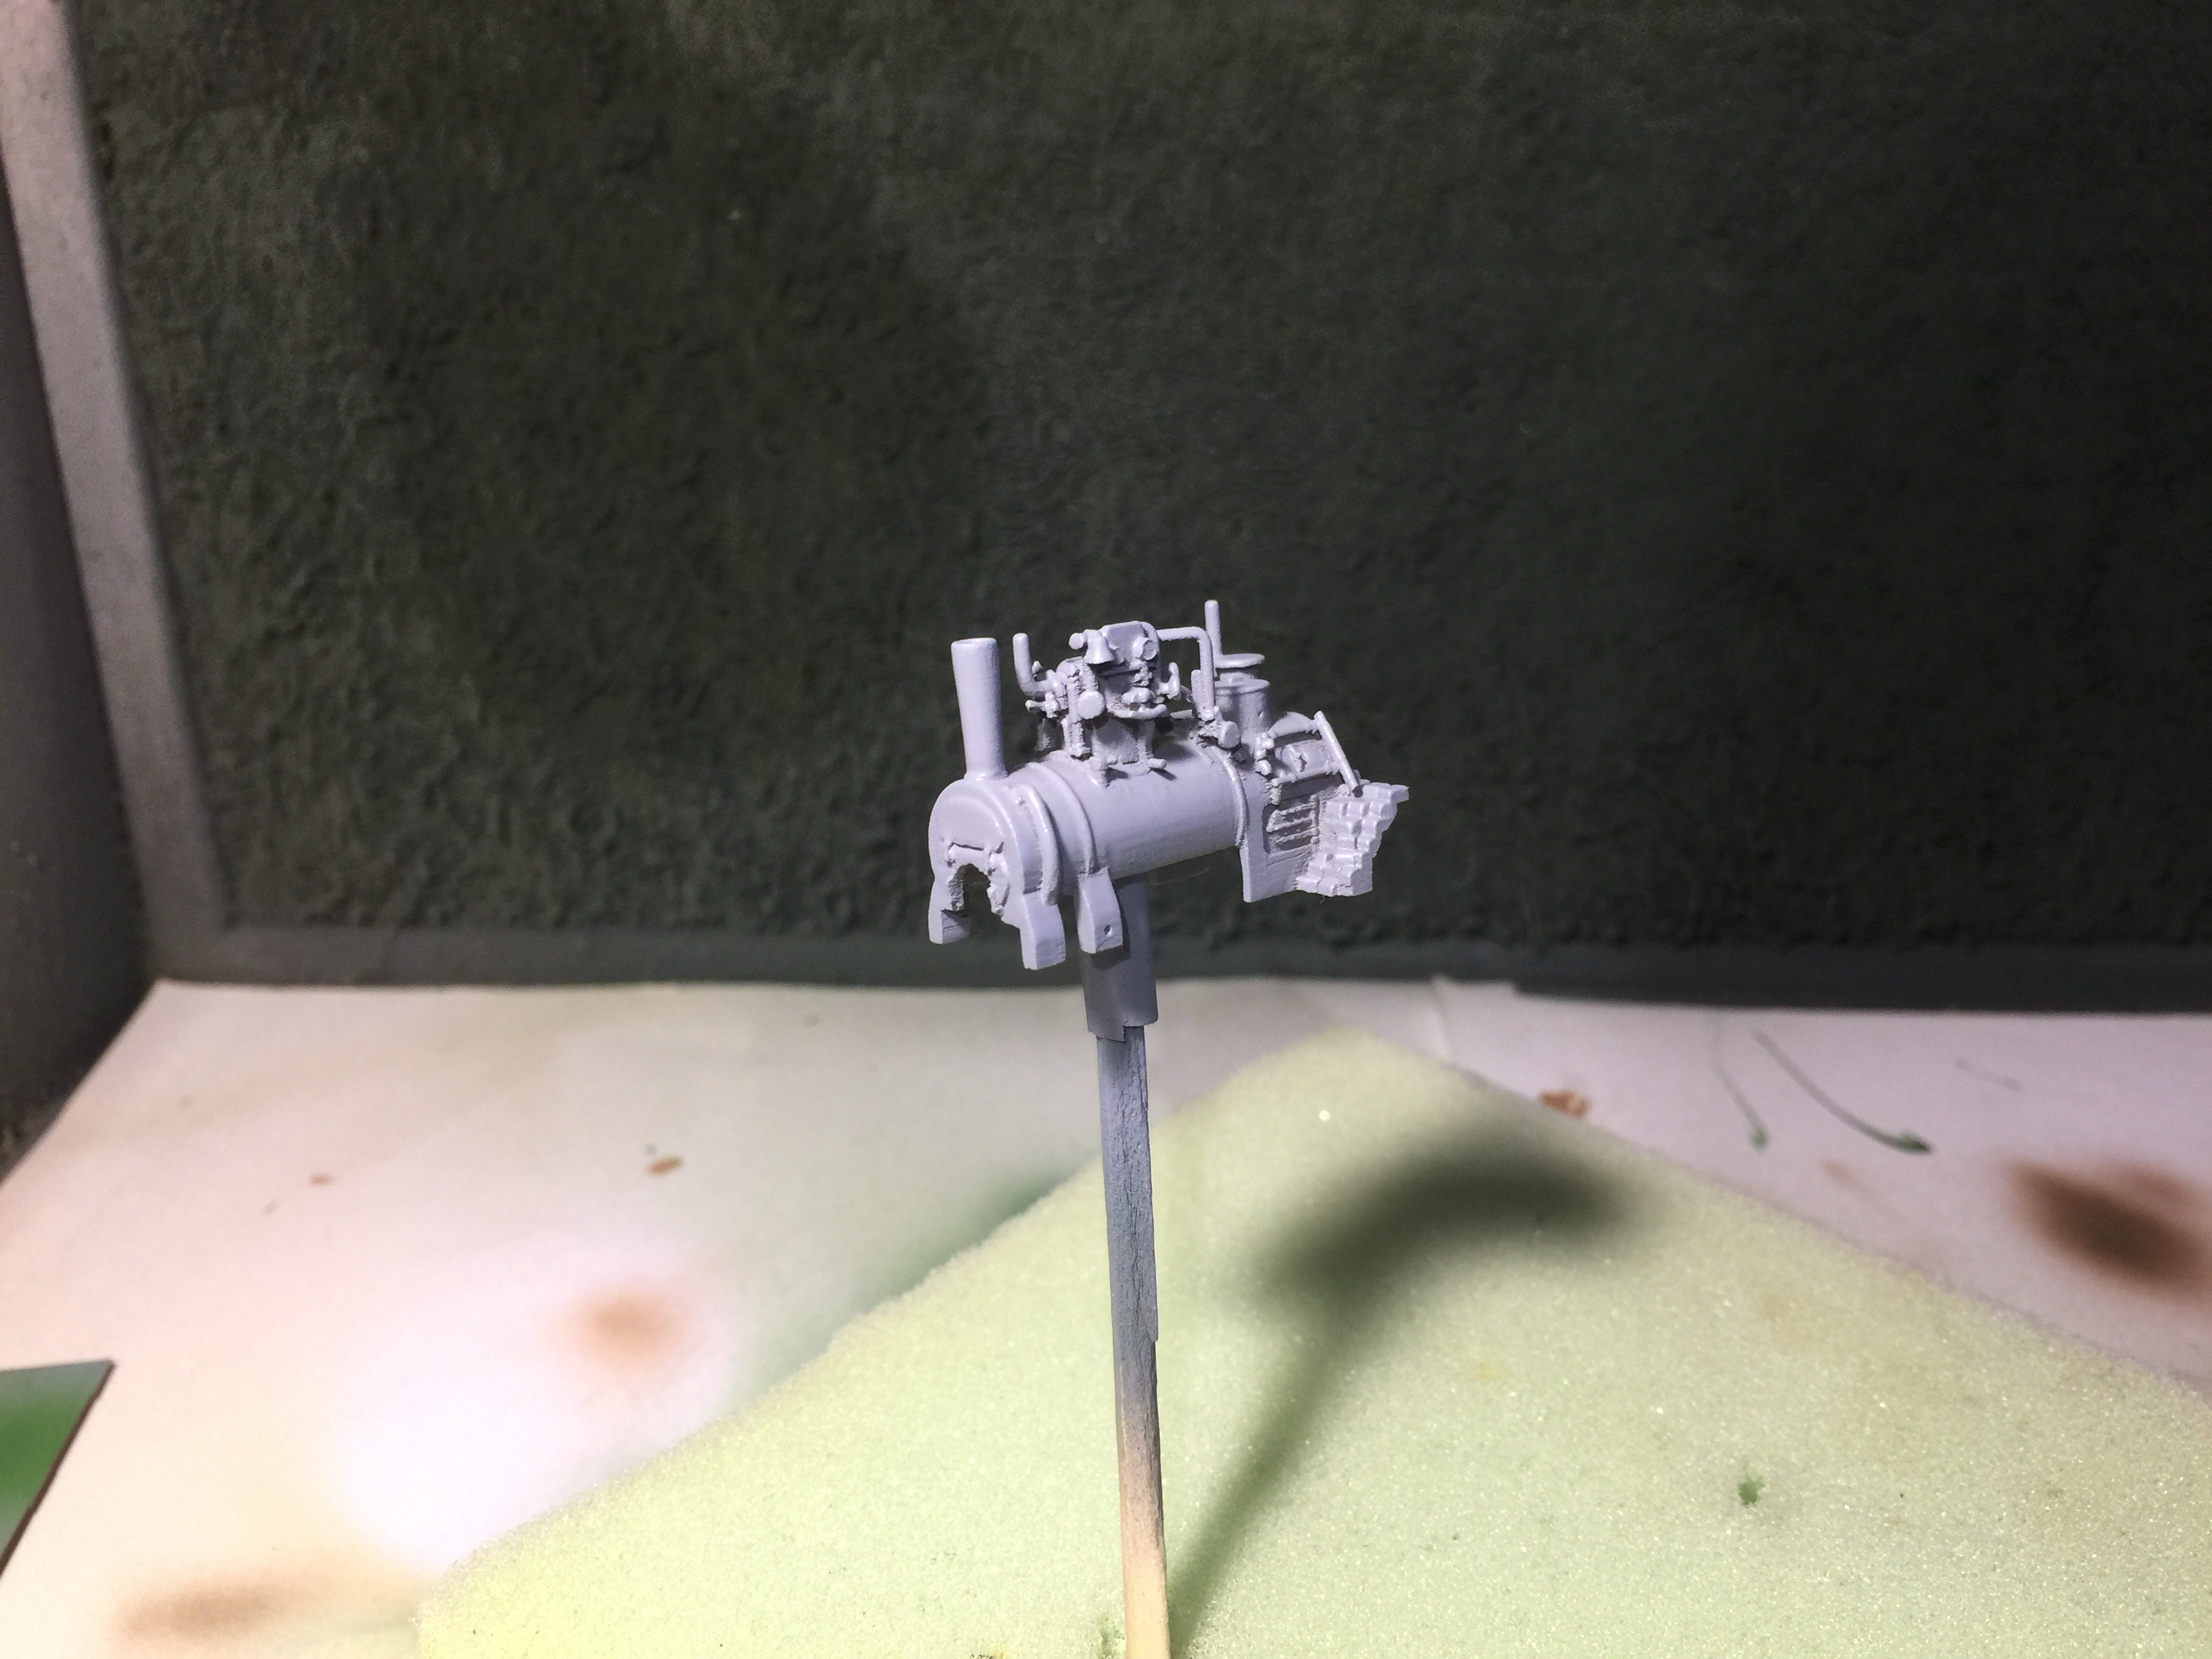
Check voor gebruikte kleuren de boodschappenlijst op de eerste pagina. Na de groene basislaag, volgen de zwarte onderdelen met een fijn penseel. Ik gebruik hiervoor een 0000 penseel.
Check the shopping list on the first page for the used colours. After the green base layer, the black details are painted. I use a 0000 brush for this job.
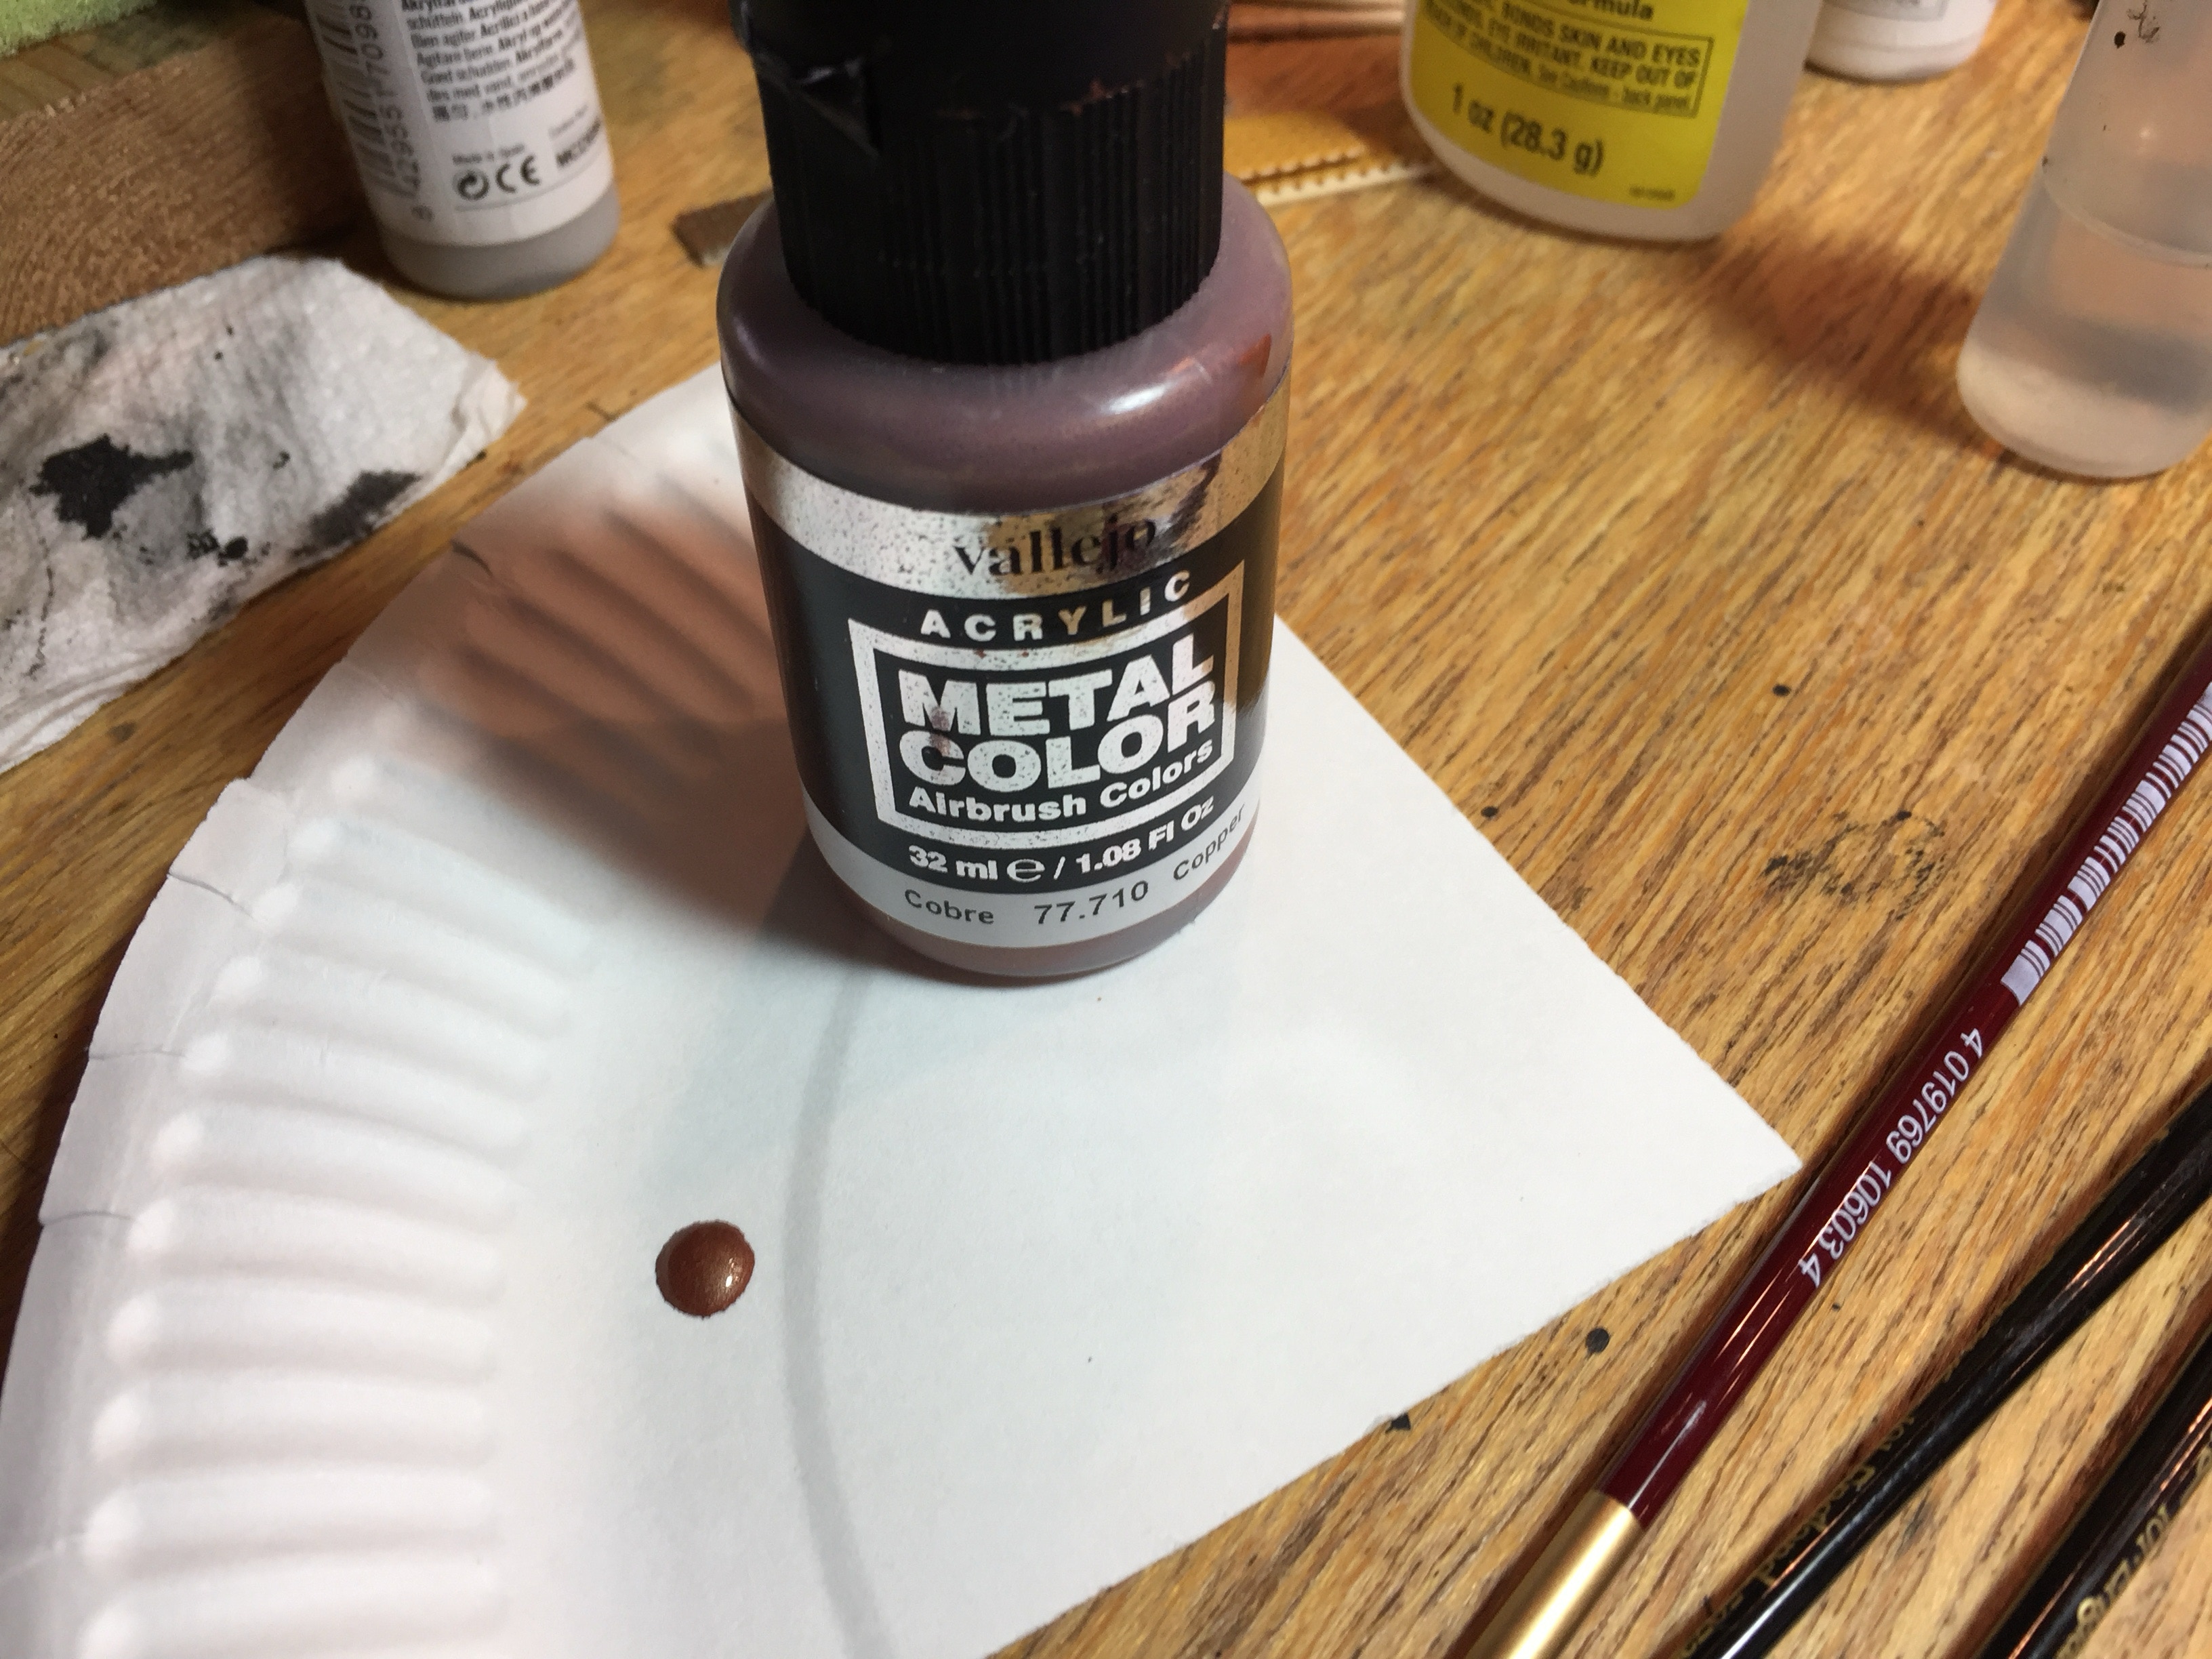
Koperkleur: bij het gebruik van deze verf, heb je echt maar één druppeltje nodig.
Voor messing: mix twee druppeltjes messing kleur met één druppel koper, voor een niet zo bleke kleur messing.
Copper colour: when you use this paint, you really only need one drop.
For Brass: mix two drops of brass colour with one drop of copper, for a colour of brass that is not so flat.
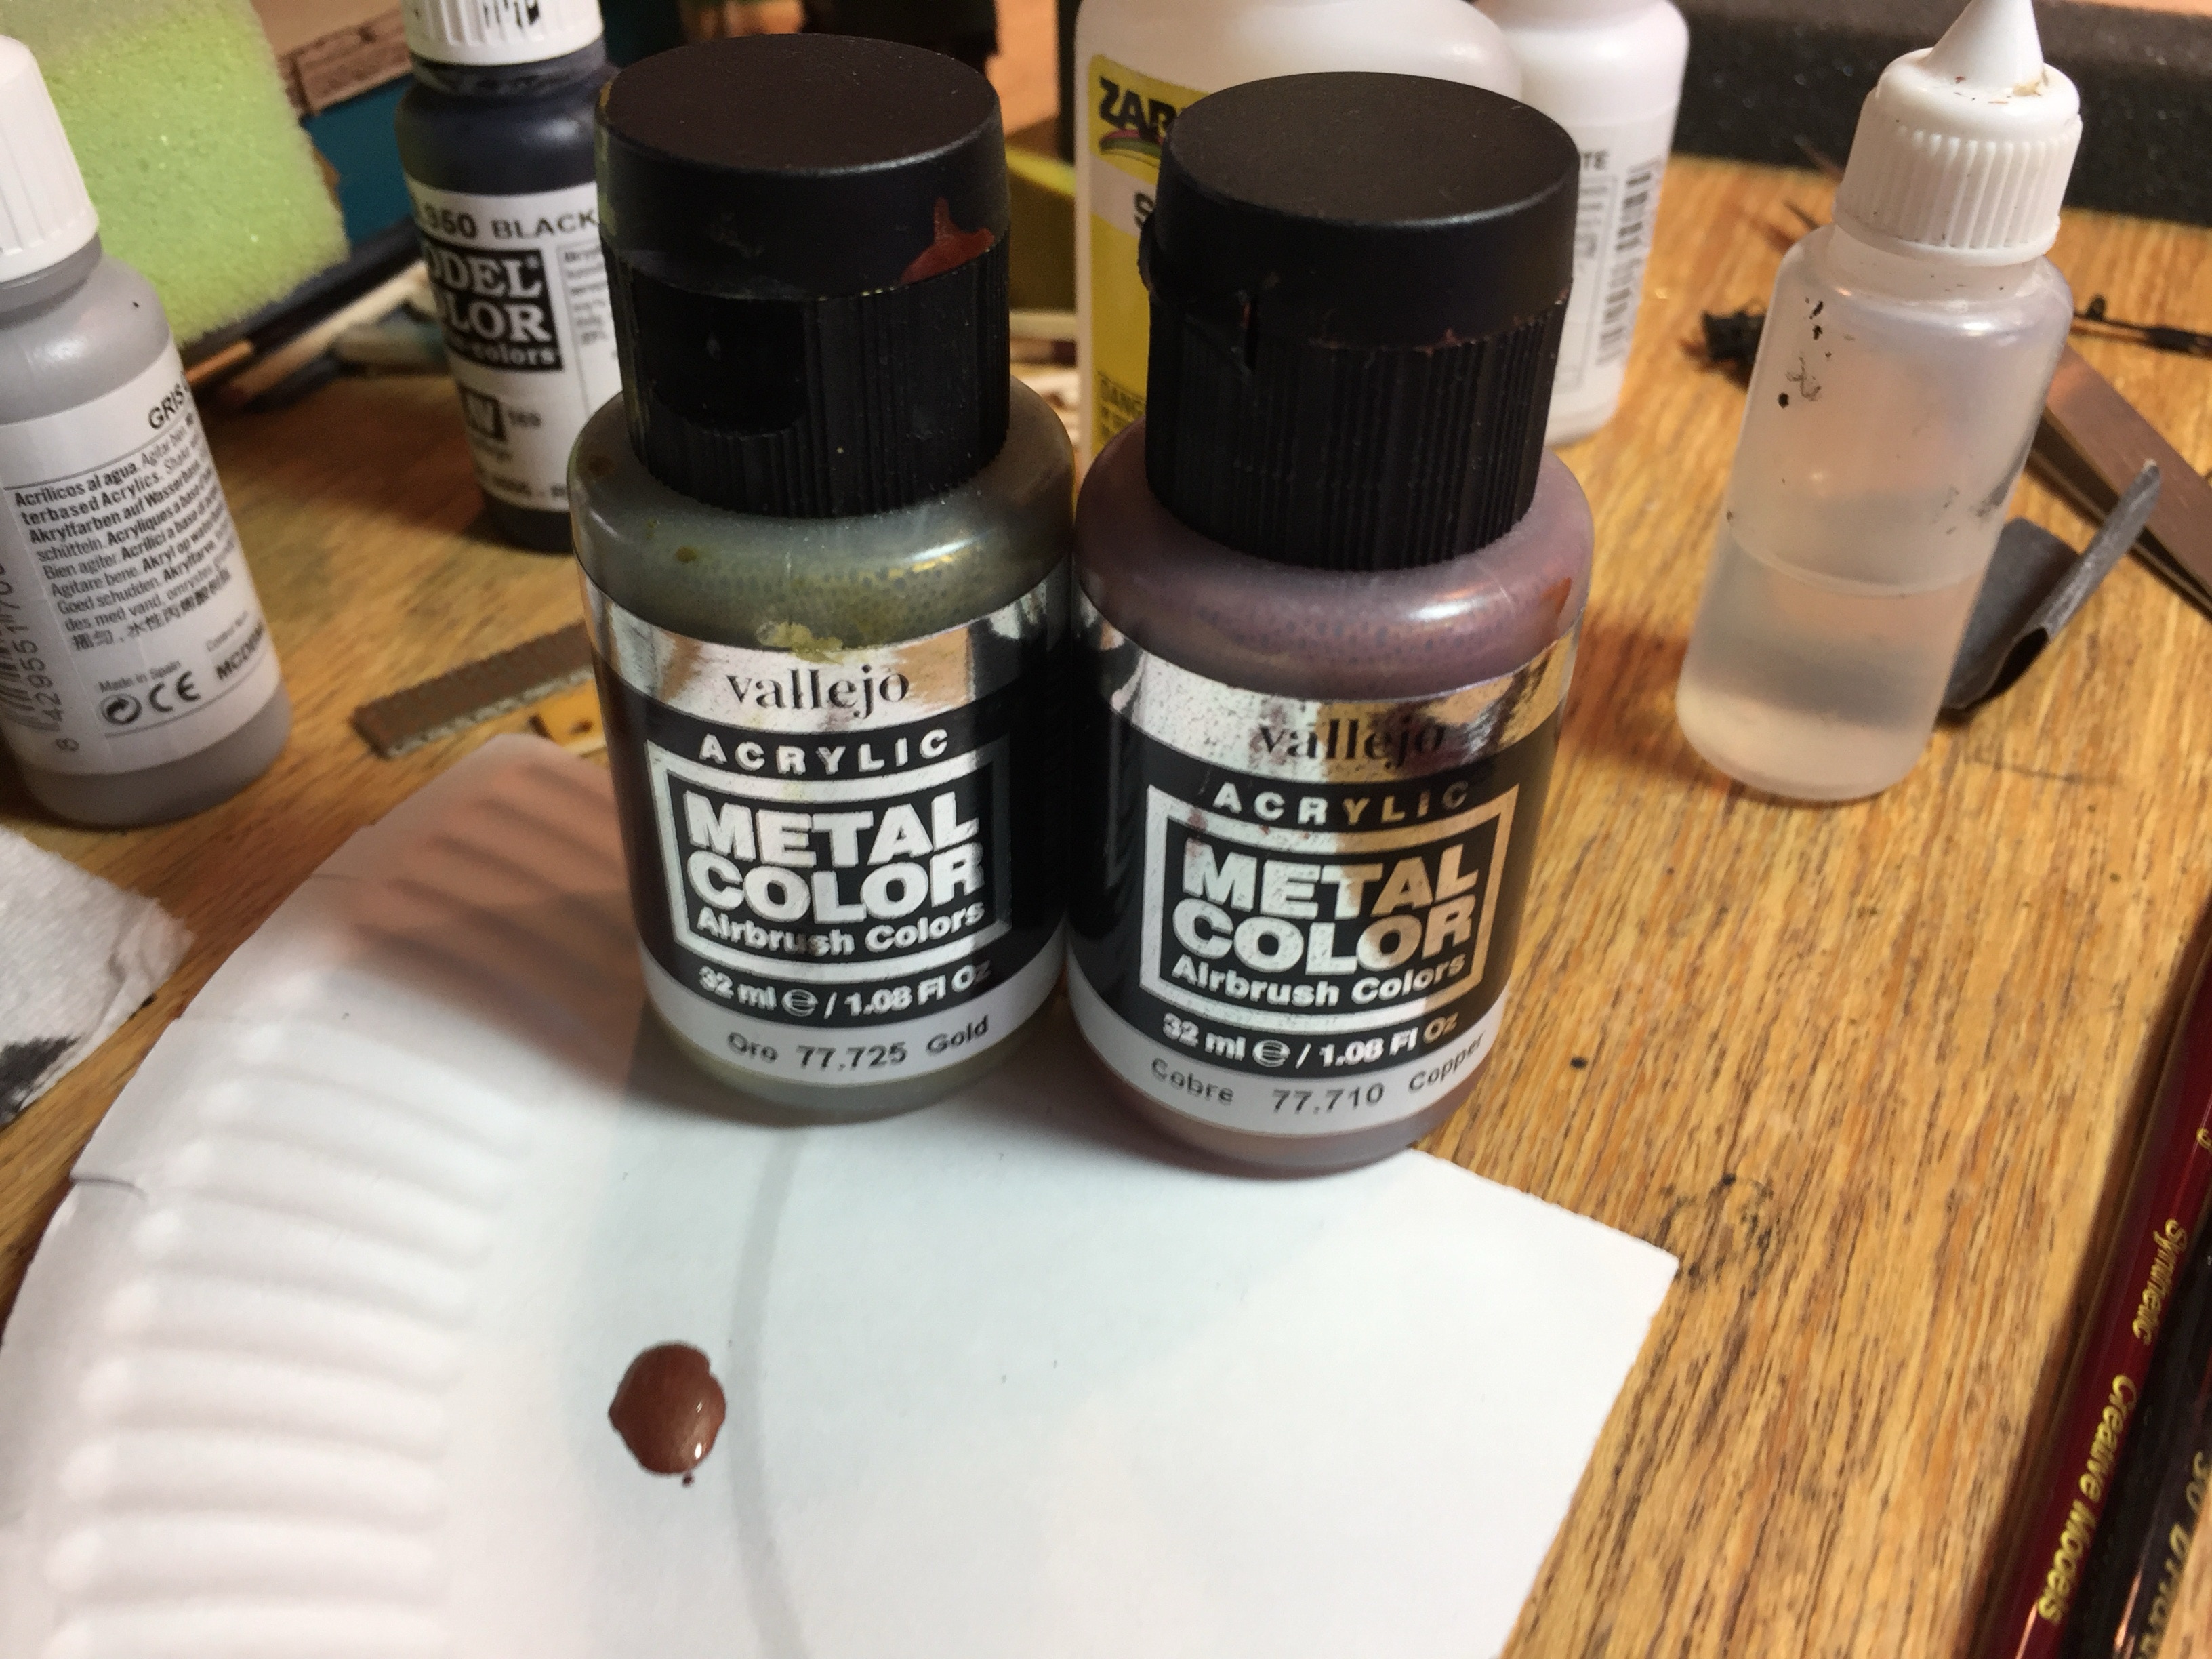
Maak het af met een zijdematte laklaag.
Seal it with a satin varnish.
HENDEL ZANDDOM
HANDEL SAND DOME
Voor de hendel van de zanddom wordt een stukje 0.4 mm messing draad in een L vorm gebogen. Aan beide kanten van de L wordt de lengte ca 4,4 mm.
The handel of the sand dome will be formed in an L shape with a piece of the 0.4 mm brass wire. On both sides of the L the length is about 4.4 mm.
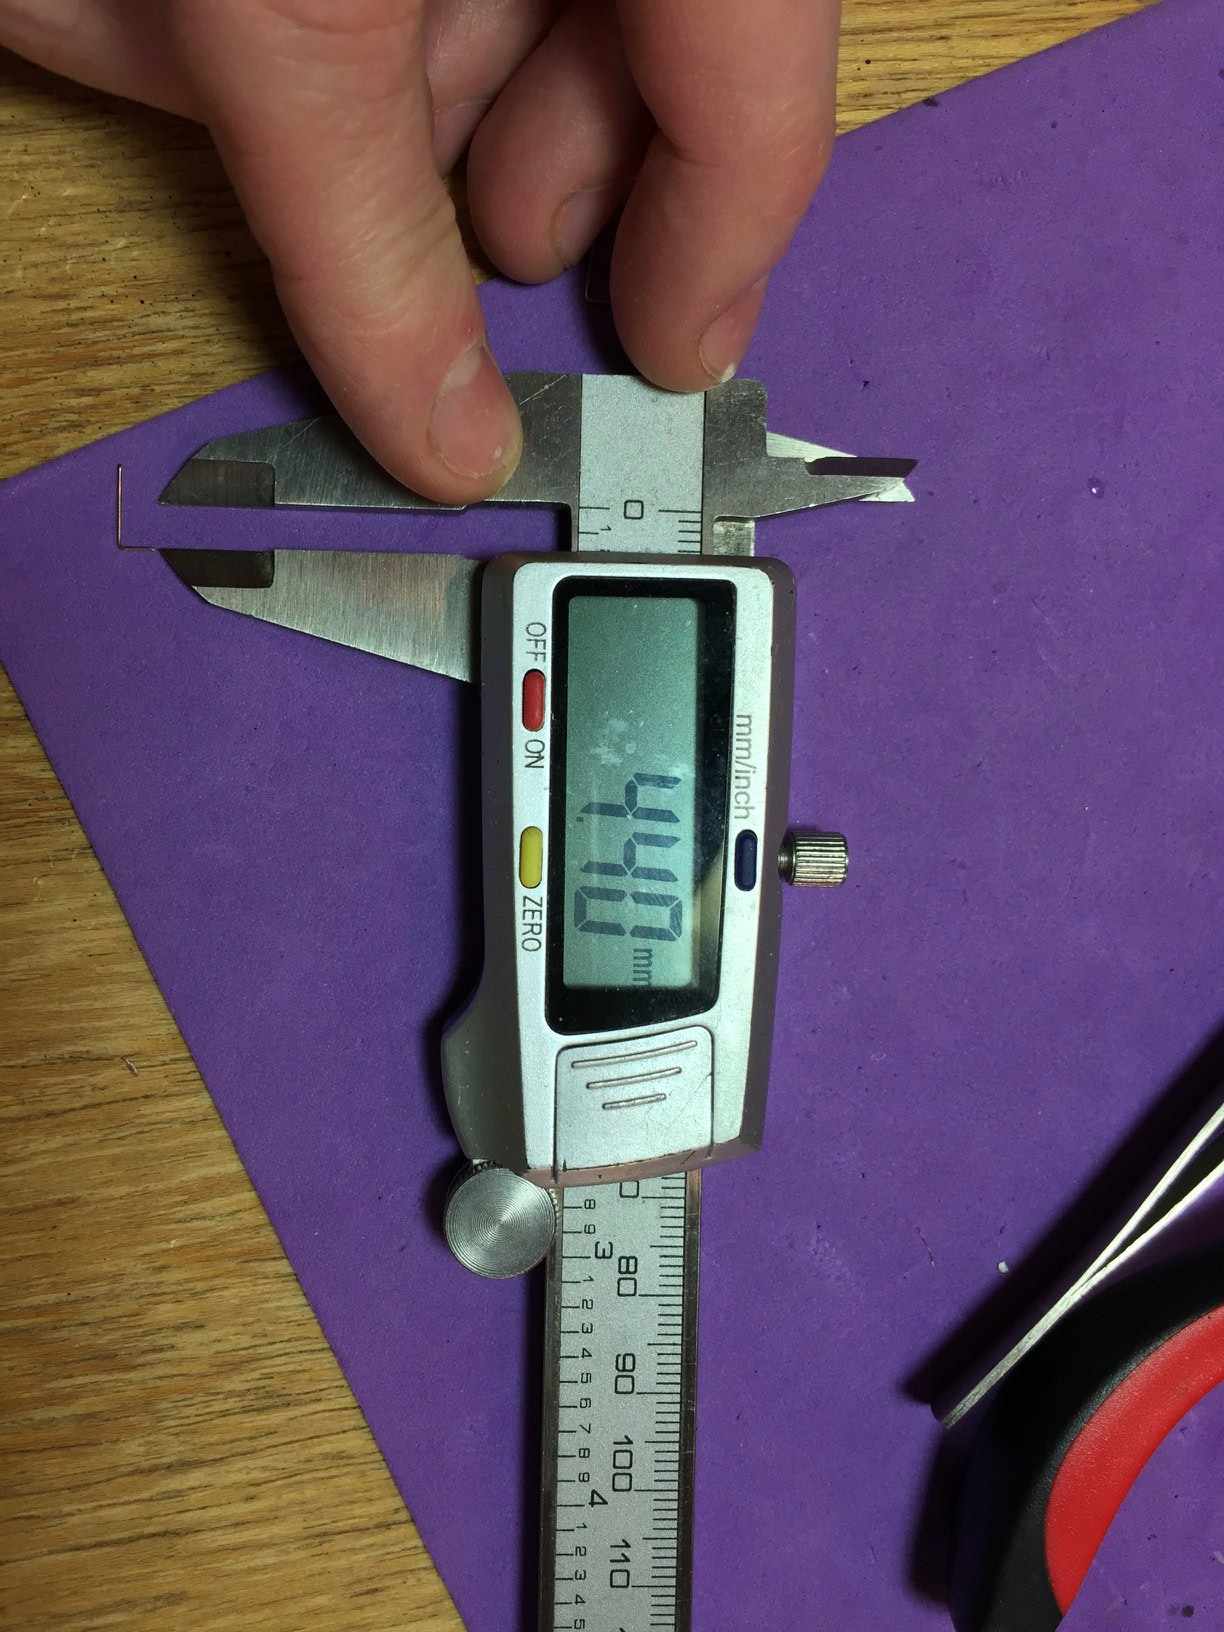
Verf het zwart en druk het op z’n plaats. Als het niet goed past, gaatje voorboren met een 0,4 mm handboortje.
Paint it black and press in place. If it doesn’t fit well, pre-drill hole with a 0.4 mm hand drill bit.
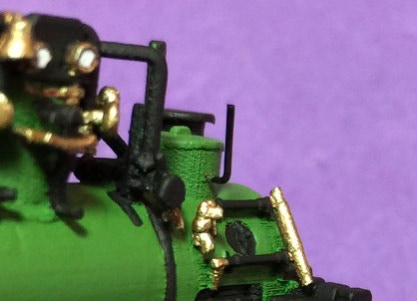
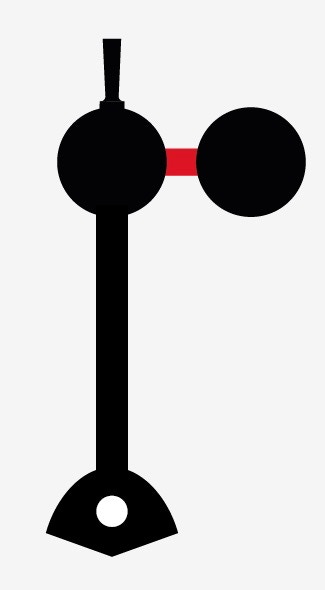
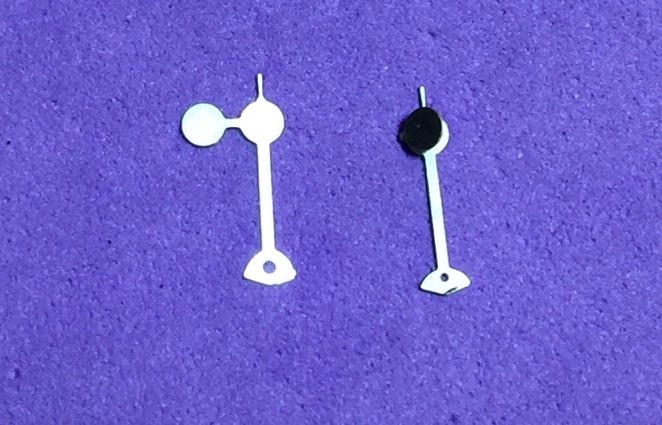
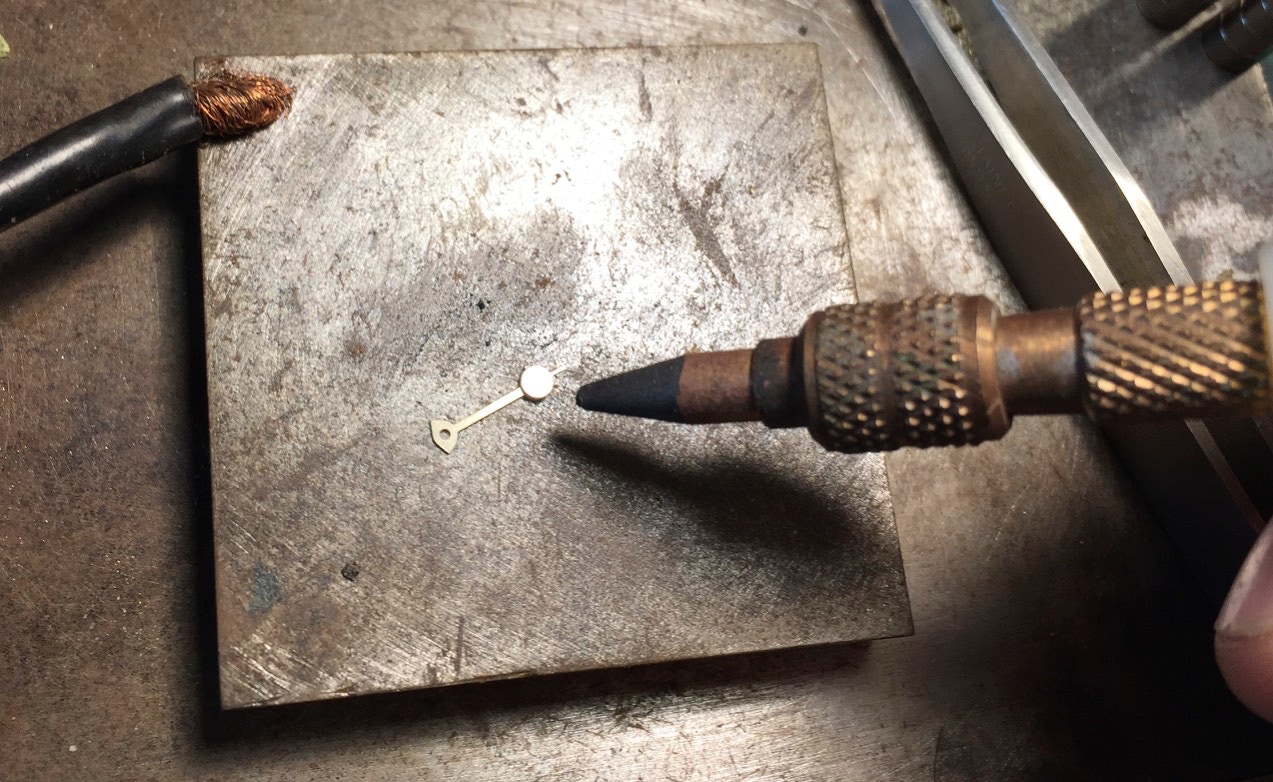
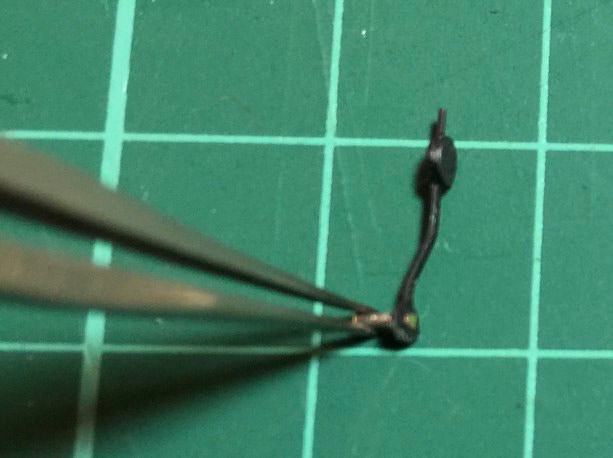
HANDREM
HAND BRAKE
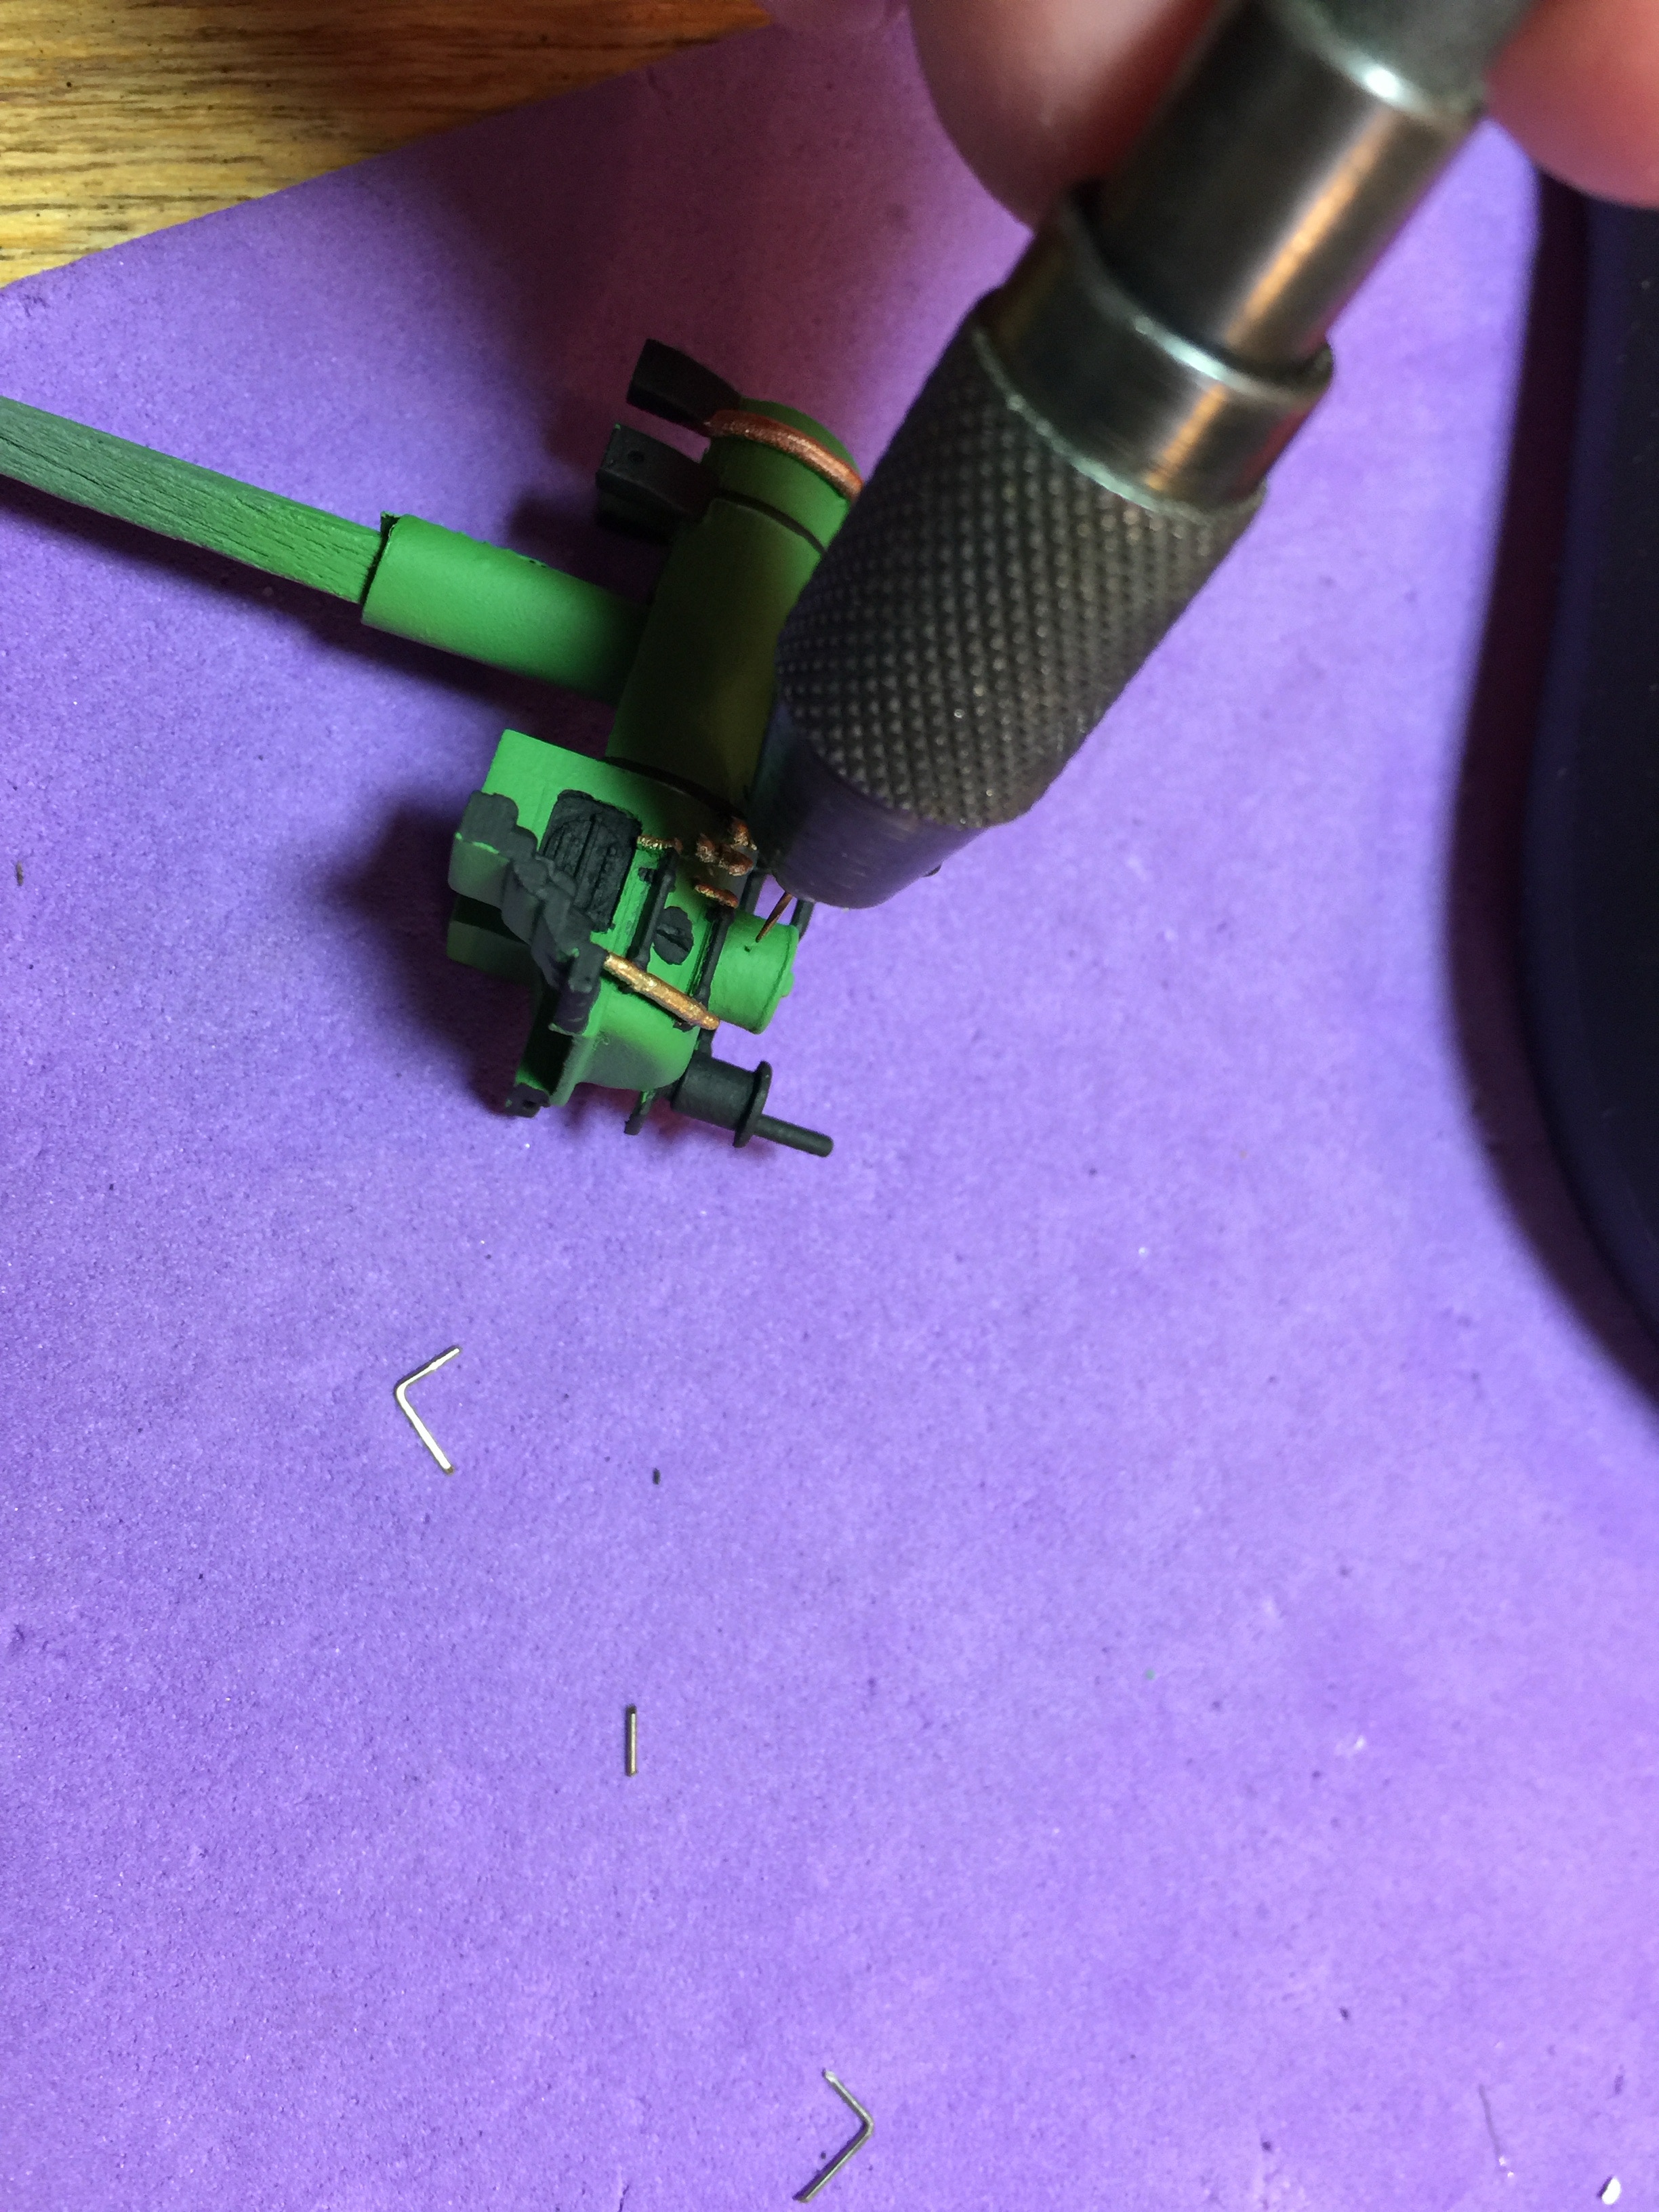
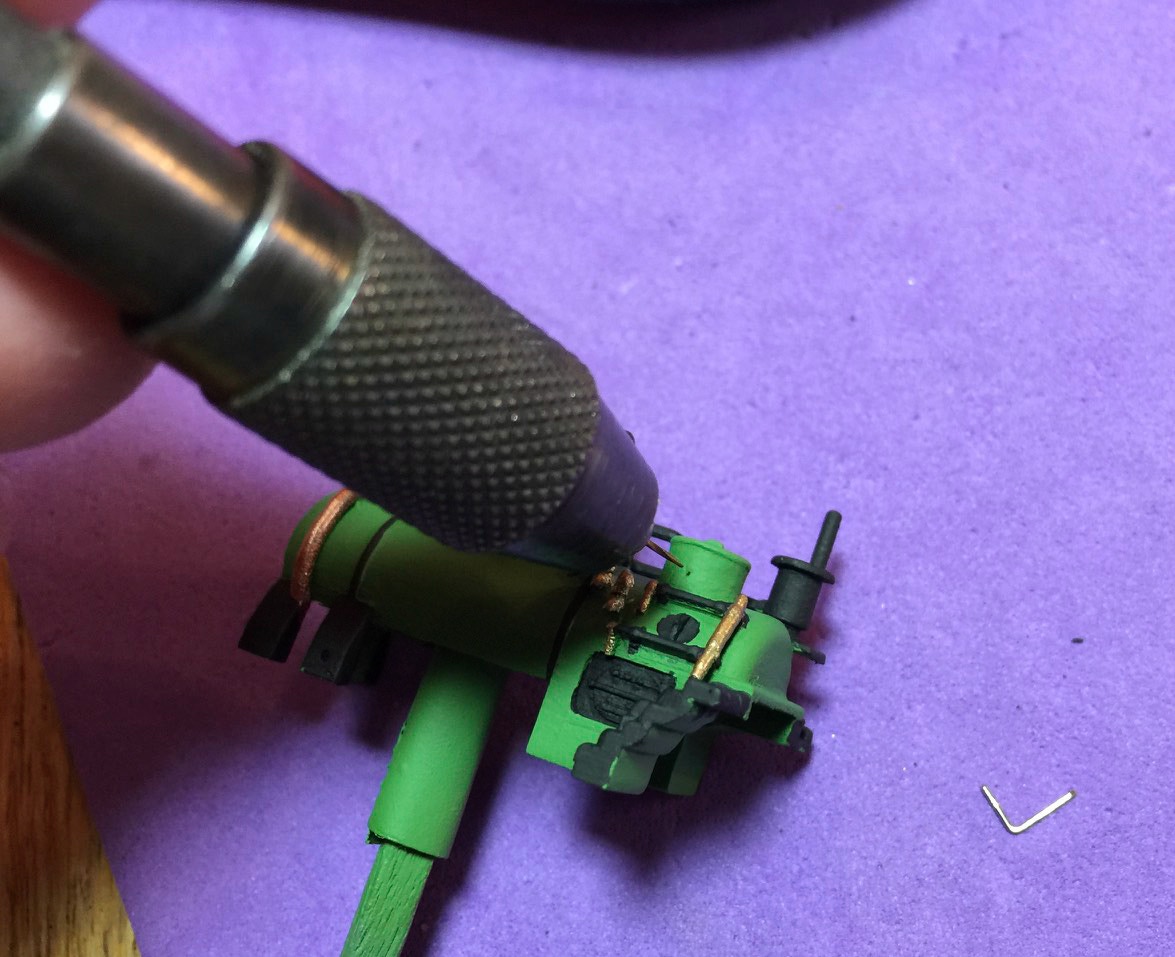
Het ronde “gewicht” van de handrem wordt 180 graden gebogen en gesoldeerd op de andere cirkel. Daarna het vouwtabje afvijlen en in een S vorm buigen, zodat de handrem langs de ketel loopt. Een stukje messing 0,6 mm draadje in het gaatje solderen en dan zwart verven.
The round “weight” of the hand brake will be folded 180 degrees and soldered on the other cirkel. Then file off the folding tab and shape the pole of the brake in an S shape, so the brake follows the curve of the boiler. Solder a piece of 0.6 mm in the hole, then paint black.
•