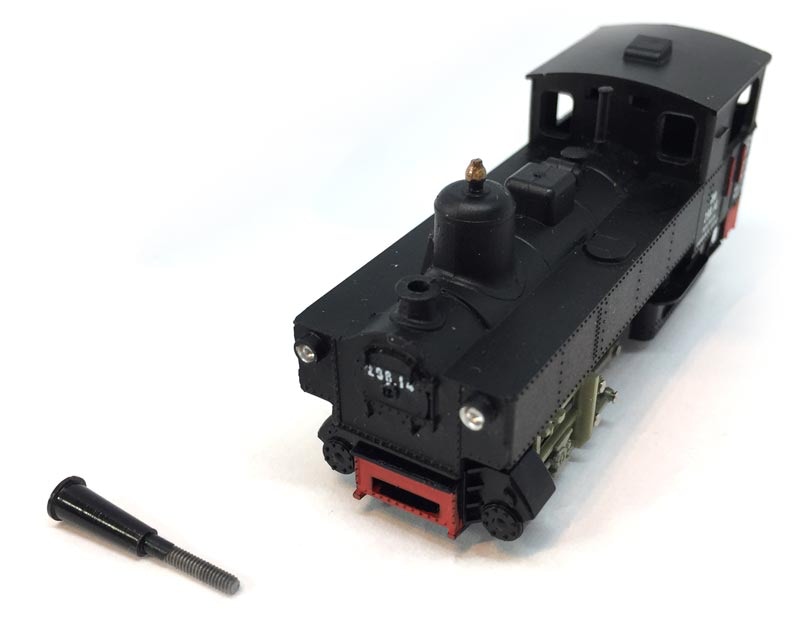
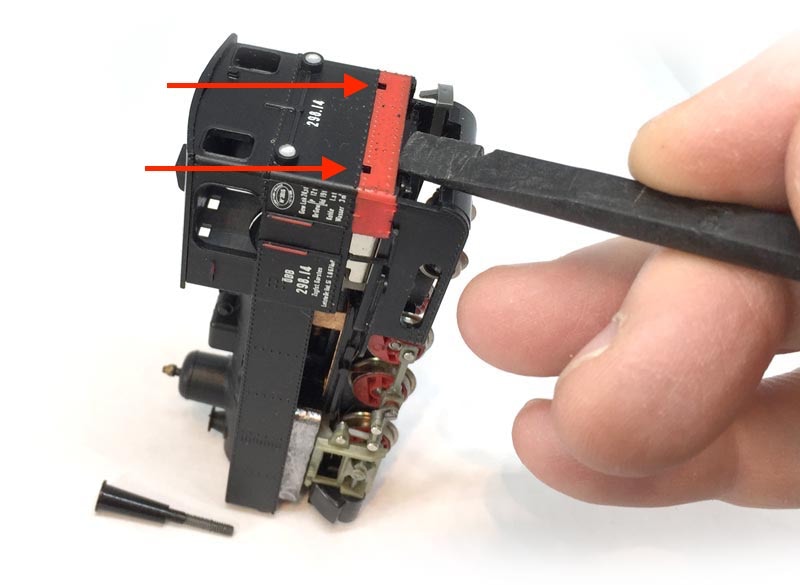
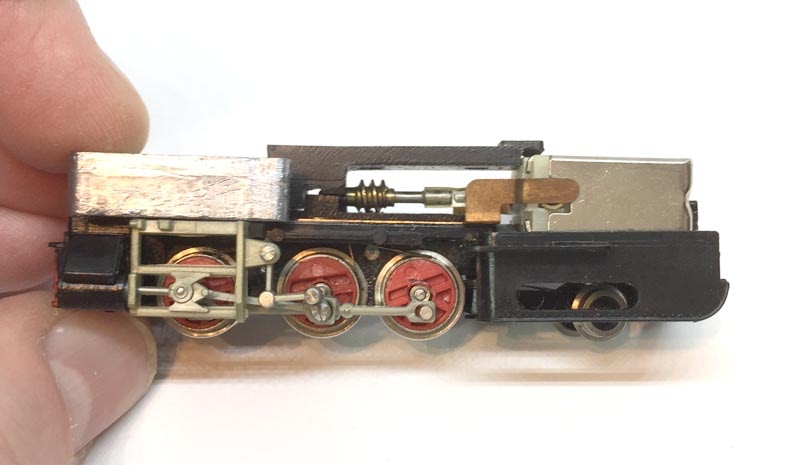
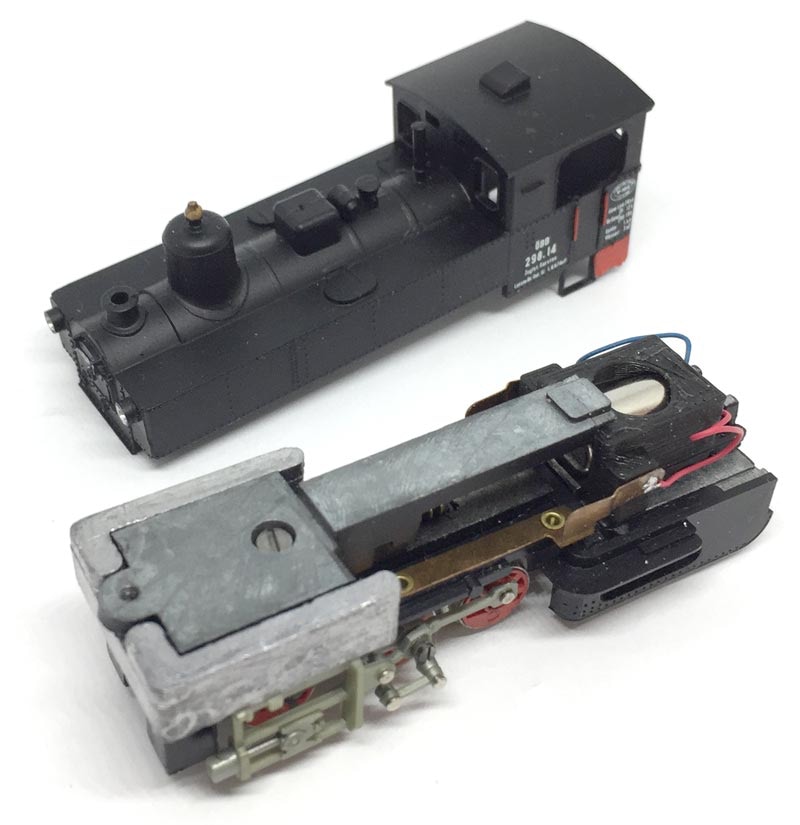
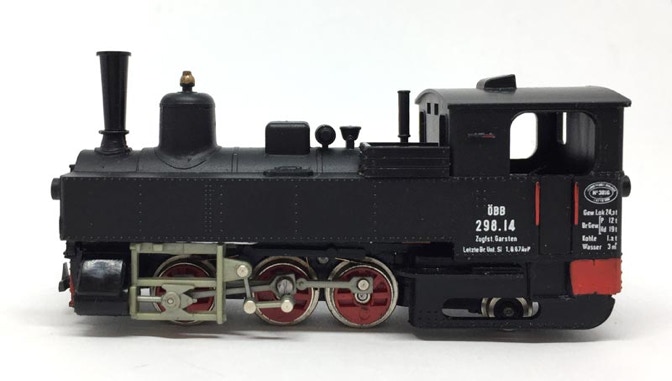
Conversion Liliput U Revision 1

to 12V coreless motor

What you need for conversion set

- The model and upgrade kit

- Small flat screwdriver

- Soldering iron 15W/25W

- Thin wire (get the thinnest wire here)


Good to have:

- General modelling tools


Installation time: Around 45 minutes

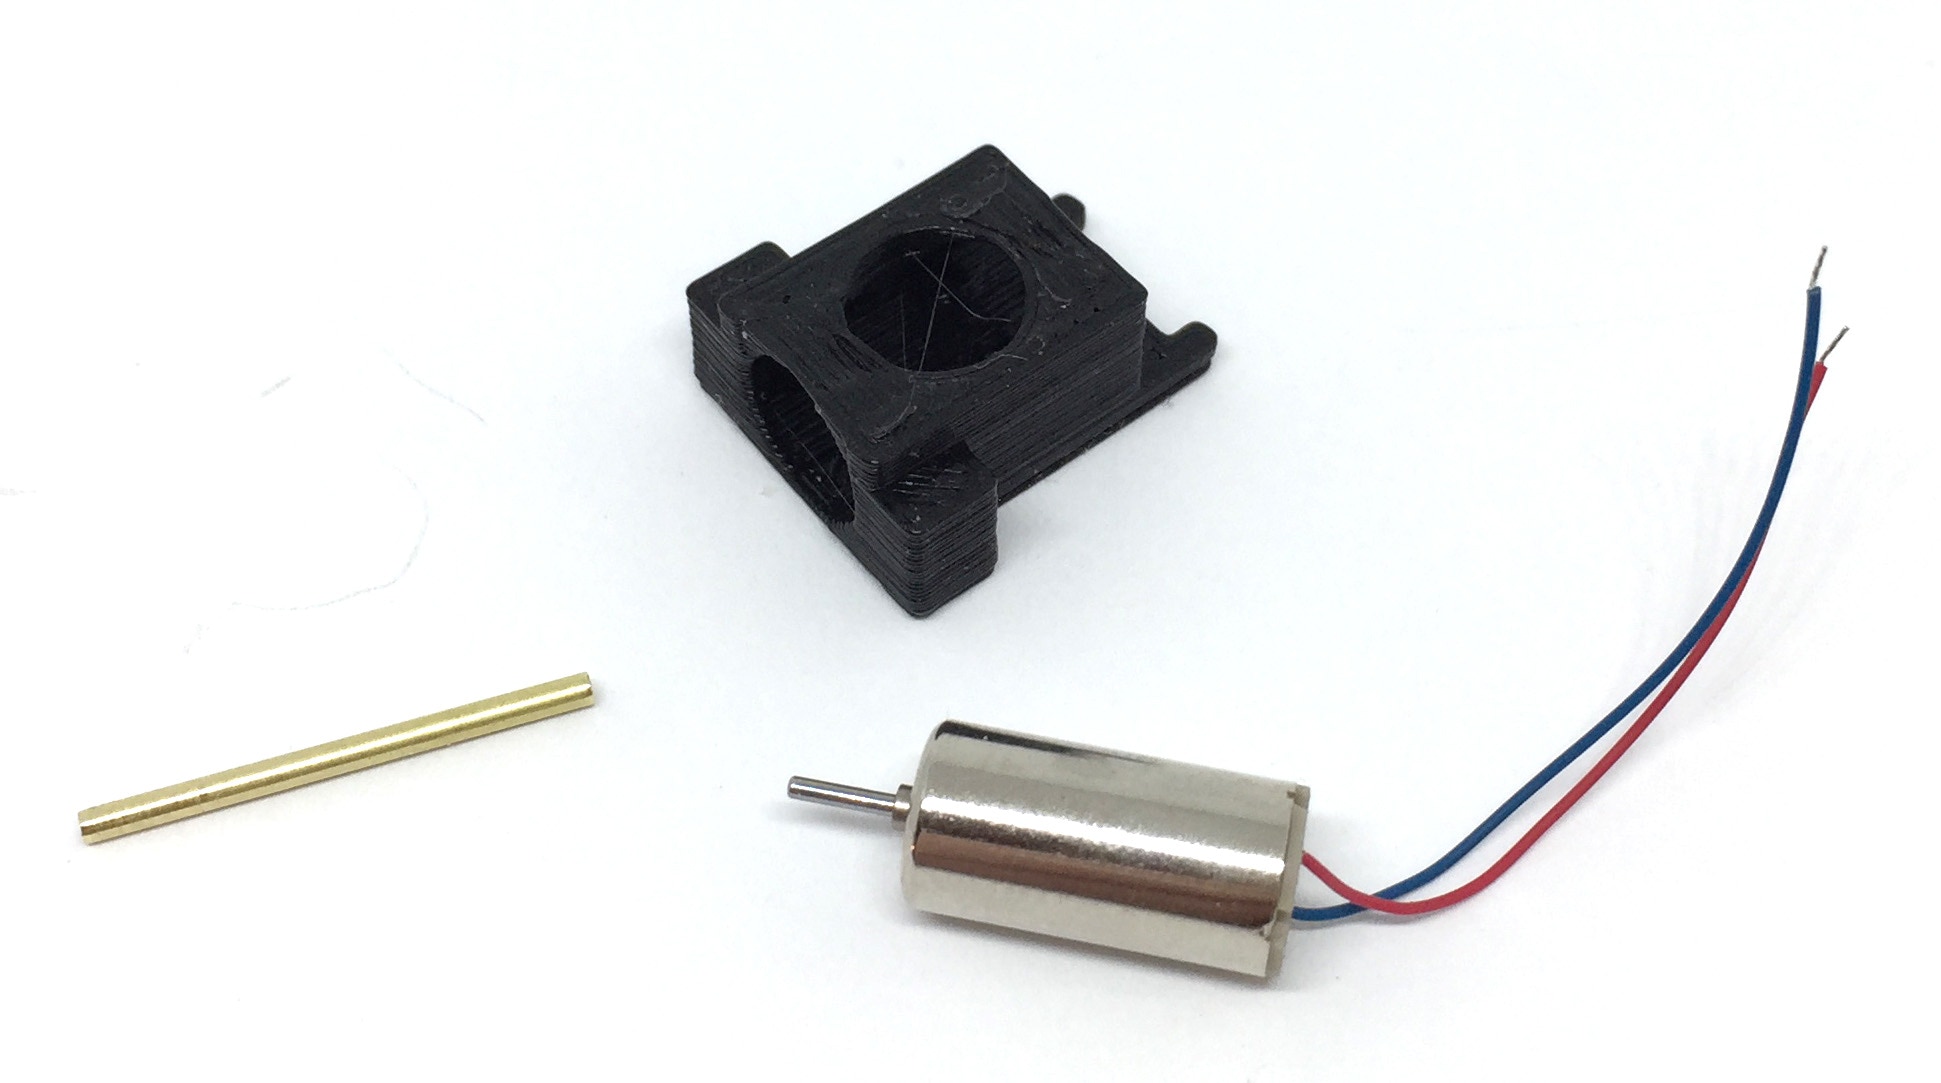
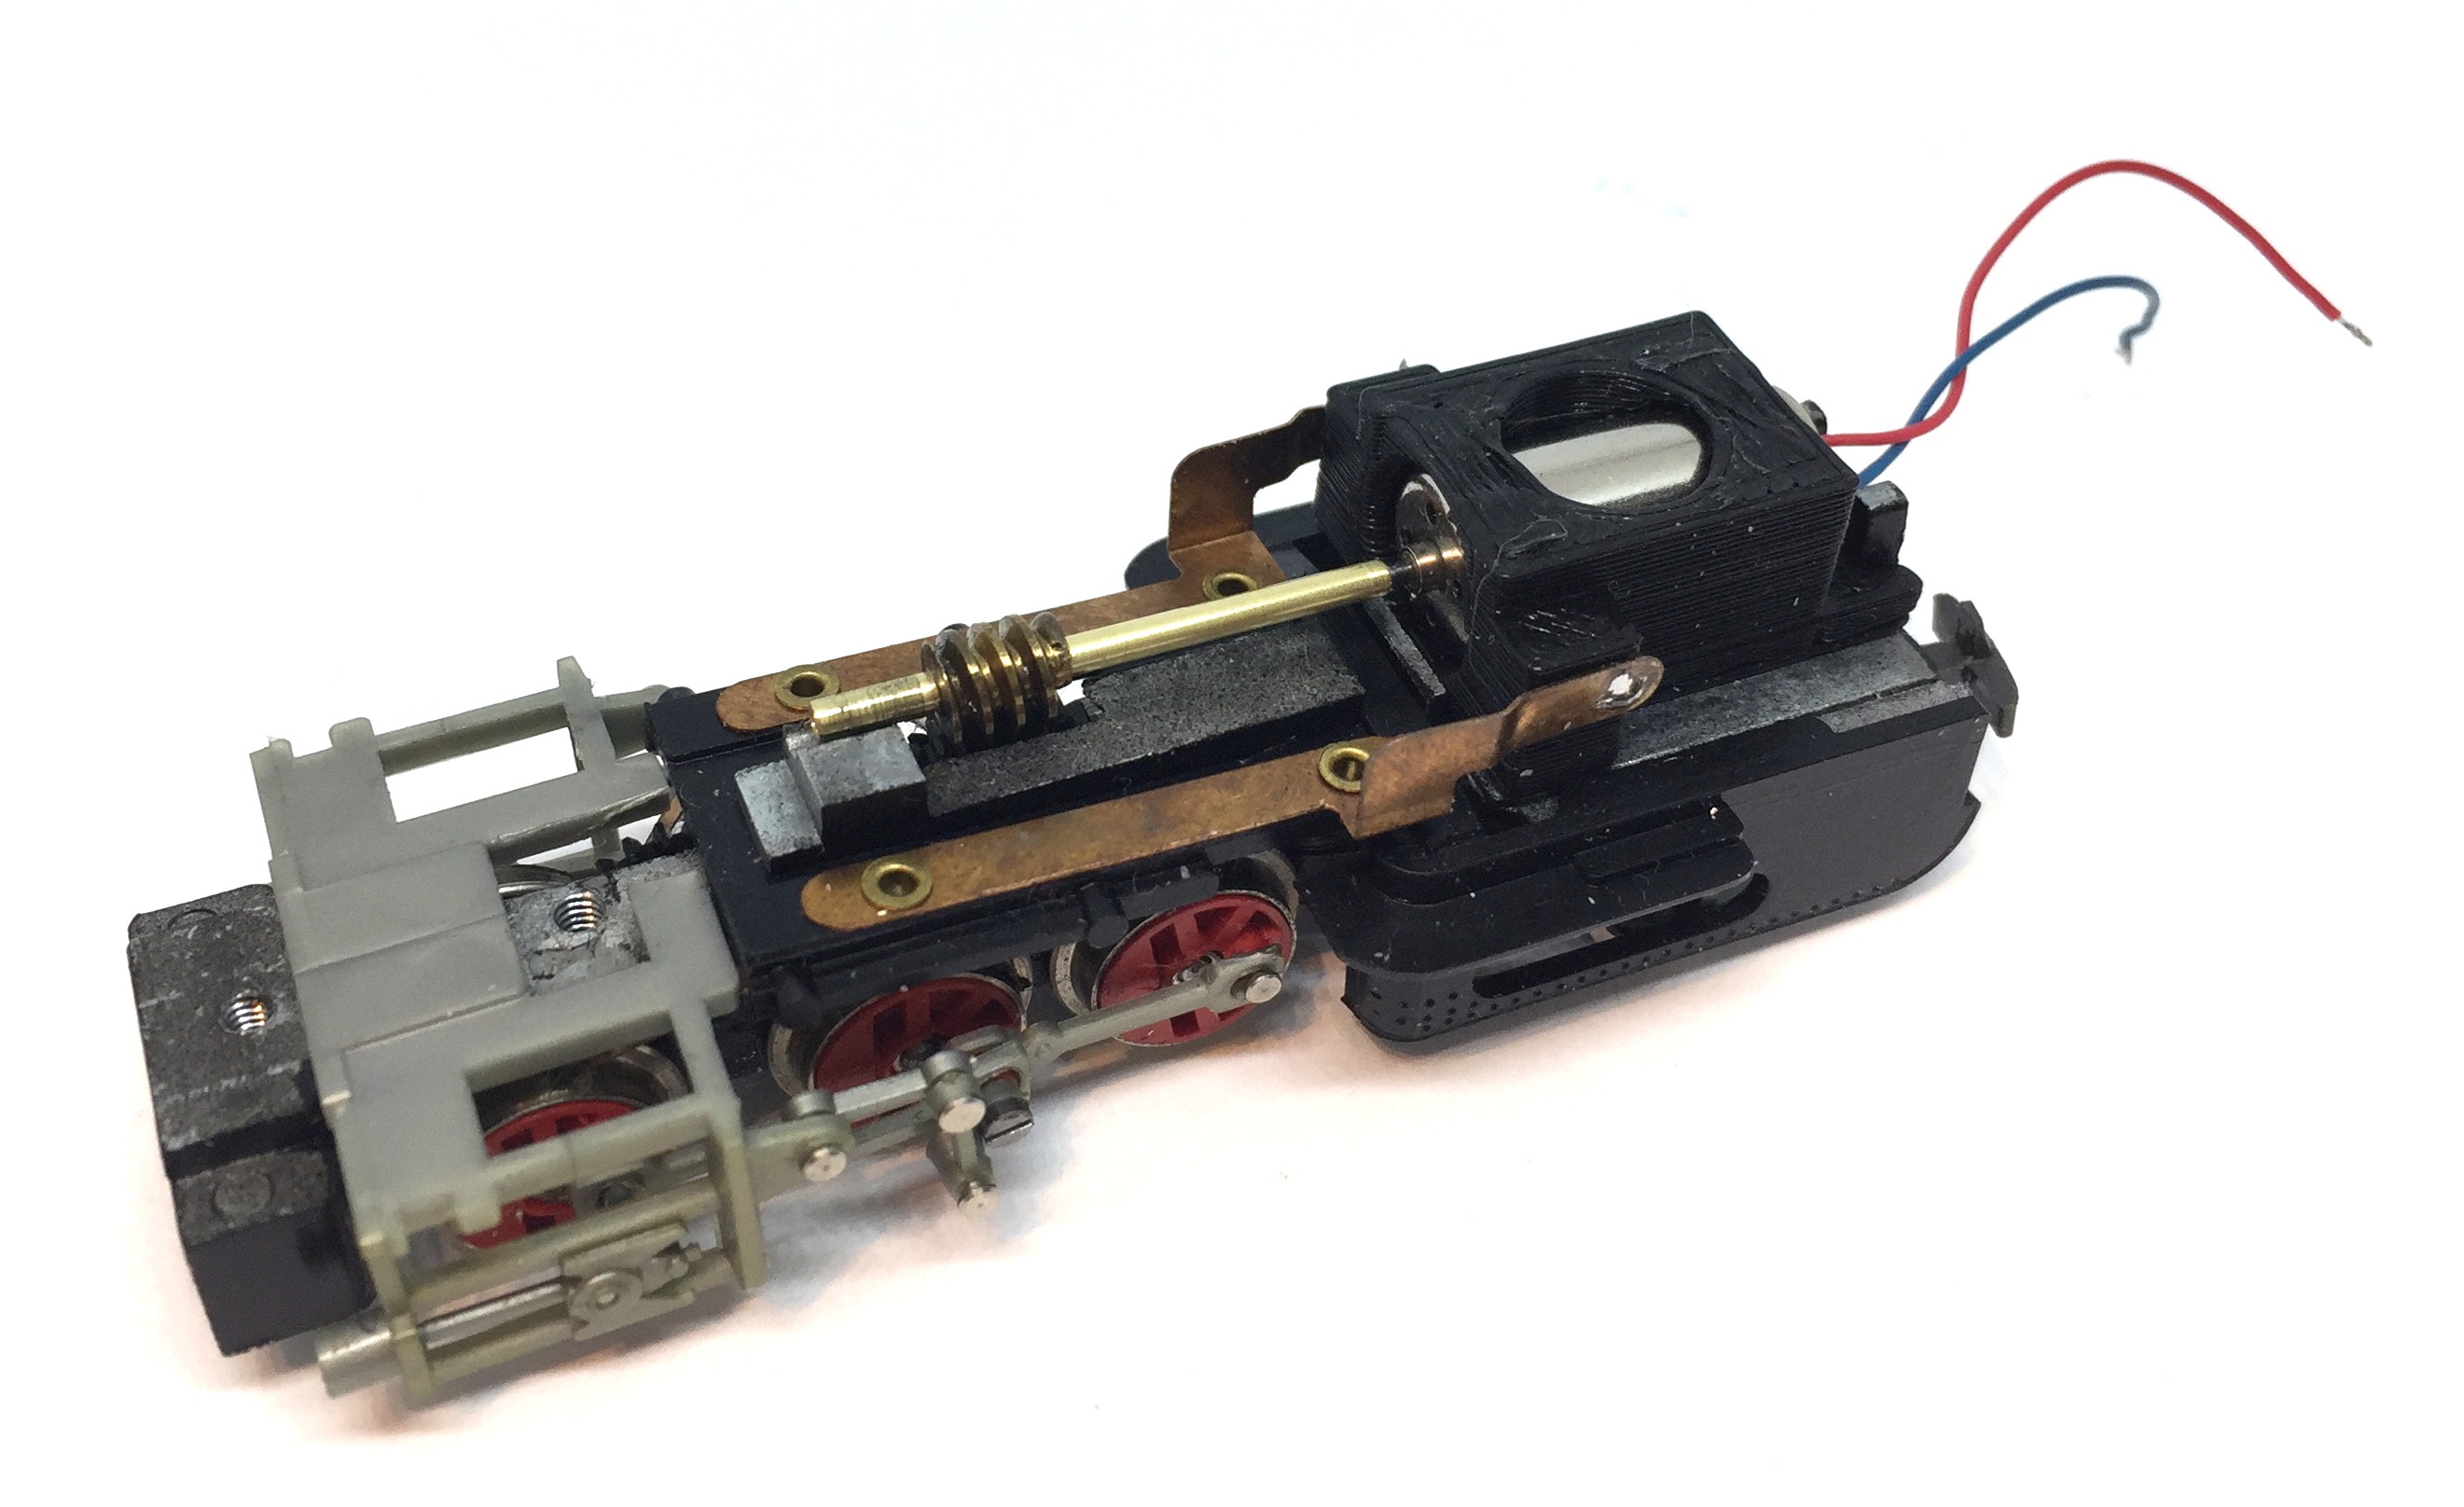
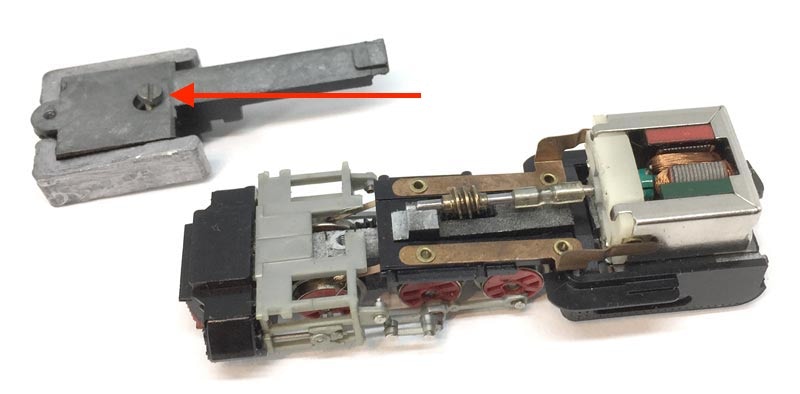
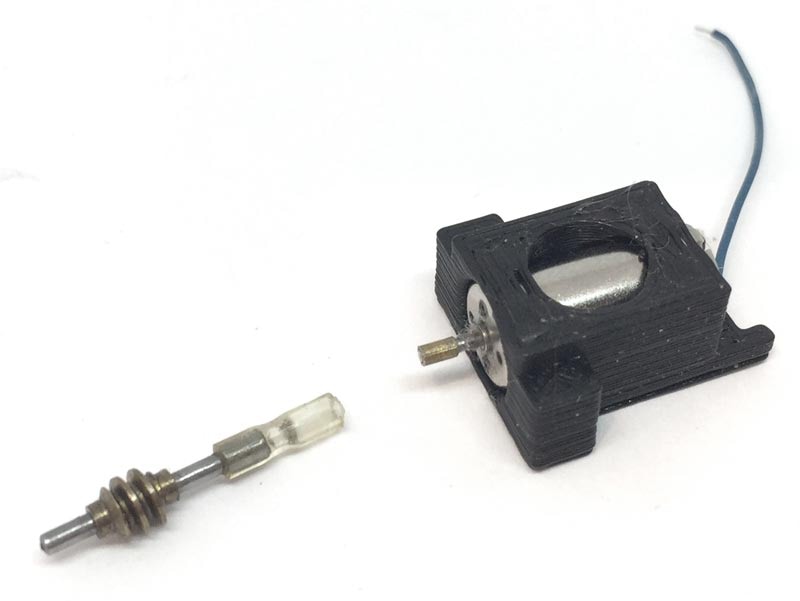
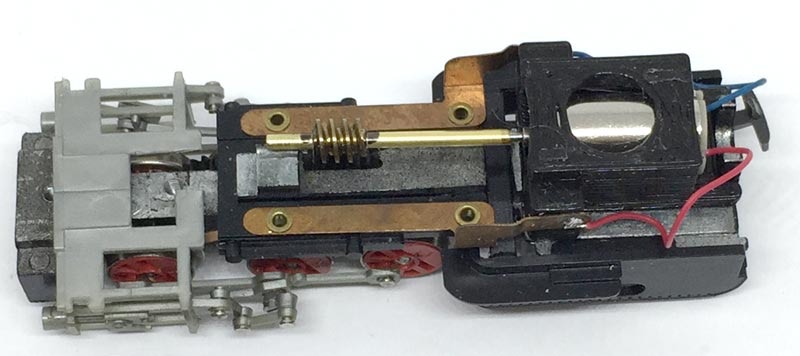
LILOKU-1   Coreless motor conversion kit

For Liliput H0e models of the first generation, made in Wien (Vienna).


Contents of the kit:

1x  8x16 mm 12V motor with one shaft

1x Motor casing

1x long brass shaft adapter


This kit does not include a worm, so you have to take the original one off of the motor! How to do so confidently, read here.

KASTENLOK INDEX

Question? Just reach out!

1

Remove housing

The chimney is fitted as a screw.  Just turn it counter clockwise to take it out.  On the back there are two tabs on the chassis, that fit into the two square holes on the back. Lift the housing over the tabes. You can then lift the housing straight off the chassis.

3

4

Release the screw and take the metal weights off the main drive unit.

Remove the original worm of the shaft.  Your worm will either be on a separate shaft, where the motor has a short shaft, or it will be on a longer motor shaft.


To remove the worm, there is page on this website dedicated to it. There you can find a short instruction video on how to do this.

http://tramfabriek.nl/worm-removal.html

5

2

This is how the chassis looks like without the housing.

First fit the worm on the adapter. Check for central positioning above the sprocket. Then glue the brass adapter on the shaft as pictured. If it doesn’t stay in place by friction, use Loctite (preferred) or Superglue.

6

7

You’re done! Test the model before putting the housing back on. If everything works well, press housing and chassis together. The screw the chimney back on. 


Or fit DCC, sound and/or a Powerpack (see below)

Digital conversion

This motor upgrade kit can very well be converted to DCC. Check the digital setting page, for many decoders, to get the best driving experience.


I would advise using the Train-O-Matic Micro decoder with wires (art. 02010223), the SPP-N Powerpack from the same brand.

When soldering the wires to the contacts,, take the casing out and away from the contacts. Otherwise you’ll be soldering the contacts to the casing.  Note the colours of the wires for correct pole connection. Test the direction of the train, compared with another of your trains. If the train moves in reverse direction, swap the cables.