UK based
Prices for UK customers are shown inc 20% VAT
Other countries, inc EU, prices shown are ex VAT.

KASTENLOK INDEX


UK based
Prices for UK customers are shown inc 20% VAT
Other countries, inc EU, prices shown are ex VAT.
KASTENLOK INDEX
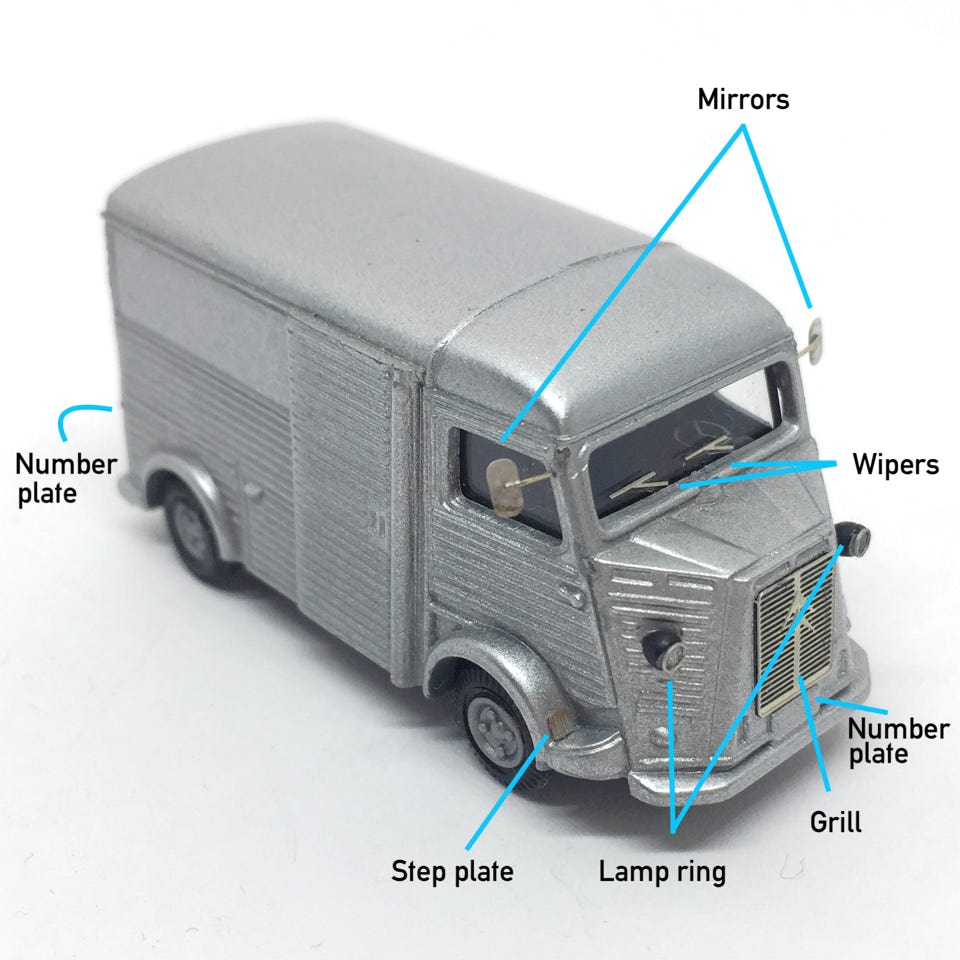
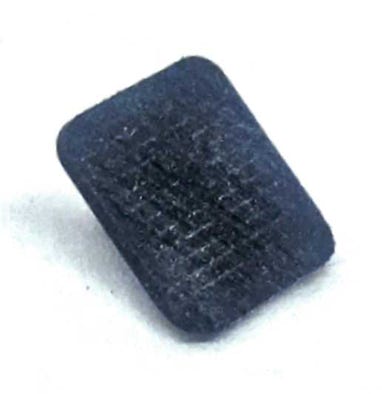
An etched sheet with wing mirrors, grill, lamp rings, step plate, wipers and number plates.
Scroll down to read more…
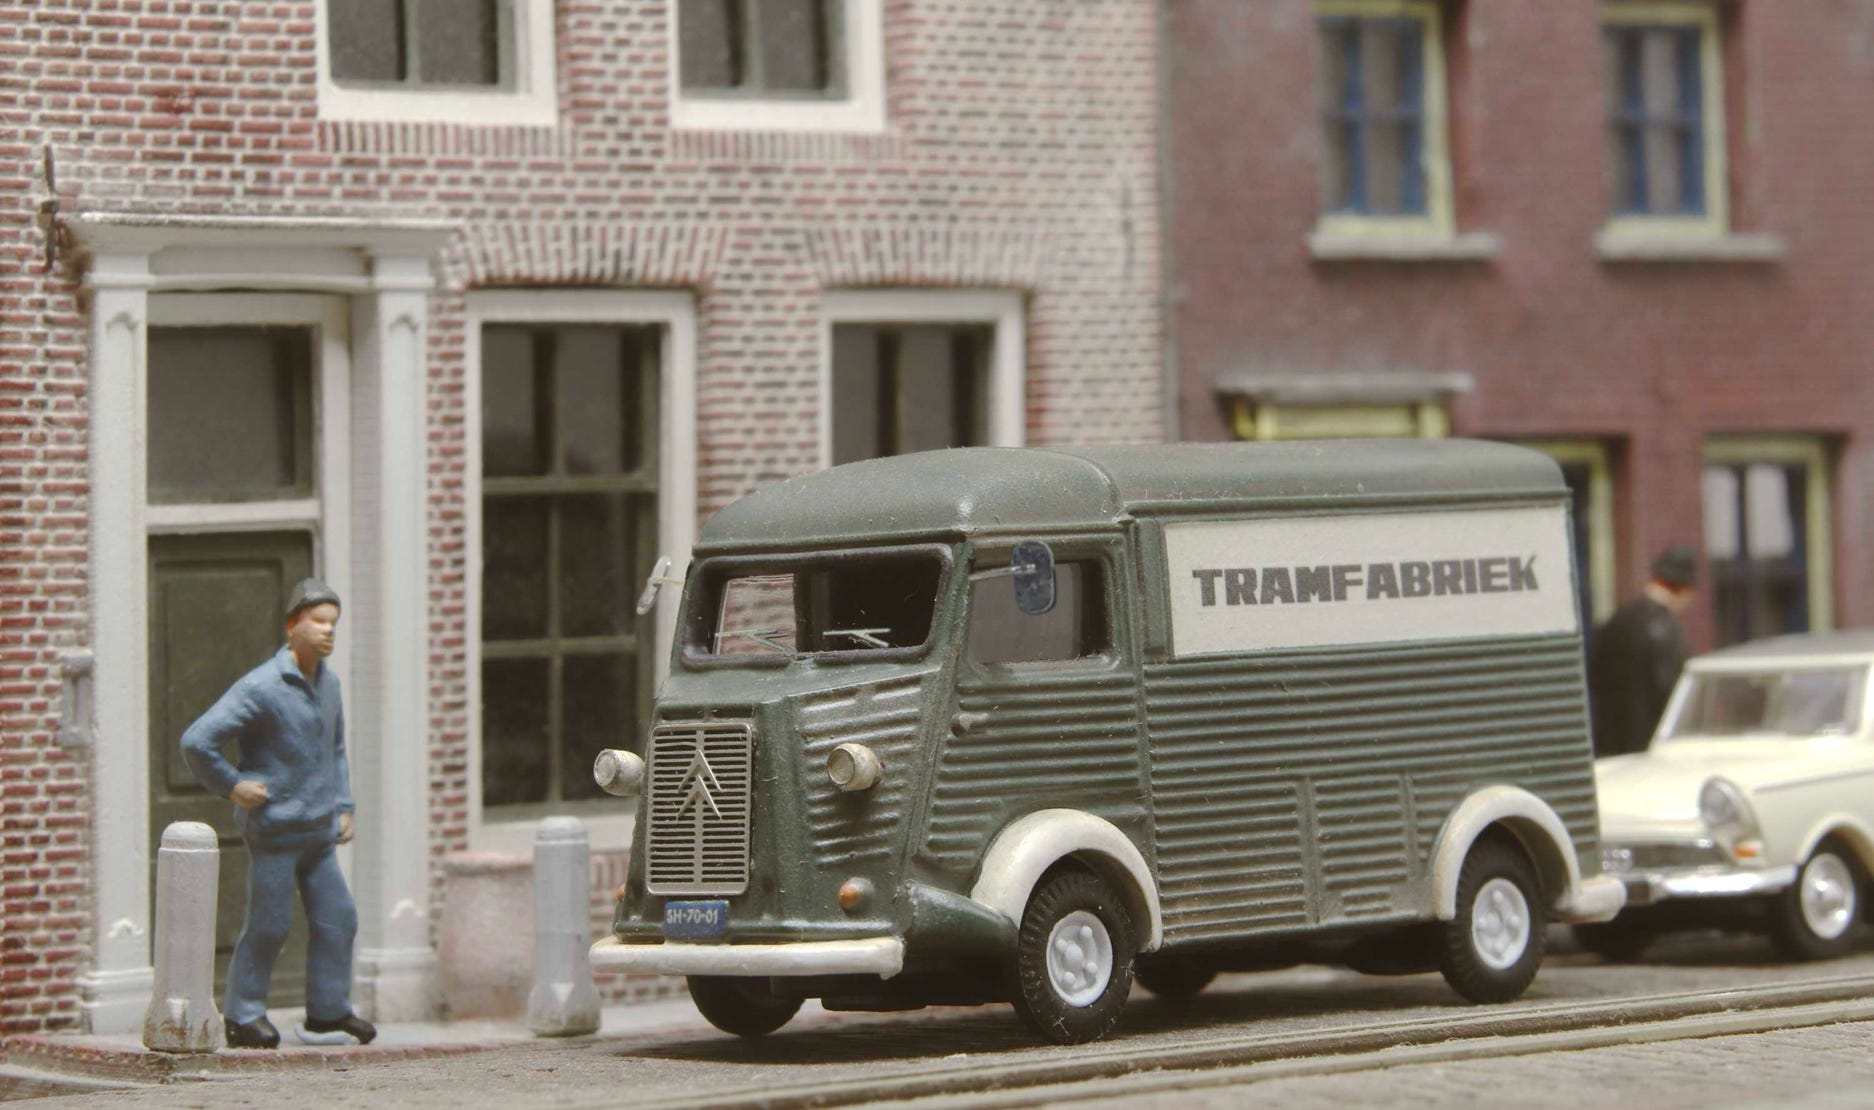
Citroen HY for Busch and Wiking 1:87 models
1
Etched kit to upgrade the Busch Citroen HY model. Included in the etch is:
- Grill (Busch only, advised not to install on Wiking model)
- Lamp rings
- Wing mirrors
- Wipers
- Step plate
- Base panels for number plates, front and back. For the back side, plates are included for lower or top position. (National numberplate itself not included, just the metal base)
Basic modelling skills are needed to install this kit. Be aware that the items are very tiny. I personally would advise not to install the wipers as this is very difficult to install clean, I've just included them because I could. If you do decide to glue the wipers, use Kristal Klear, Glue'n'Glaze or PVA.
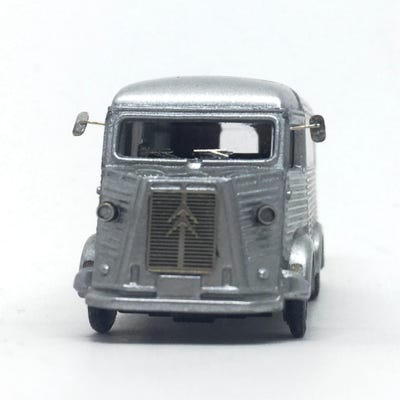
Below is what you’ll receive. Model not included:
A discount will be applied when buying 3 or more..
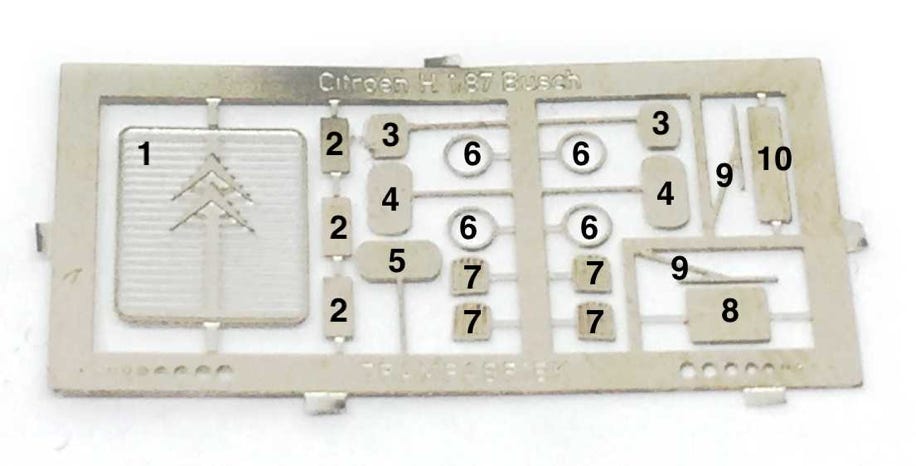
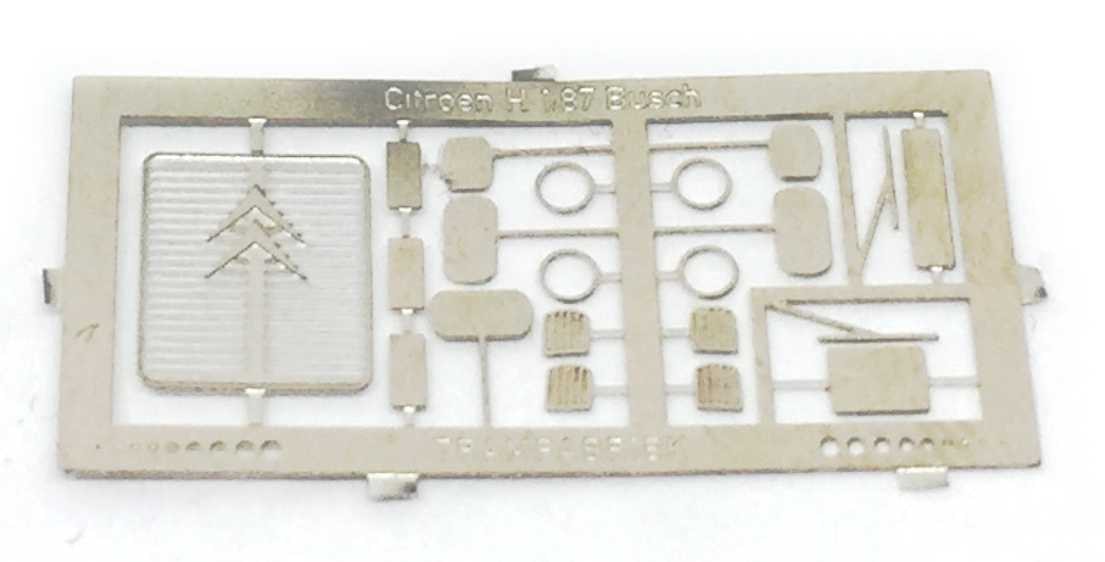
1. Grill (Busch only)
2. Number plates for split at top rear.
3. Rear view mirror (small)
4. Rear view mirror (large)
5. Alternative, single rear view mirror
6. Lamp ring
7. Door foot step plate
8. Number plate (rear)
9. Window wipers
10. Number plate (front)
A thin rod of 0.3 mm nickel silver is also included (not pictured), for those who would like the mirror holder seen on top of the mirror. This is more realistic, as well as it is a stronger connection. A piece of this rod can be glued with super glue or soldered.
Instructions
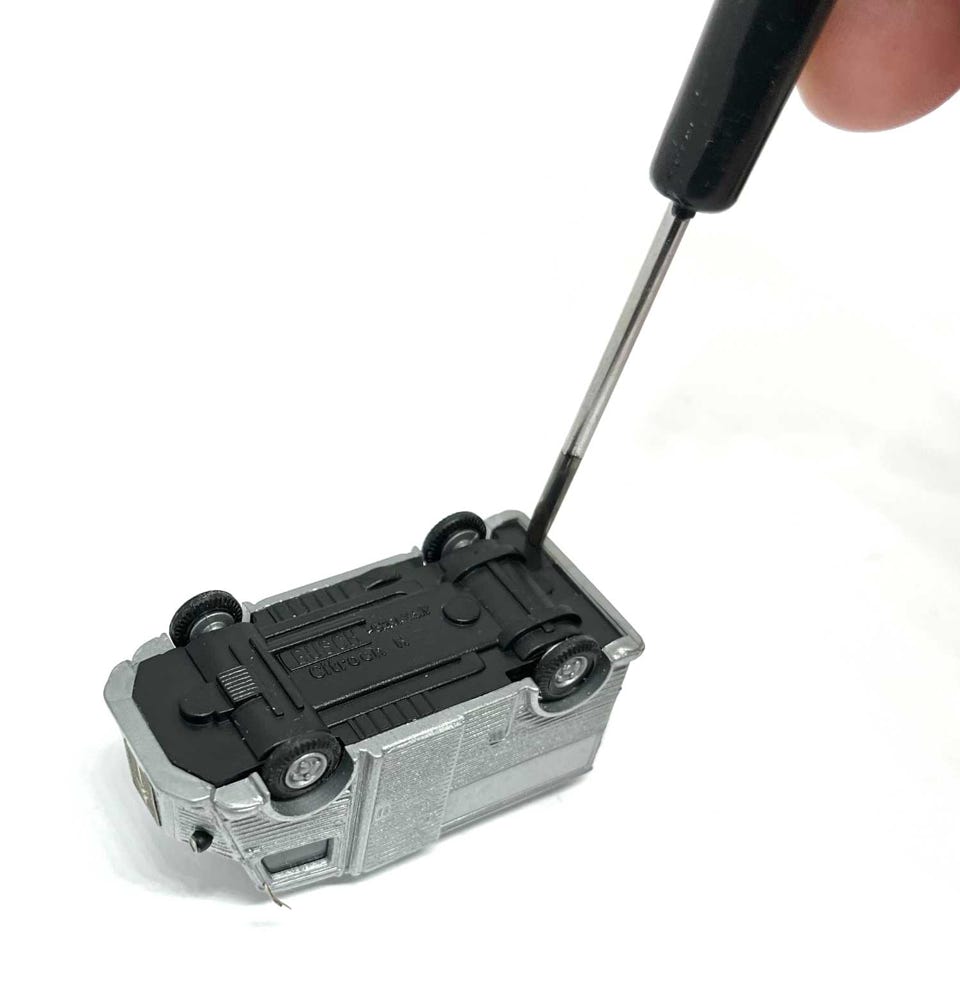
Take apart is for Busch model only:
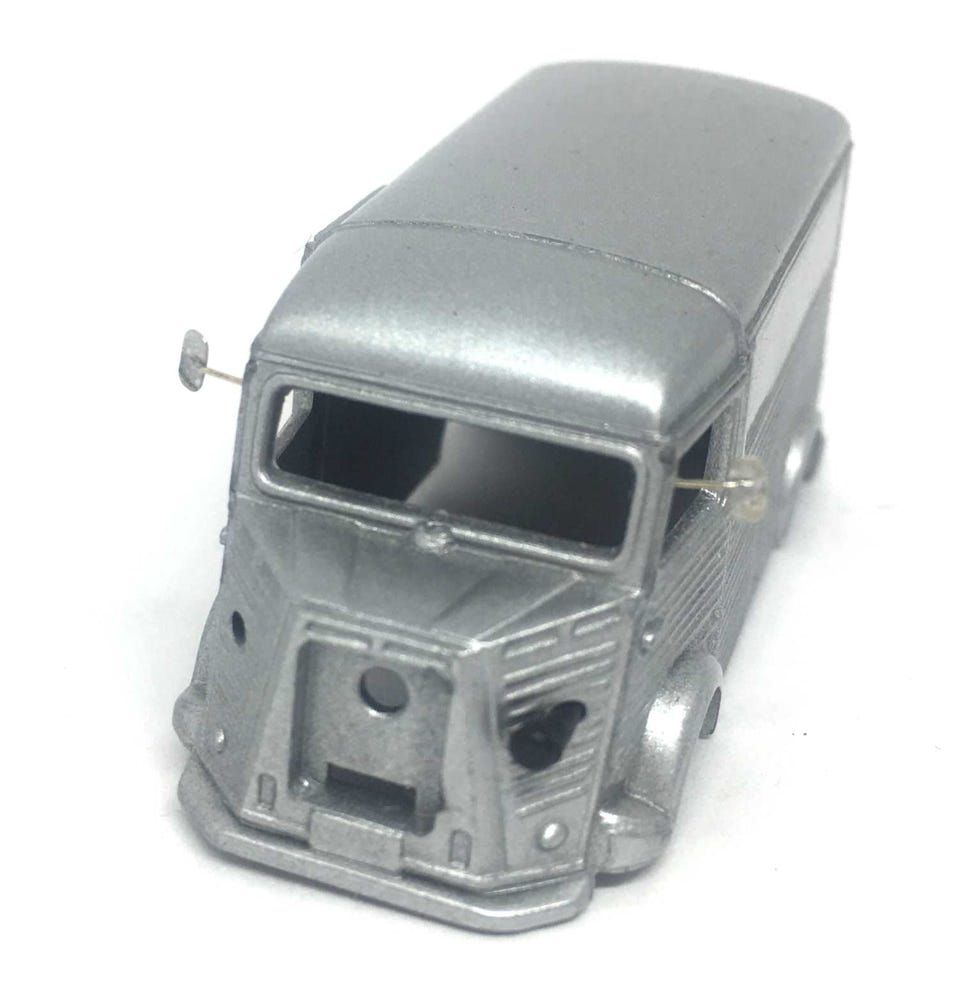
I prefer to disassemble the model. Open it from the rear bottom, by putting a small, flat screw driver between the chassis and the rear. There is a small tab that sticks out through the back. That might bend, but you should be able to move it back (if you don’t open the model several times). It’s not really essential, the model stays together without the tab anyway.
2
5
Take the window piece out and press the lamps and grill out. The lamps are really tiny, so put them in a little box, not loose on the table.
3
4
Fitting all the other parts with superglue is easy to understand from the picture below. Save fitting the mirrors for last. This is explained in the next step. I would advise against fitting the wipers. It can be a messy job and it is difficult to glue it. They are just on the etch because there was space for it.
Two of the split plates (item 2 on the etch) can be used if you want to fit a split number plate on the backside of the bus. Illustrated on the picture below.
Put some sandpaper (about grit 400) flat on the table. Slide the grill a few times over the sandpaper, so the ribs come off.
CAREFULLY cut the grill of the etch frame and keep on handling it carefully. Put a bit of super glue on the plastic and glue the grill on top of the plastic. Make sure the correct side is up.

6
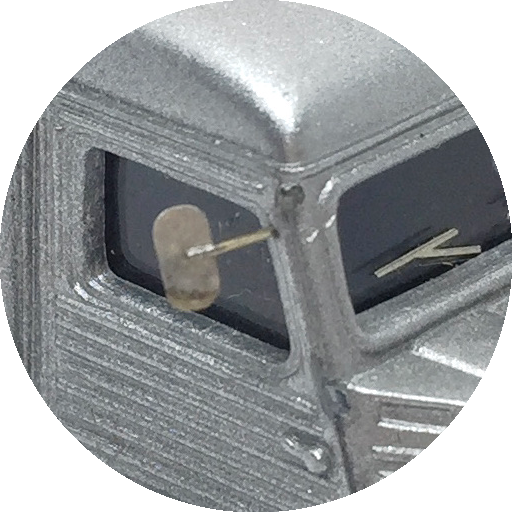
Because of the thinness of the nickel silver, the mirrors will easily bend. You can just as easy bend it back, but if you, like me, prefer a stronger fix, use the 0.3 mm nickel silver wire supplied. As an extra bonus, it will look more realistically as well, because of the connection on the back of the mirror. Either glue or solder the wire to the mirror, then cut the wire to size. With a sharp item, like a pin in a hand vice, press a little starter hole for the mirror in the plastic. Use a 0.5 mm drill, put it in a hand vice and drill a hole by hand (not machine). Glue the mirror in place. Take note that the window glazing has to fit, so don’t let the mirror rod protruding much beyond the plastic.

•