

UK based
Prices for UK customers are shown inc 20% VAT
Other countries, inc EU, prices shown are ex VAT.
Métallurgique draaistellen

KASTENLOK INDEX

Métallurgique bogies

UK based
Prices for UK customers are shown inc 20% VAT
Other countries, inc EU, prices shown are ex VAT.
Métallurgique draaistellen
KASTENLOK INDEX
Métallurgique bogies
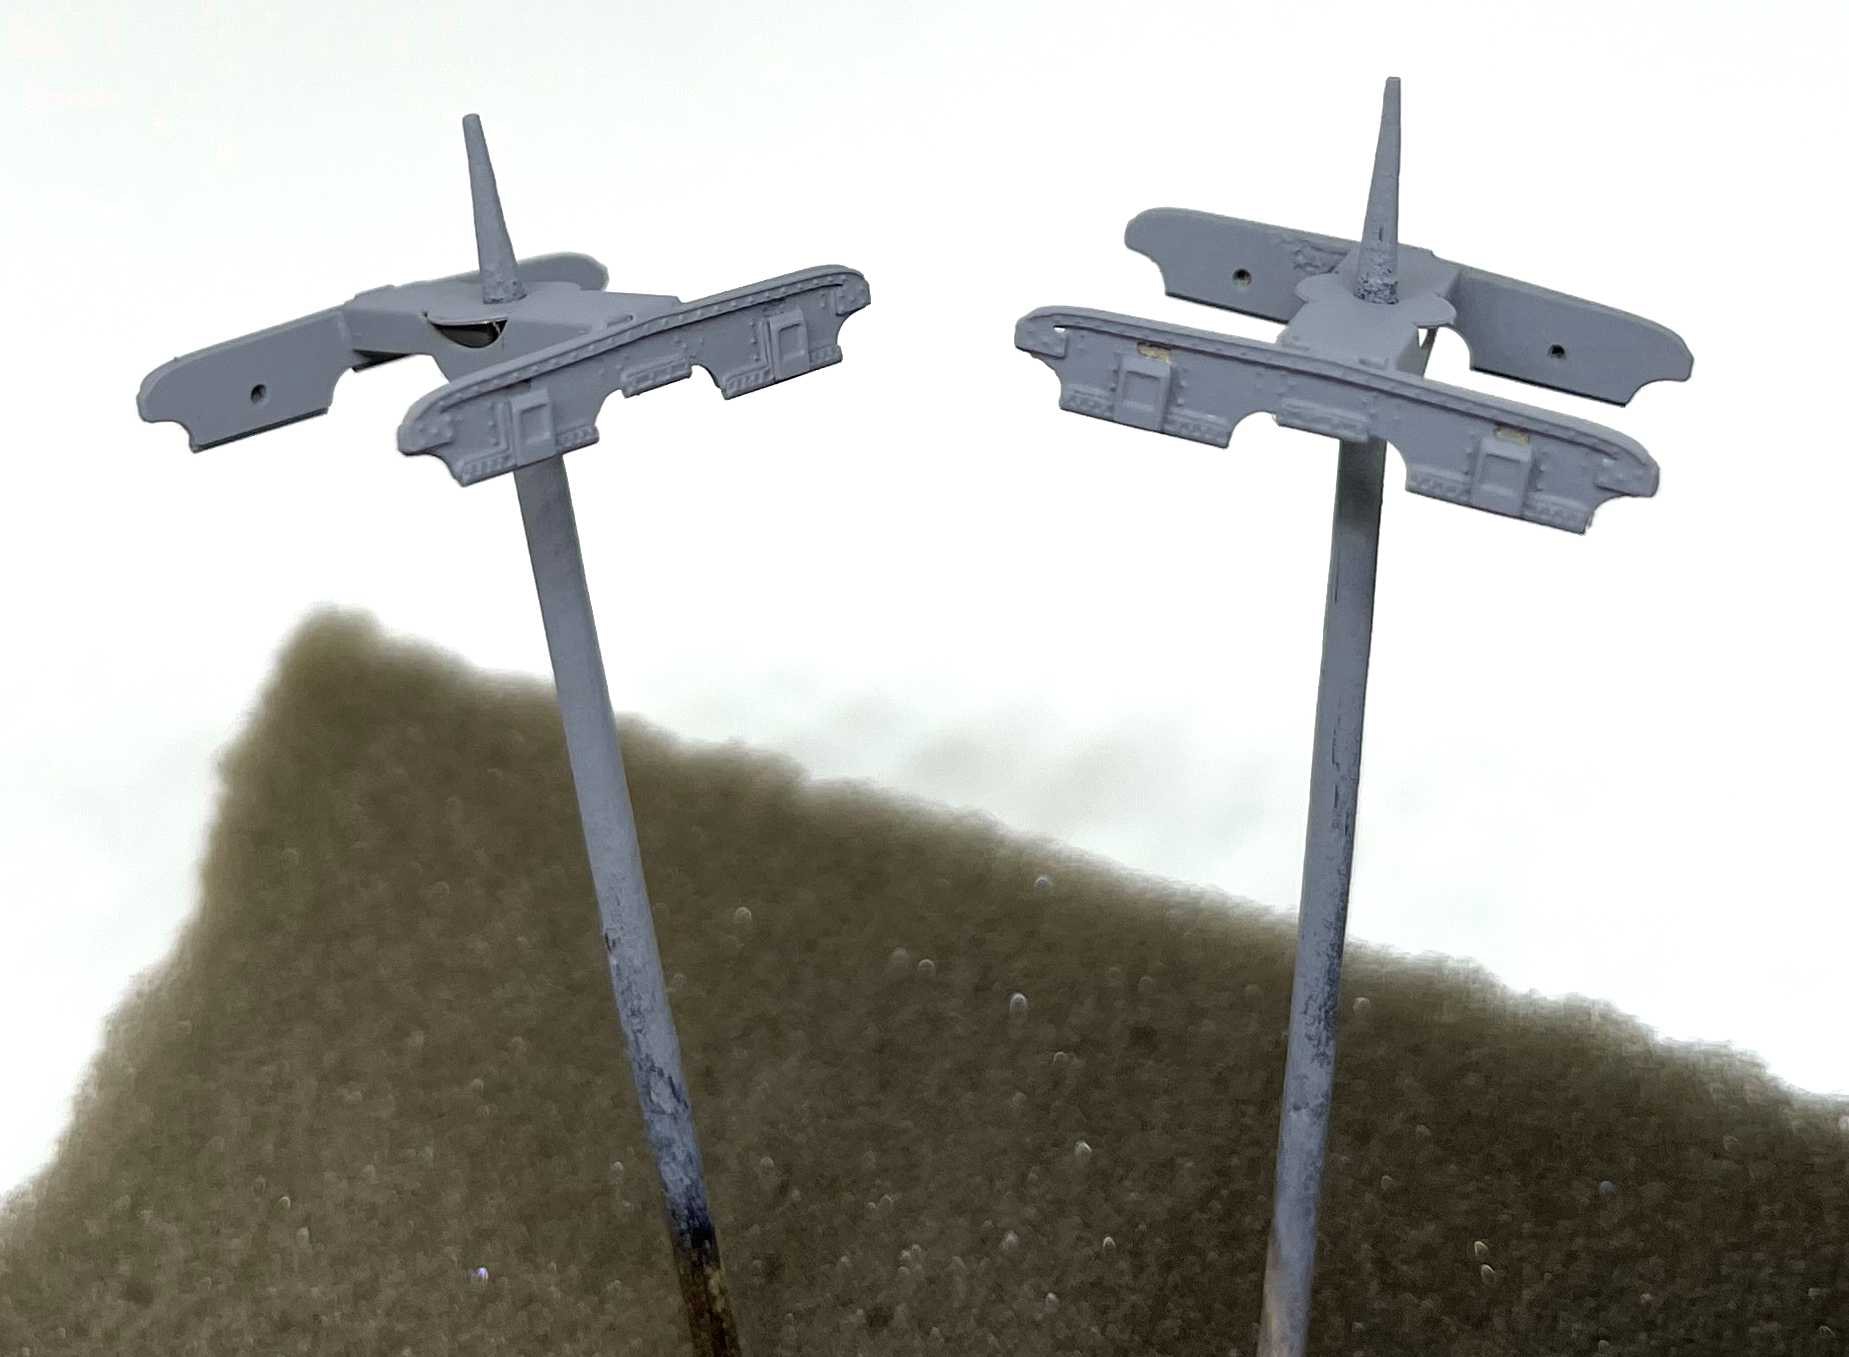
Complete inhoud van een draaistellen kit:
- Messing etsplaat voor twee draaistellen, inclusief ringetjes om juiste hoogte af te stellen
- 4 assen met 7 mm schijfwielen
- 2 Tramfabriek Draaipuntkoppelingen
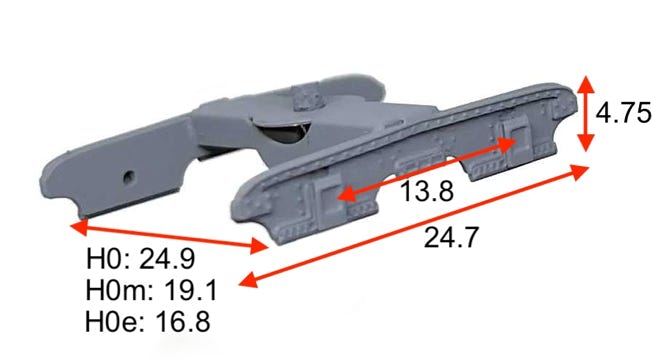
Asafstand: 13.8 mm
Contents of a bogies kit:
- Brass etch for the two bogies, including rings to adjust the correct height
- 4 axles with 7 mm disc wheels
- 2 Tramfabriek Centre Point Couplings
Wheel base: 13.8 mm
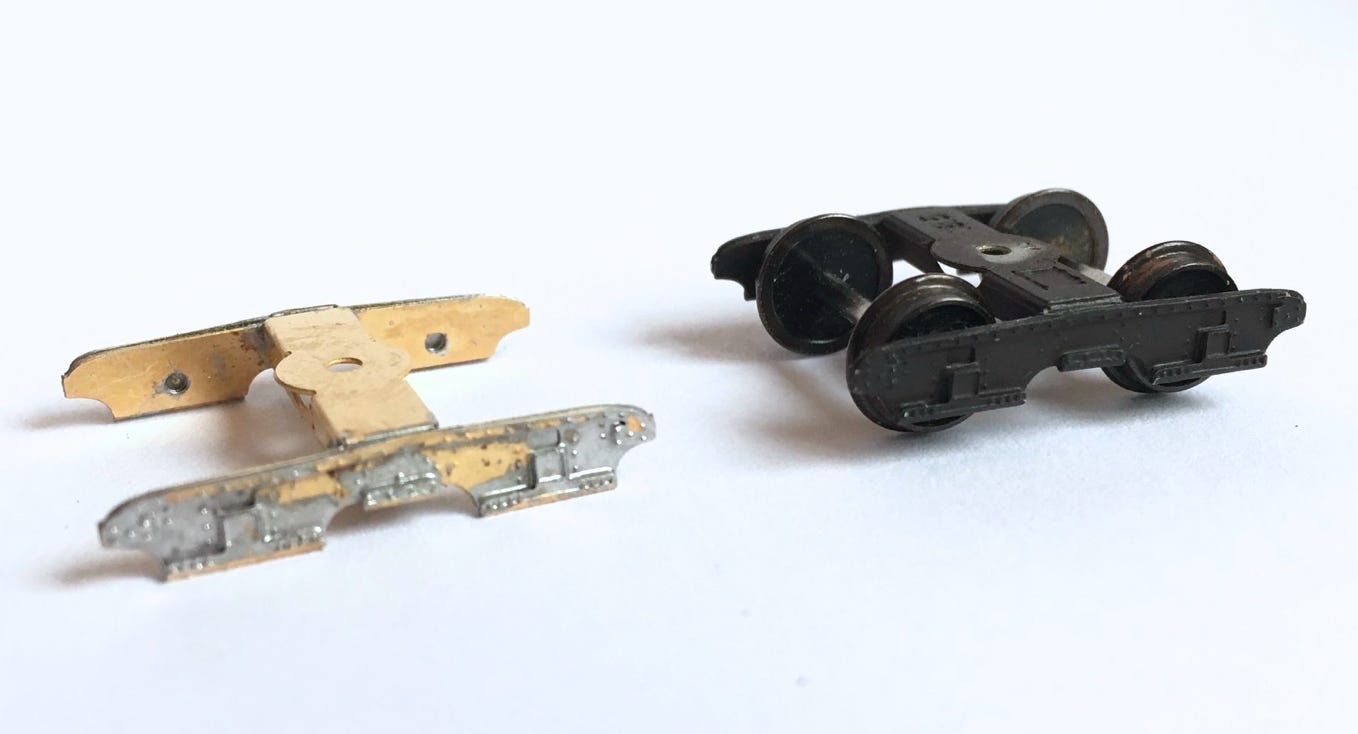
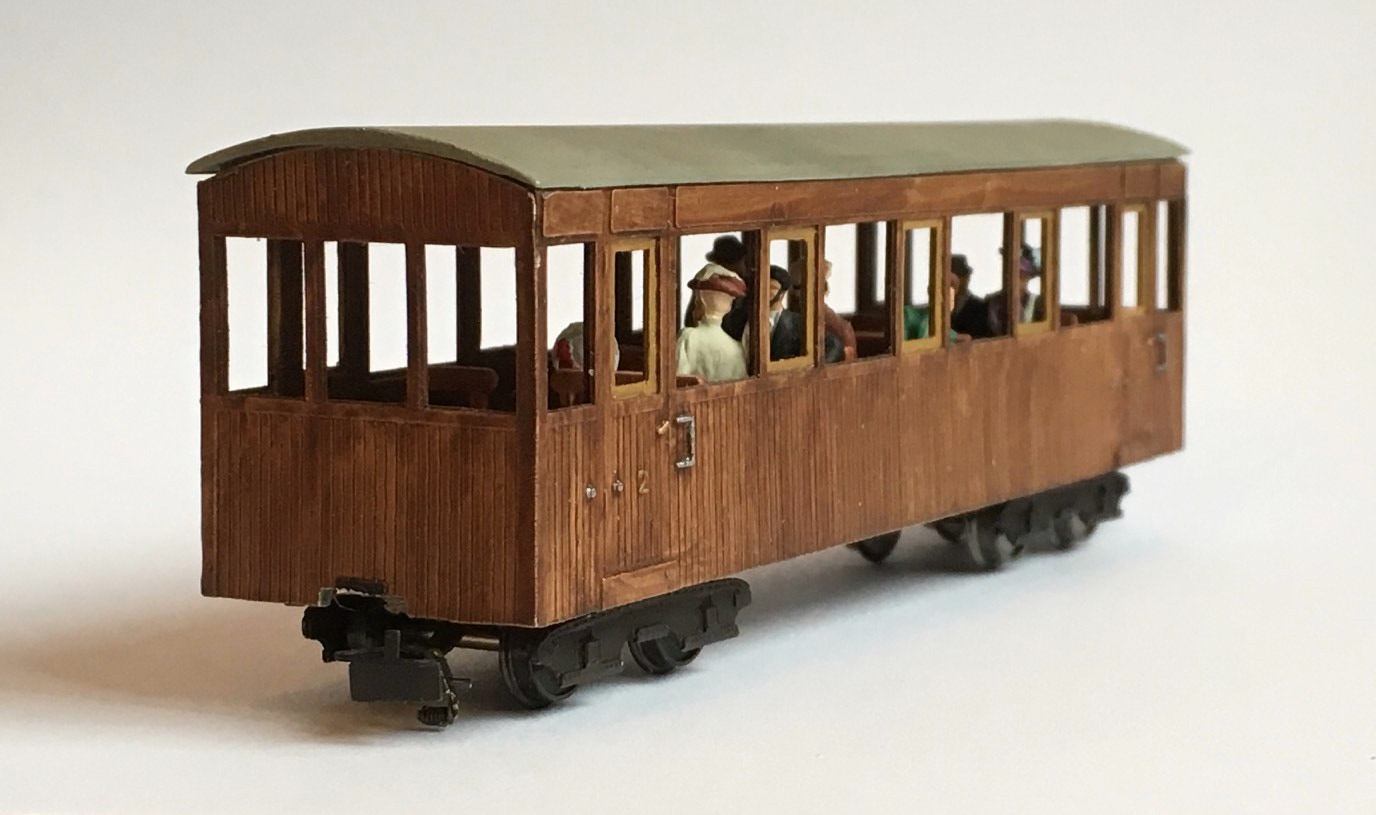
Het Métallurgique draaistel is een eigen ontwikkeling van de Tramfabriek. Het is zo ontworpen dat het flexibel en praktisch is. De koppeling is los van het draaistel en heeft het verschillende centreergaatjes, waardoor je de afstand van de koppelhaak naar wens kan aanpassen. De schorten met alle details is een vouwwerkje en worden op het draaistel gesoldeerd of gelijmd.
De bovenrand van een zijde is het enige fijne onderdeel dat gesoldeerd of geplakt moet worden, de drie onderste stukje hoeven alleen gebogen te worden (op de voorbeeldfoto links heb ik alles gesoldeerd, maar het geverfde exemplaar rechts niet). Daarna kan het geheel op het draaistel geplakt of gesoldeerd worden. Met een 25 Watt soldeerbout en soldeerpasta zit het geheel (bij mij dan) in een half uur in elkaar. Het rijtuig zelf bouwen is een eitje en een plezier, daar hoeft u geen vrees voor te hebben.
The Métallurgique bogie is a development of the Tramfabriek. It is designed in a way that it’s flexible and practical. The coupling is separate from the bogie and has several centre holes. This way you can set the distance of the coupling hook for any other carriage. The side skirts with all the detailing has to be folded and can be glued or soldered on the bogie.
The bogie is a etched brass kit, where you need to do a bit of soldering. The top edge of a side is the only fine detail that has to be soldered or glued, the three bottom ones only folded (on the picture at the left, I soldered everything, but on the painted bogie on the right not). Then the assembly can be glued or soldered on the bogie. With a 25 Watt soldering iron and soldering paste it should take about half an hour to get the whole thing together (well, I do). Building the carriage is a piece of cake and a joy, you don’t need to be worried with that.
Installation instructions (English only)
Tools needed:
- Pliers
- Soldering iron (15 or 25W) and/or super glue
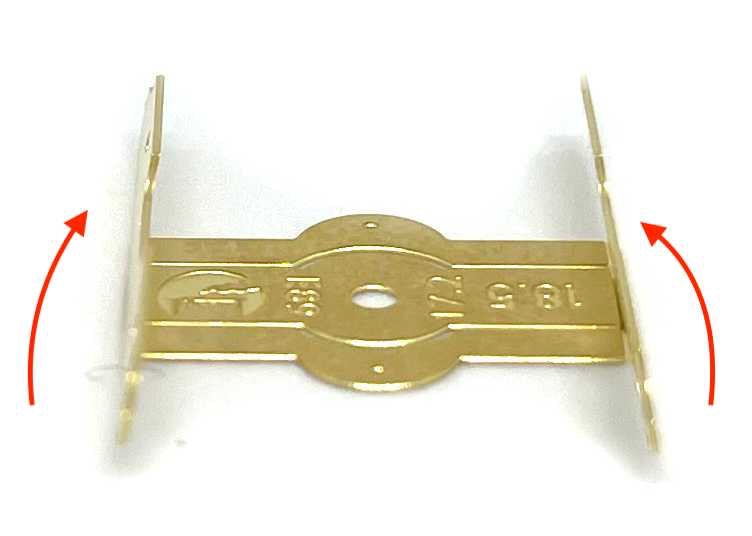
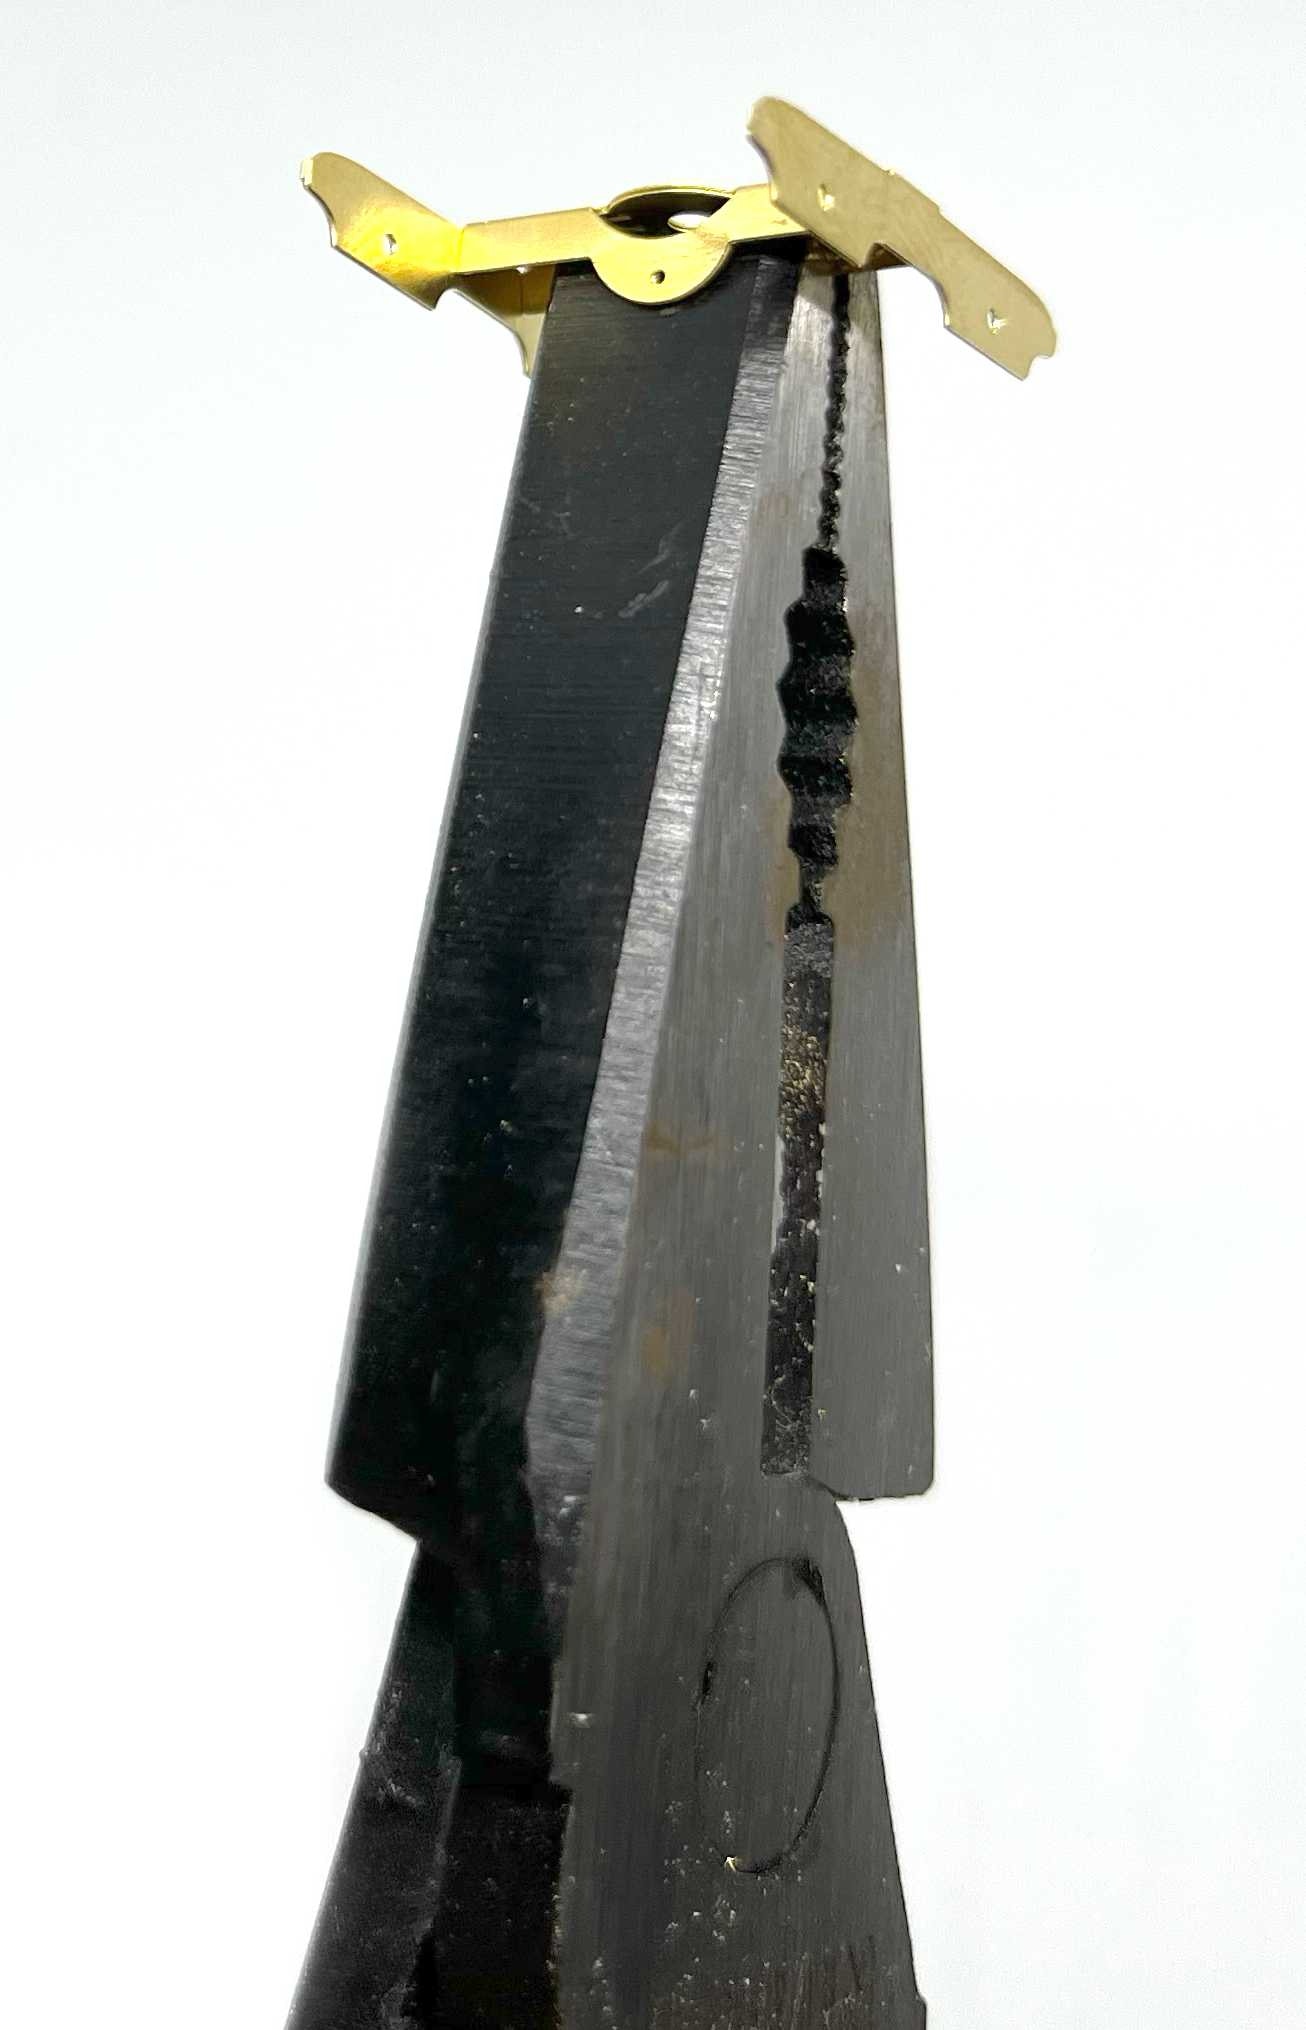
Cut the bogie from the fret and clean if from the tabs that were holding it to the fret.
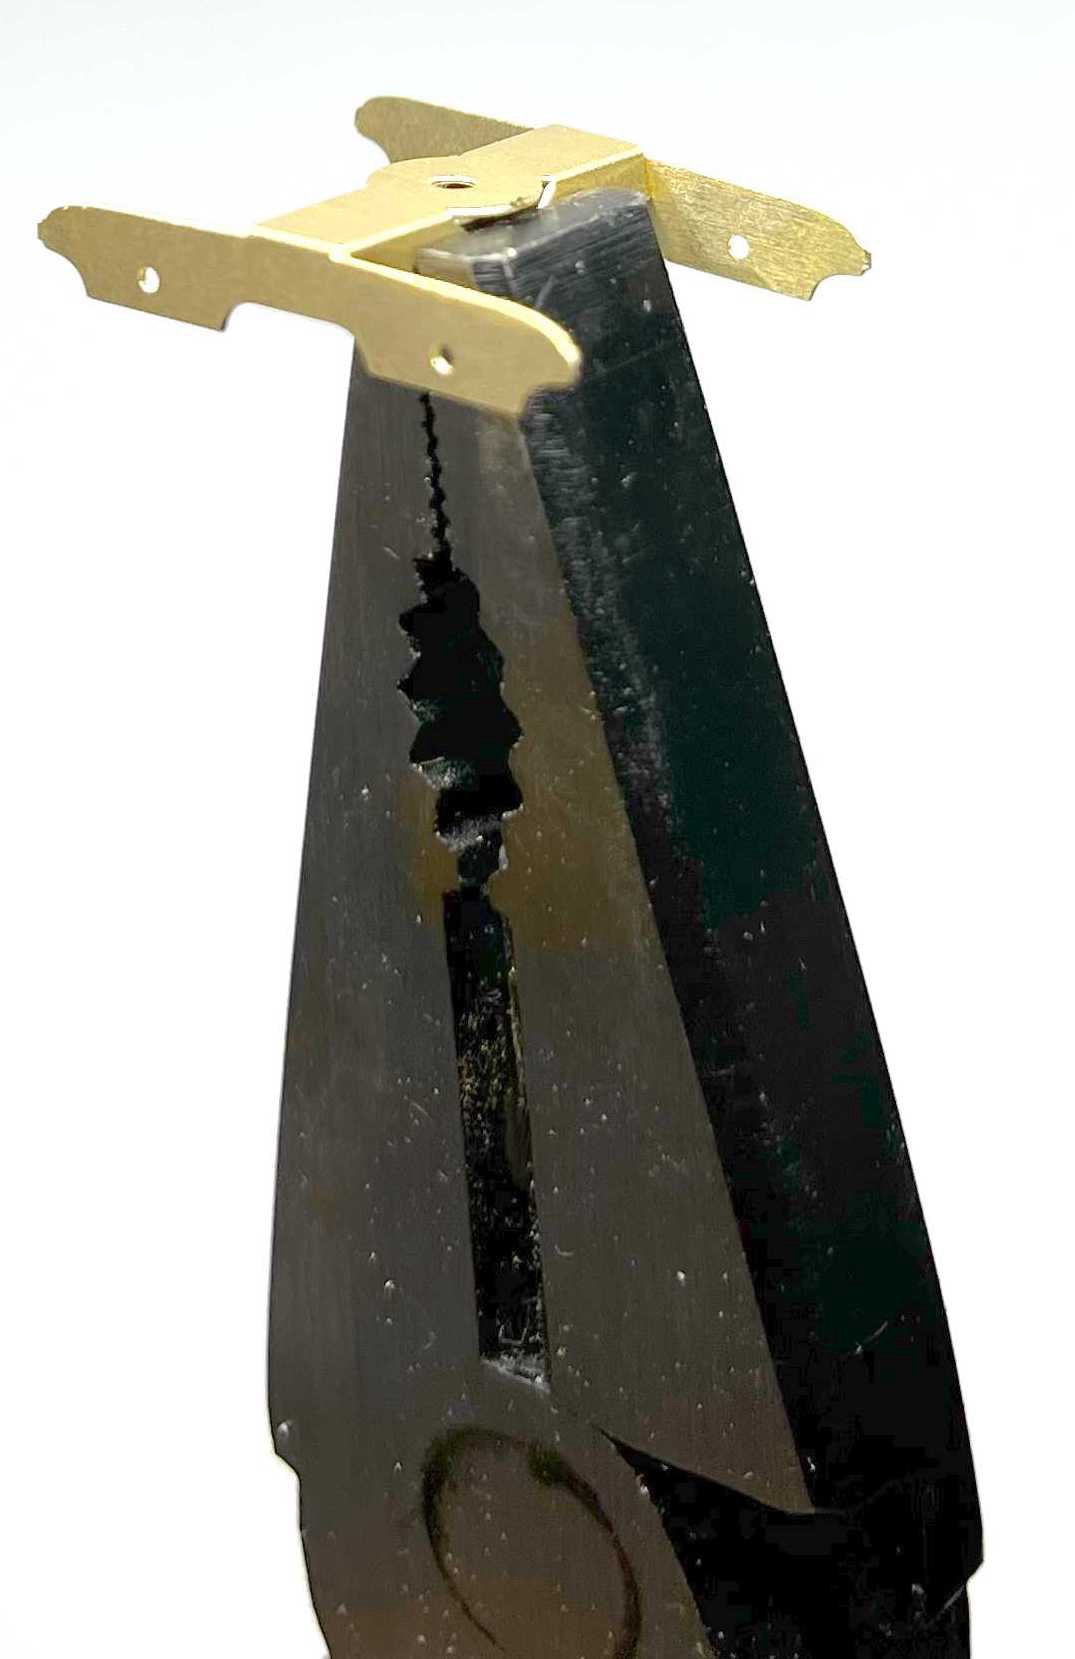
Fold the skirts inward, with the folding line inside. Overfold them like 95 degrees. Eventually they will have to be 90 degrees, but this way you make sure the skirts will press against the centre part of the frame.

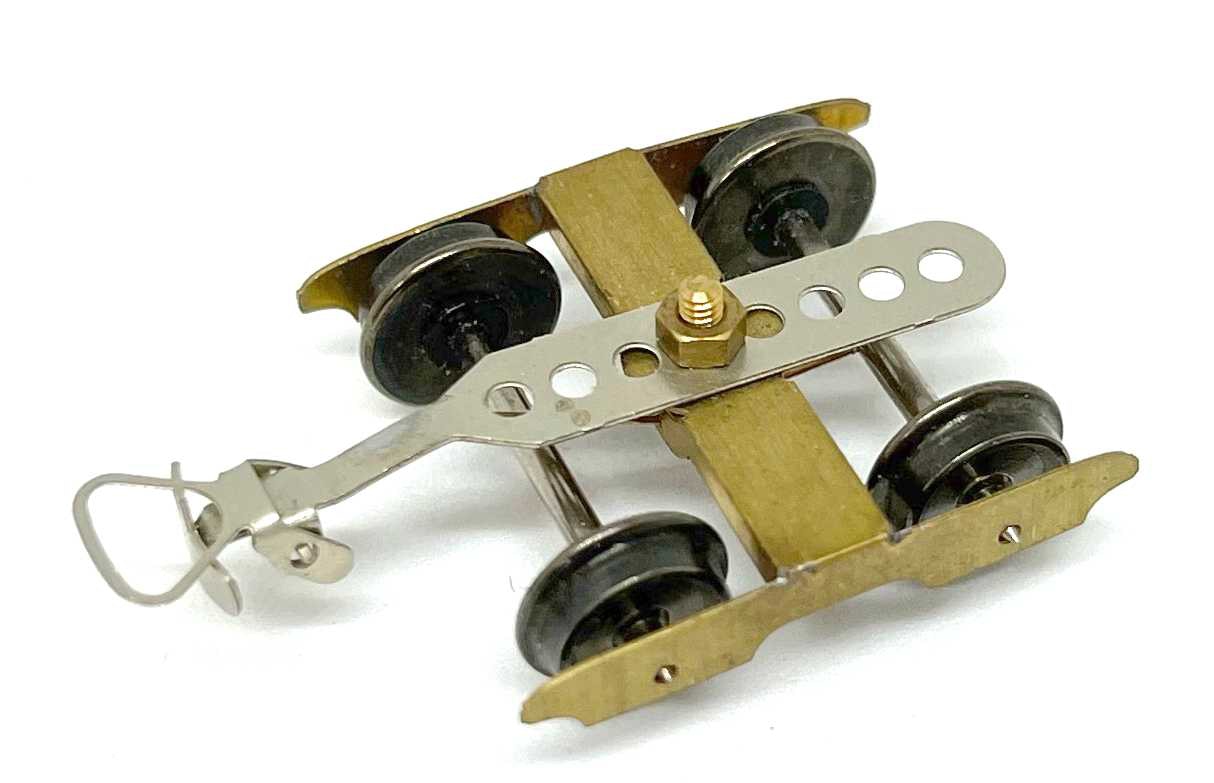
Bogie frame

Use pliers to fold the two side wings of the centre part of the frame. You might have to overbend these parts as well, so 95 degrees. This is so the wheels don’t touch it.
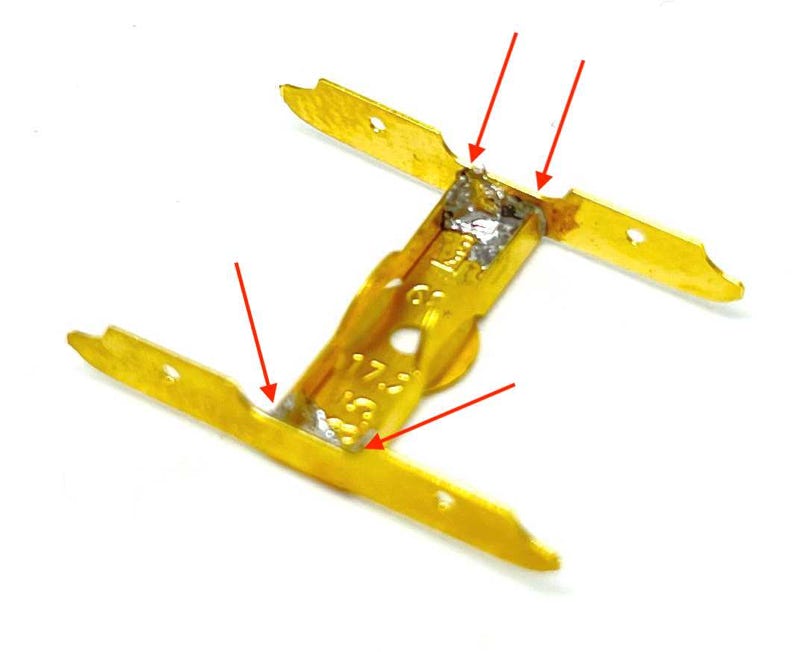
Install the wheels to check if you the can spin freely. Then put a blob of solder in each side to solder the skirts against the centre frame.
This part is finished for now. Put it aside.
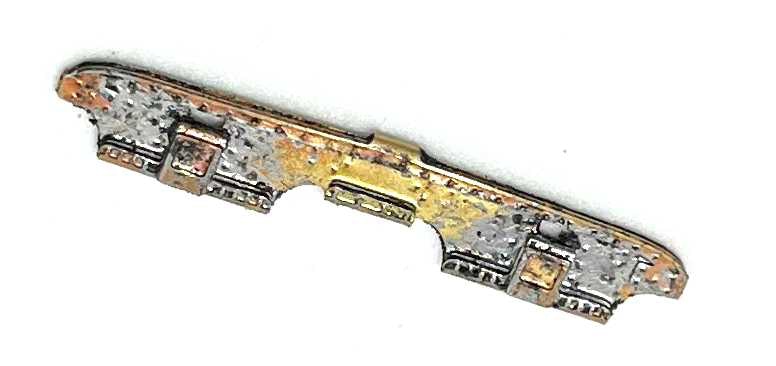
Side skirt
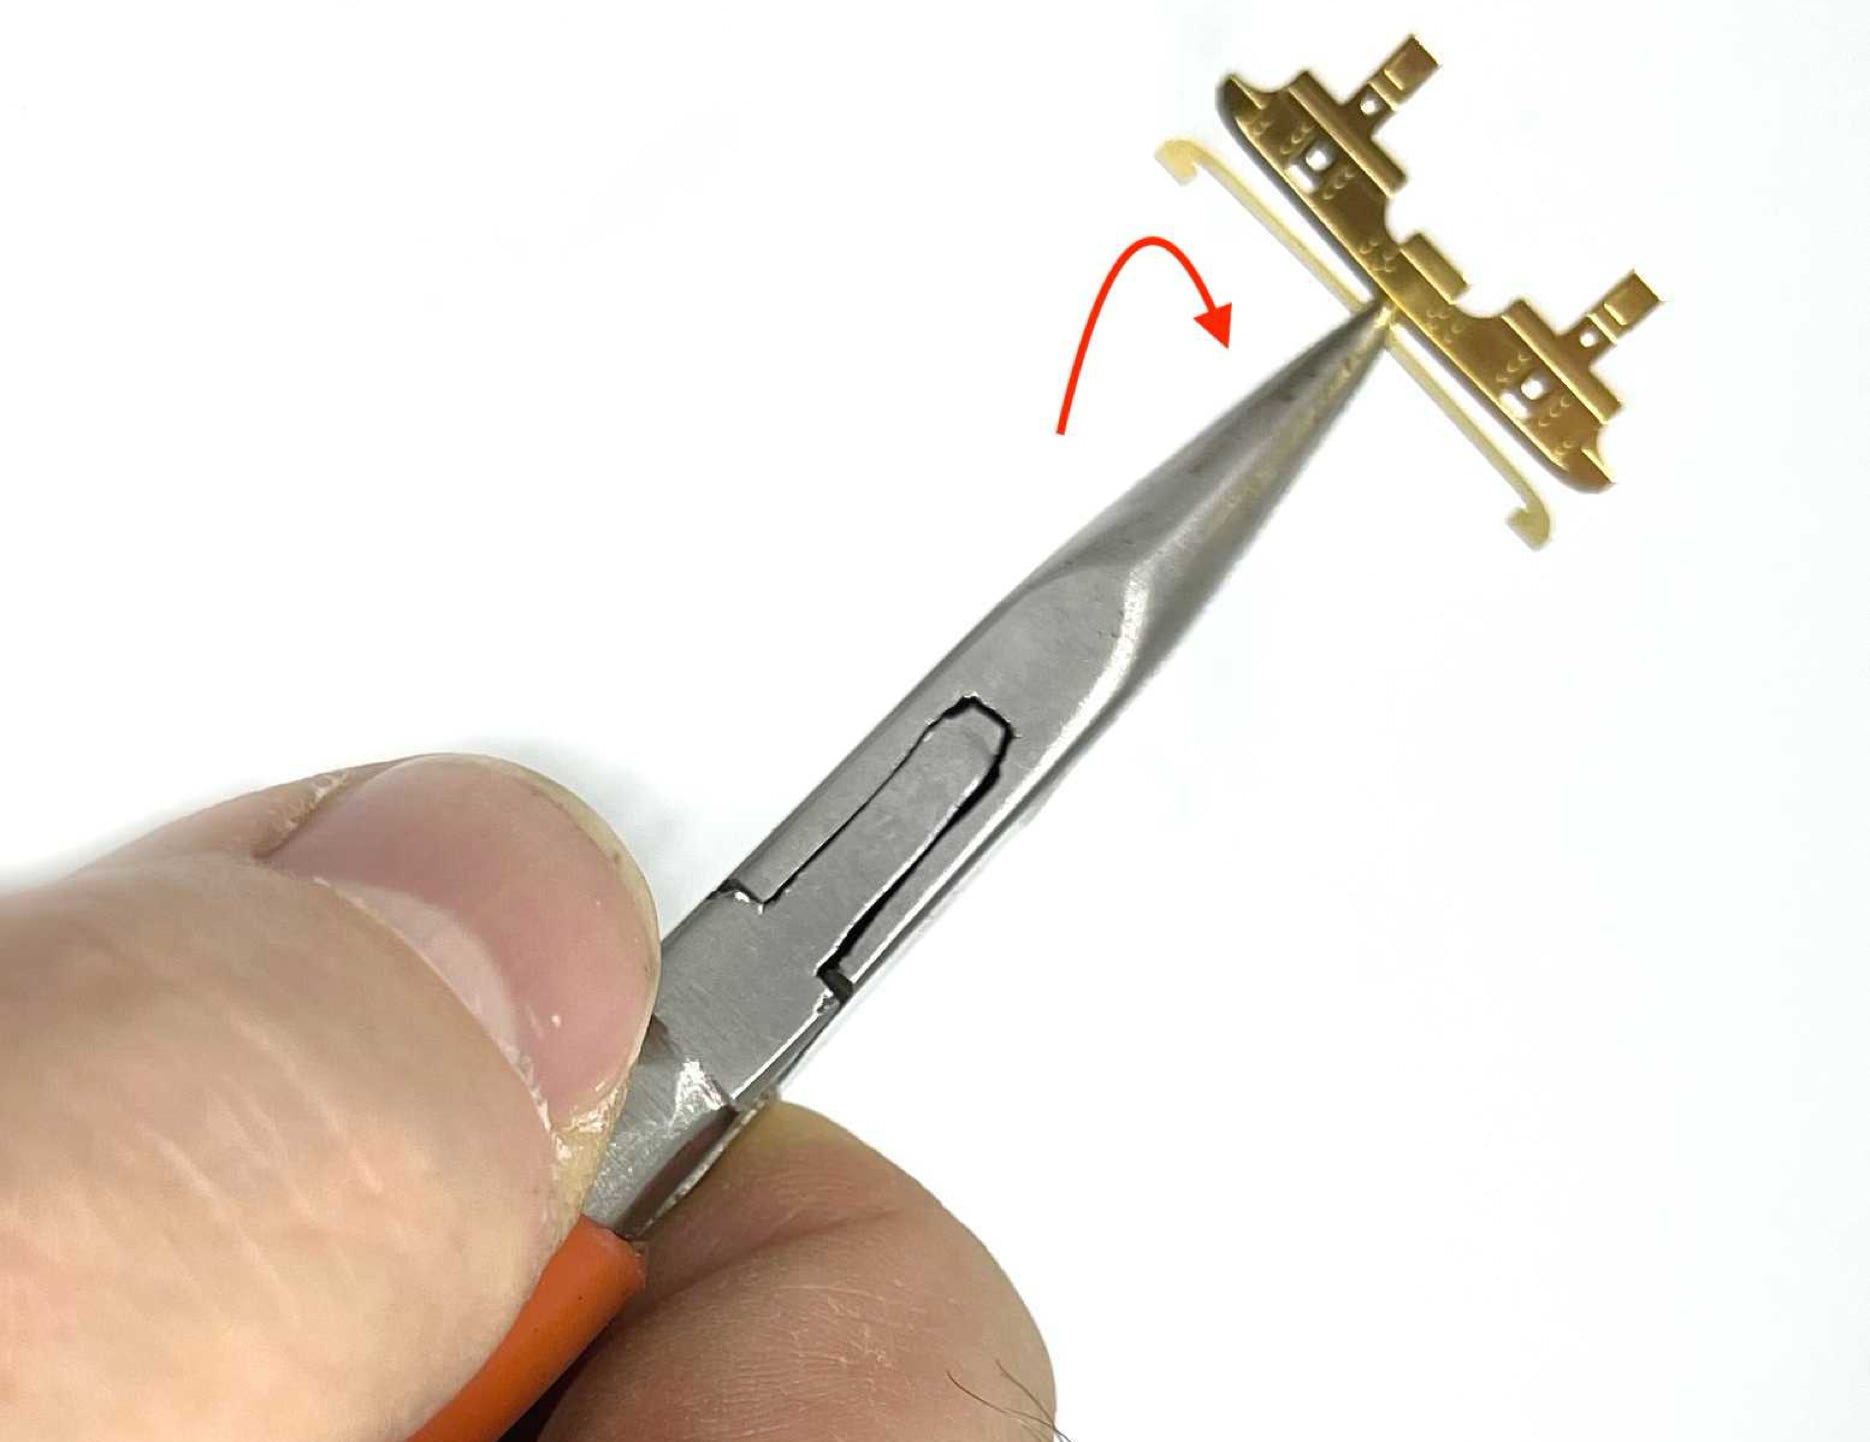
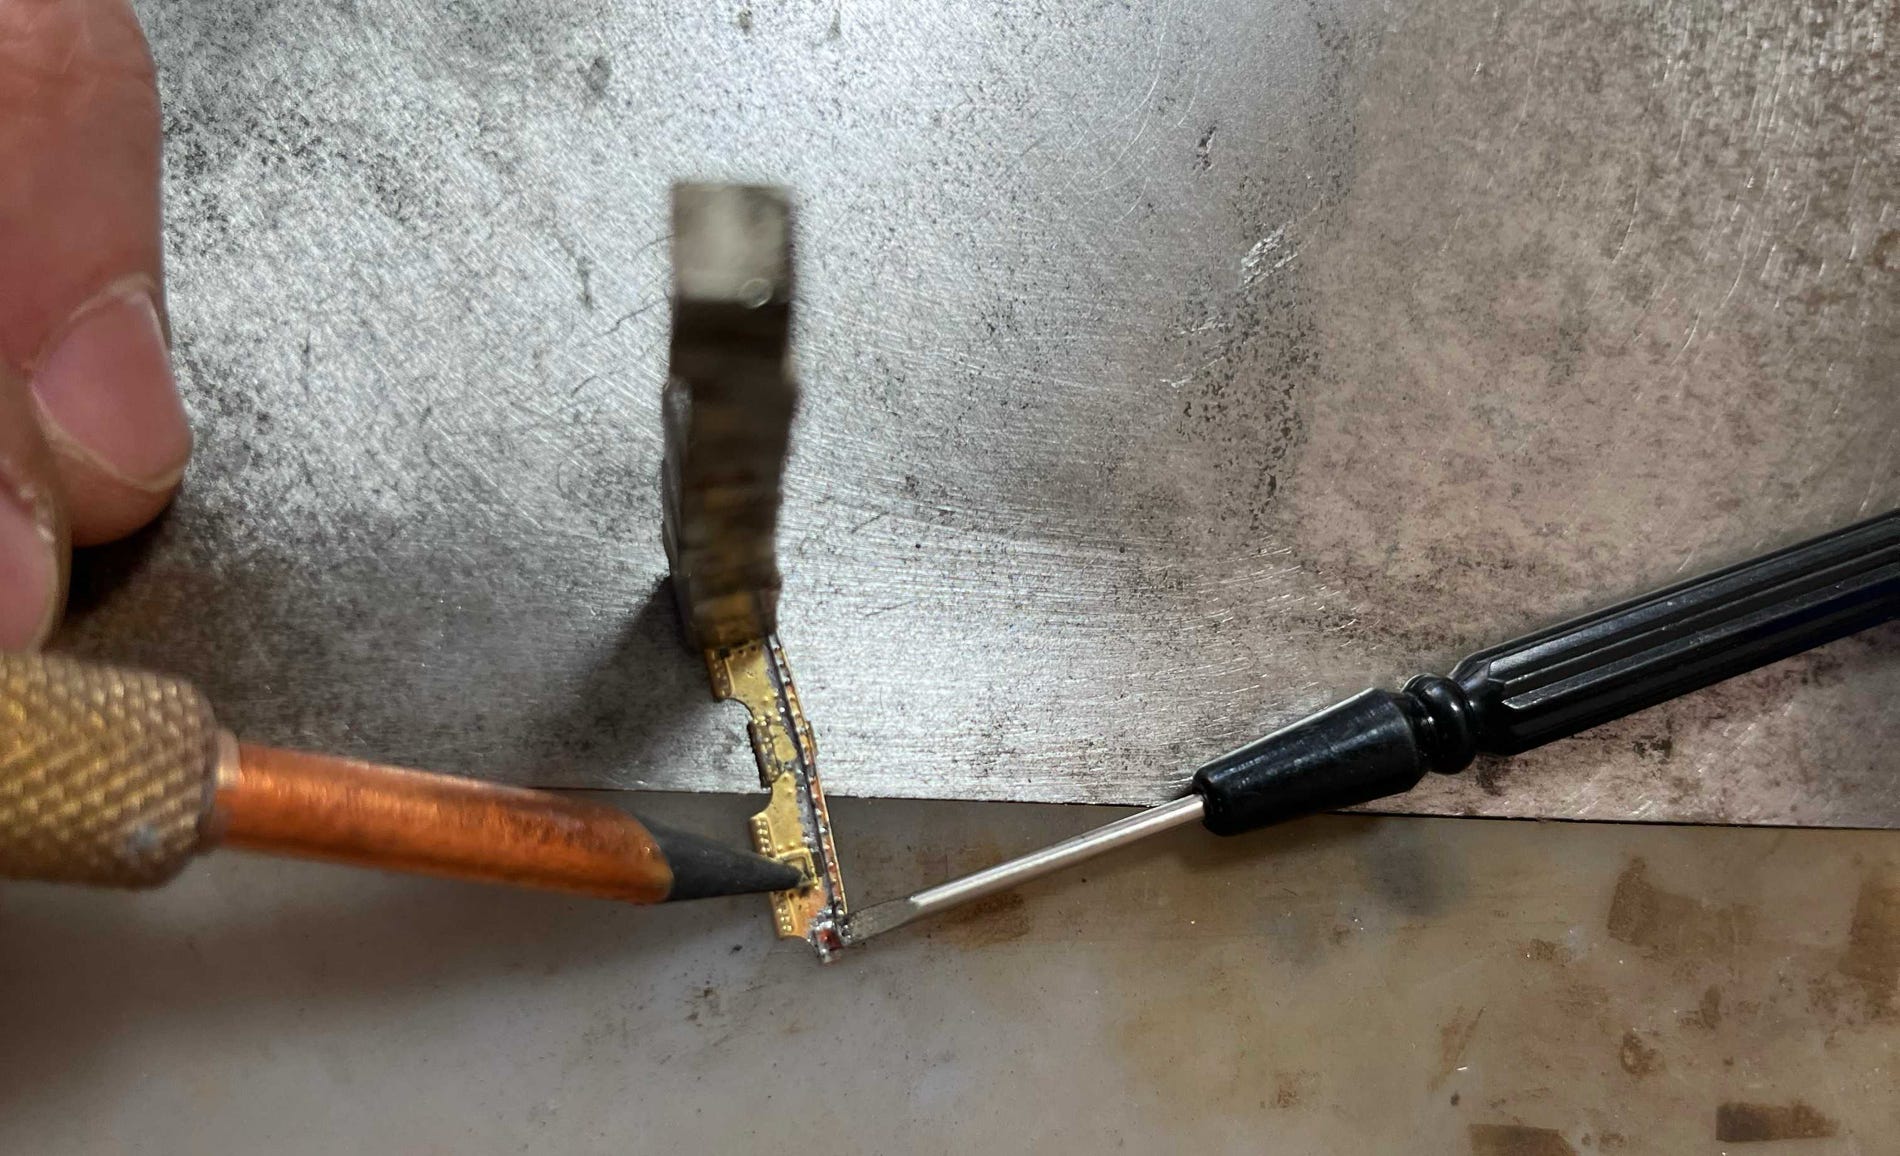
Cut the four skirts for the fret. Be very carefully with it, the long thin part will bend easily. Fold that part 180 degrees so that it lays flat on the skirt. You can see there is a space dedicated for it with the same shape. Note: when you are halfway, put solder paint (or super glue) on the thin part, then fold the rest. Make sure it is perfectly aligned.
Solder or super glue the part in place (see next picture). While doing this, keep an eye on the correct alignment.
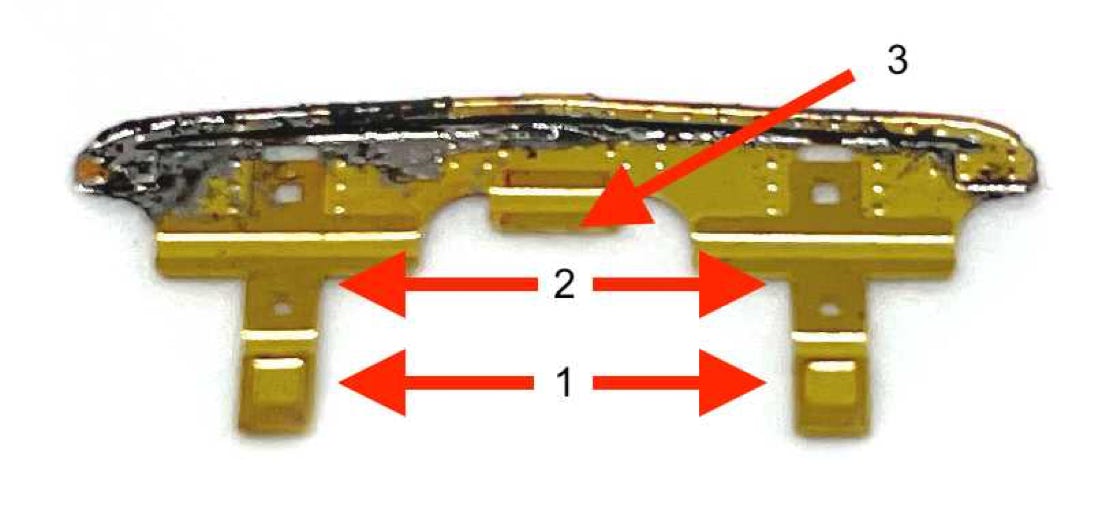
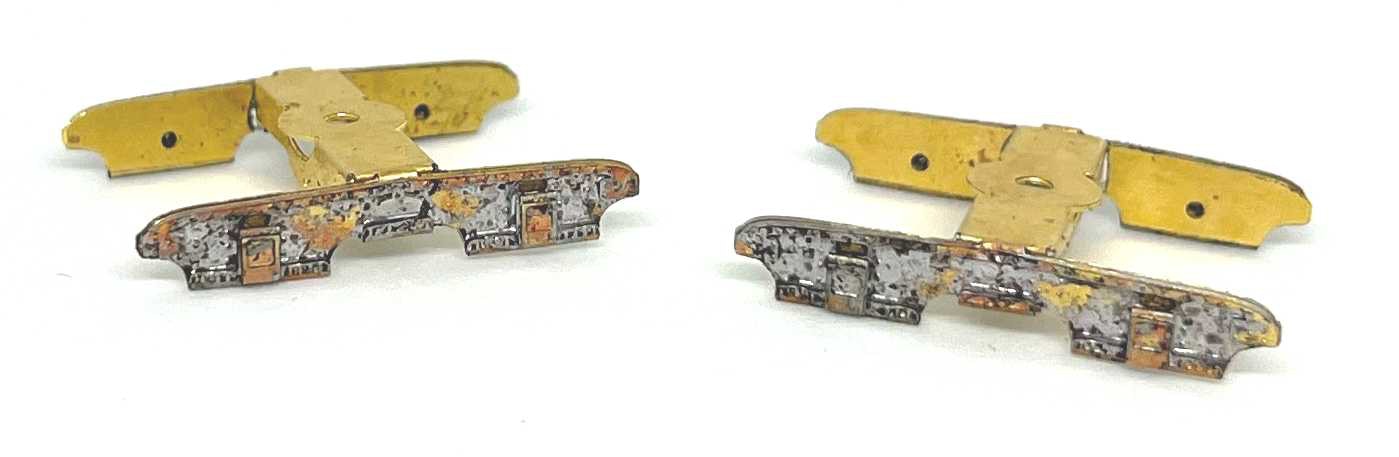
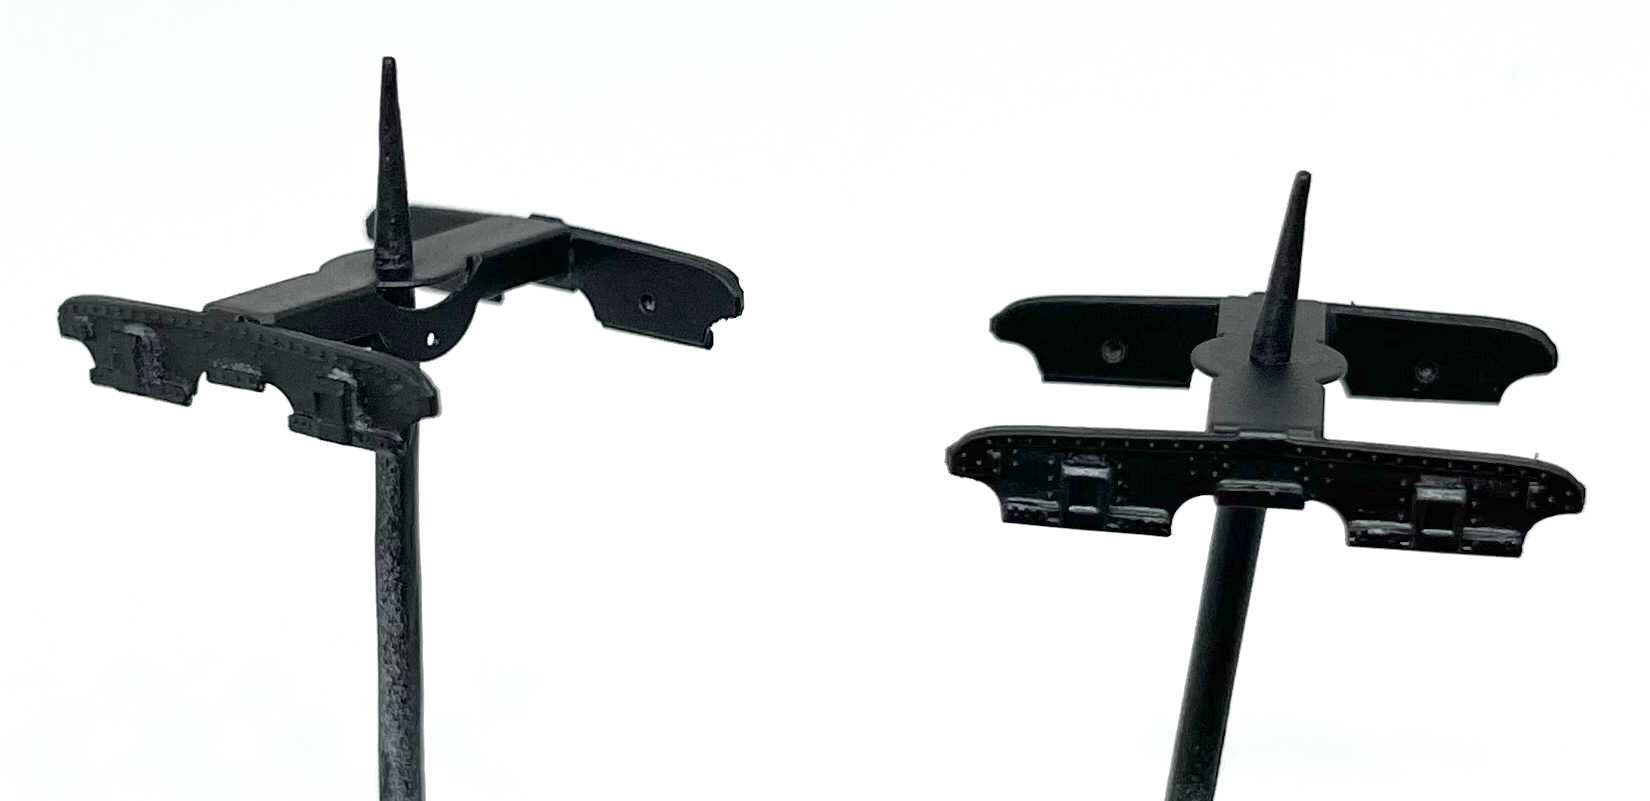
Now the axle boxes and middle part are folded. The numbers help when following the next steps.
The 3 bottom parts fold like a harmonica. On the picture, fold part 1 90 (!) degrees downwards, not the full 180 degrees!
Now do the same with part 2, but now fold it 90 degrees upward. Do not fold it the full 180 degrees.
Fold part 3 by 180 degrees. This part does not need to be soldered or glued, but it can be though if you wish.
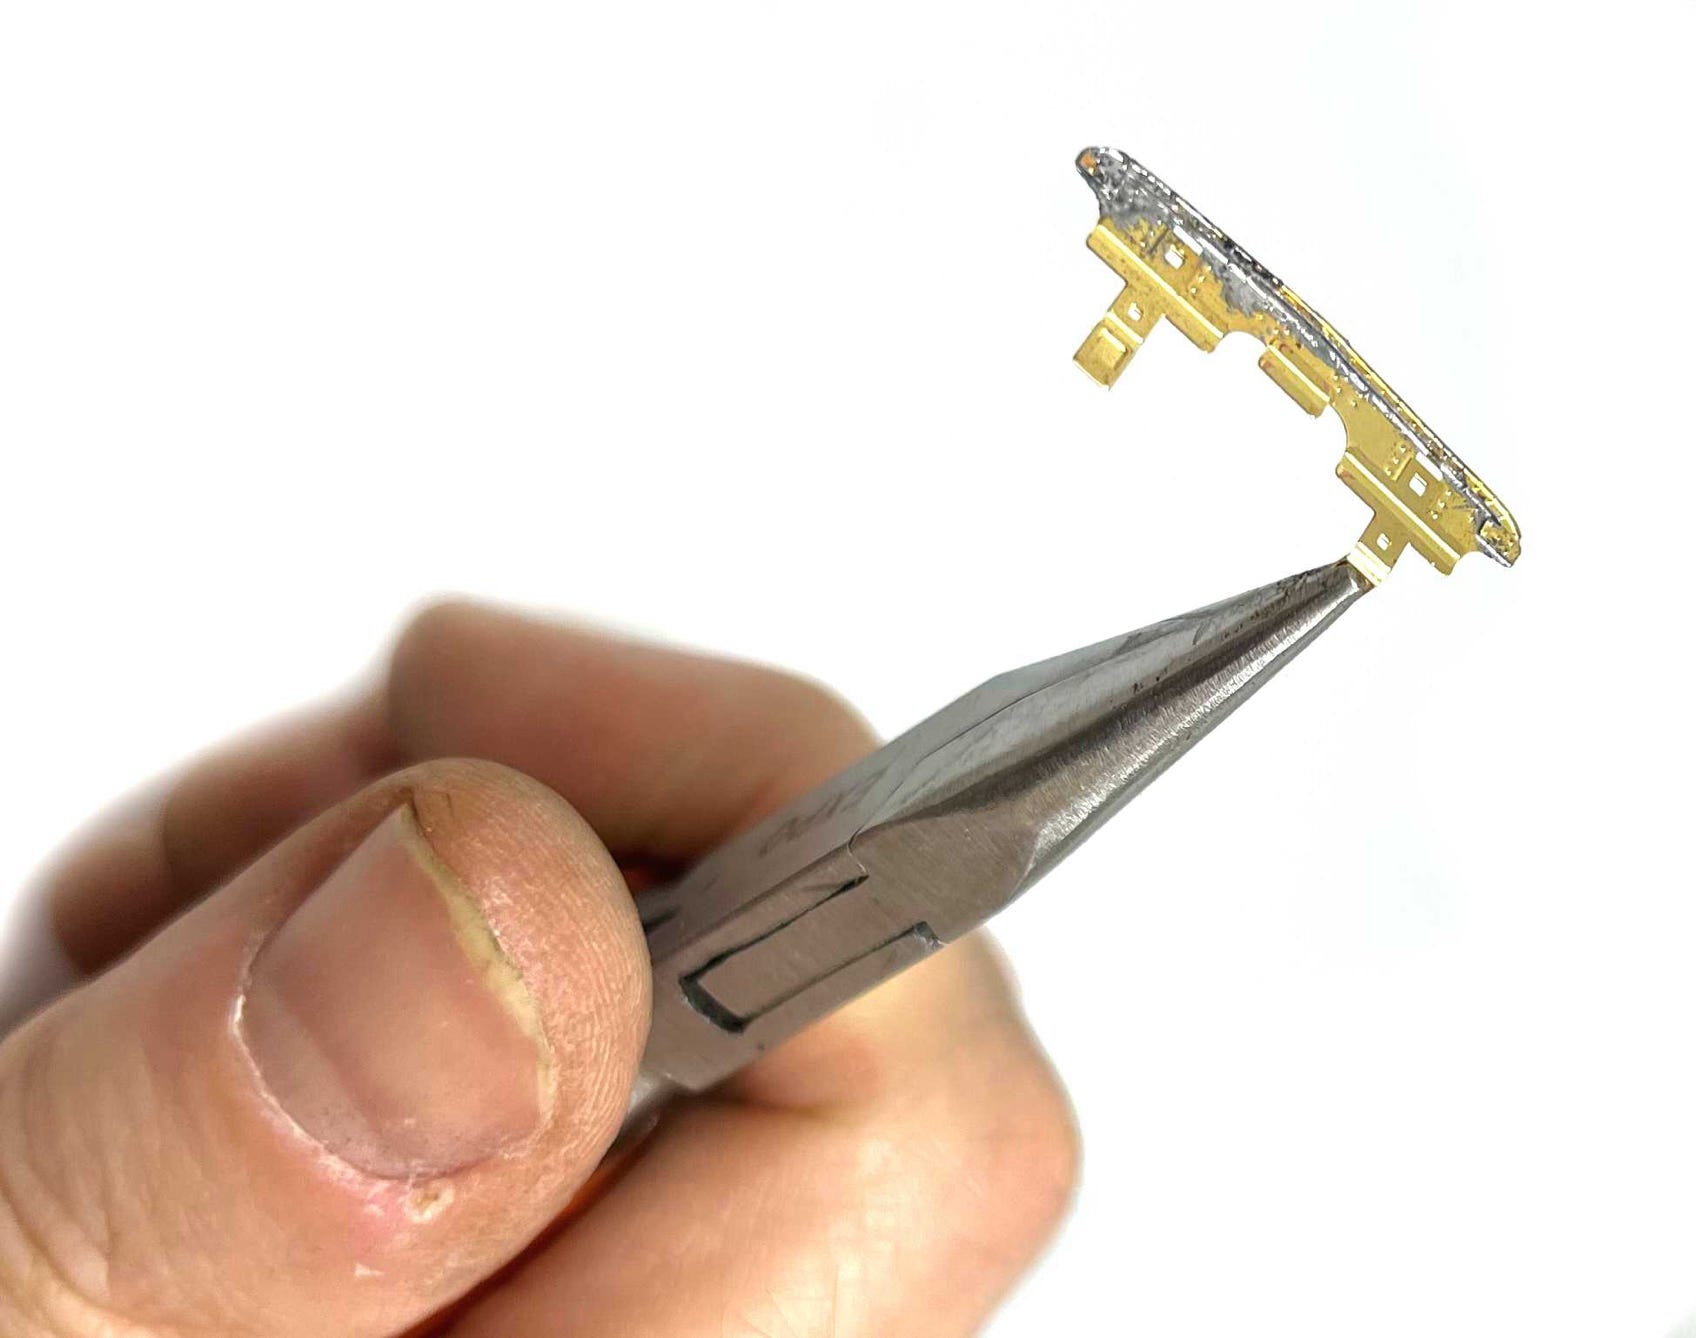
Put solder or super glue on the parts that you just folded on the right place and the collapse the harmonica, so all parts fall on top of each other. Make sure the alignment is correct. Check the back so that the holes are aligned.
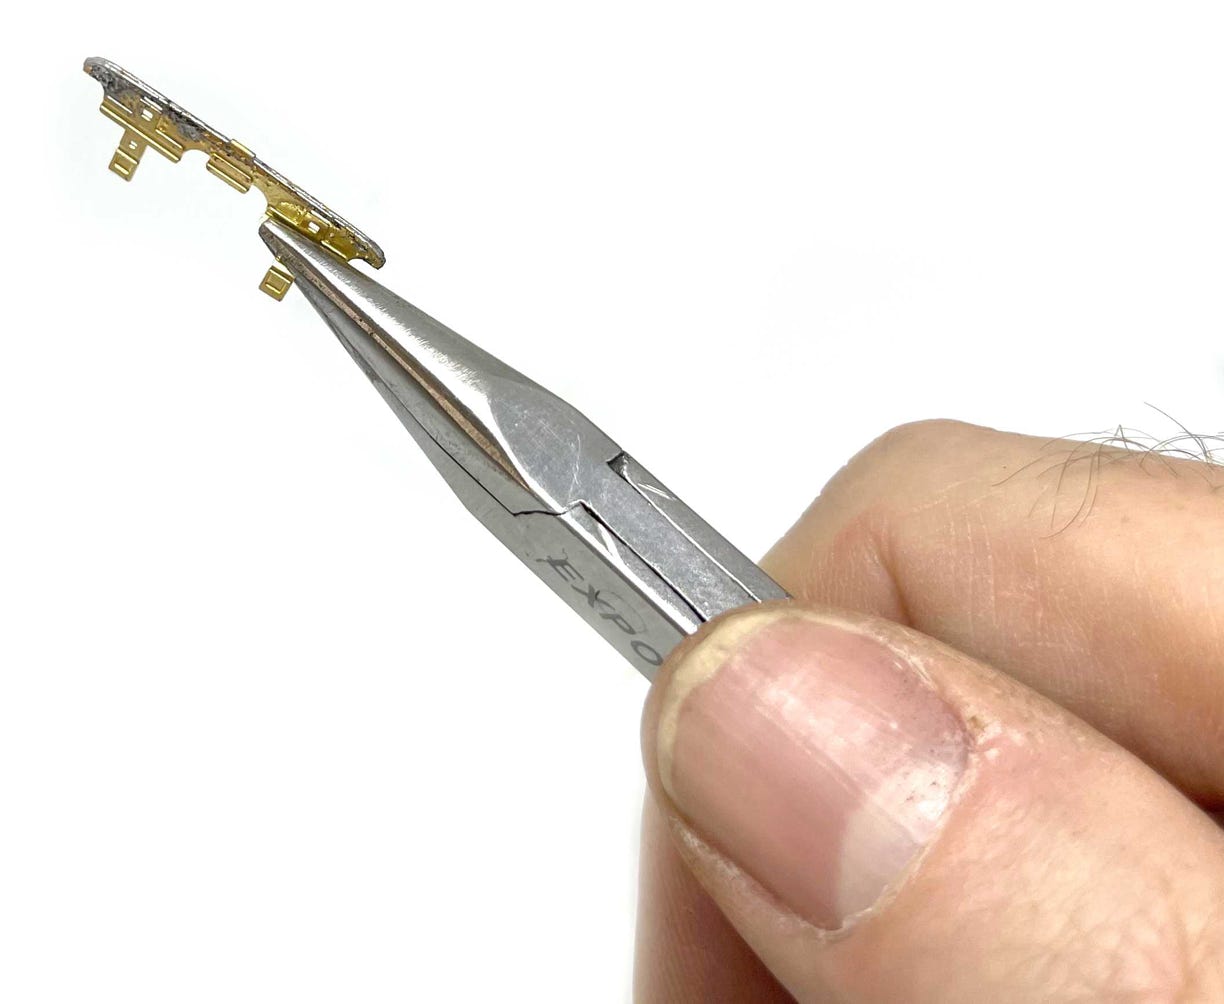
On this picture, I’m holding the top part with the rivets, that was soldered before, in place by pressing on the edge. It will not move when soldering the axle box.
This is how it will look like when you are done with this part.
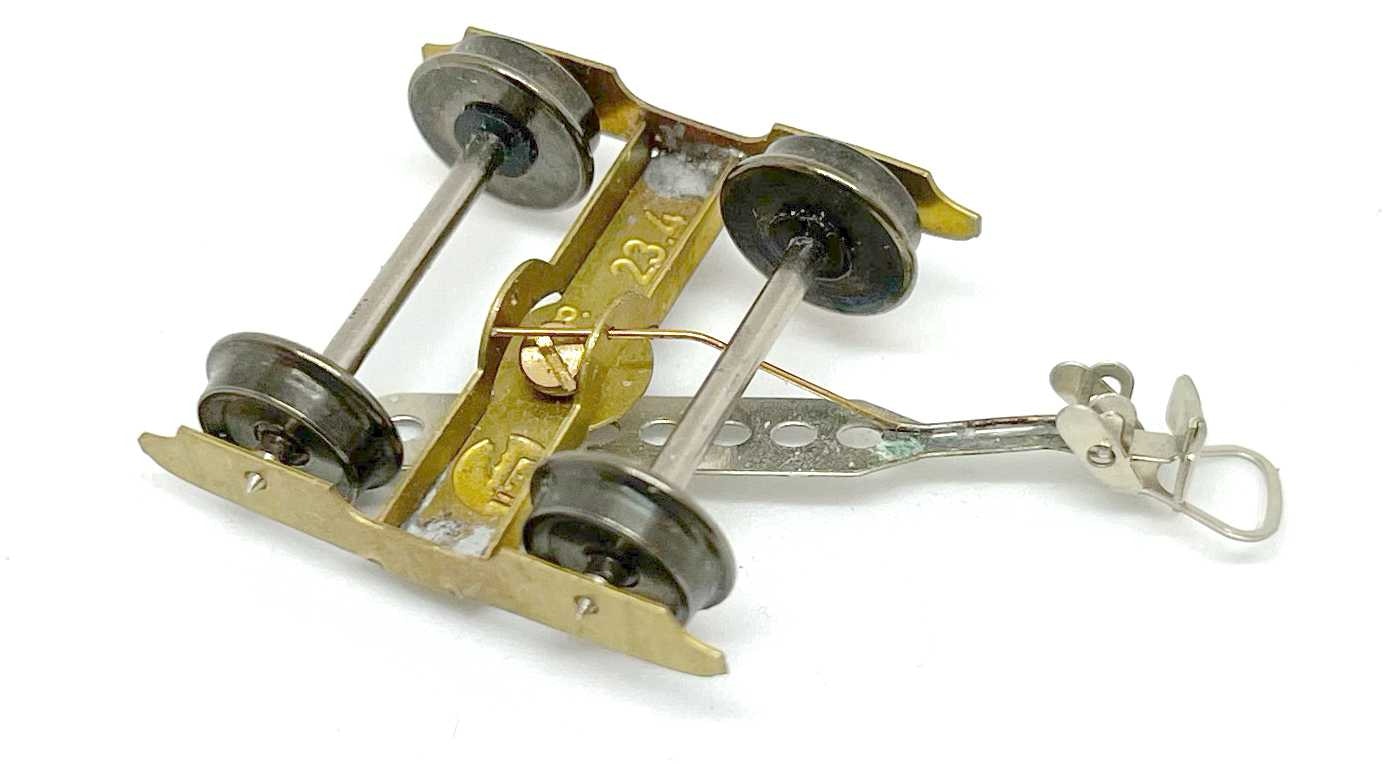
Glue the skirts on the frame. If you align on the top, the holes for the wheel axles should be open to received the wheels. Insert the wheels and see if they run freely.
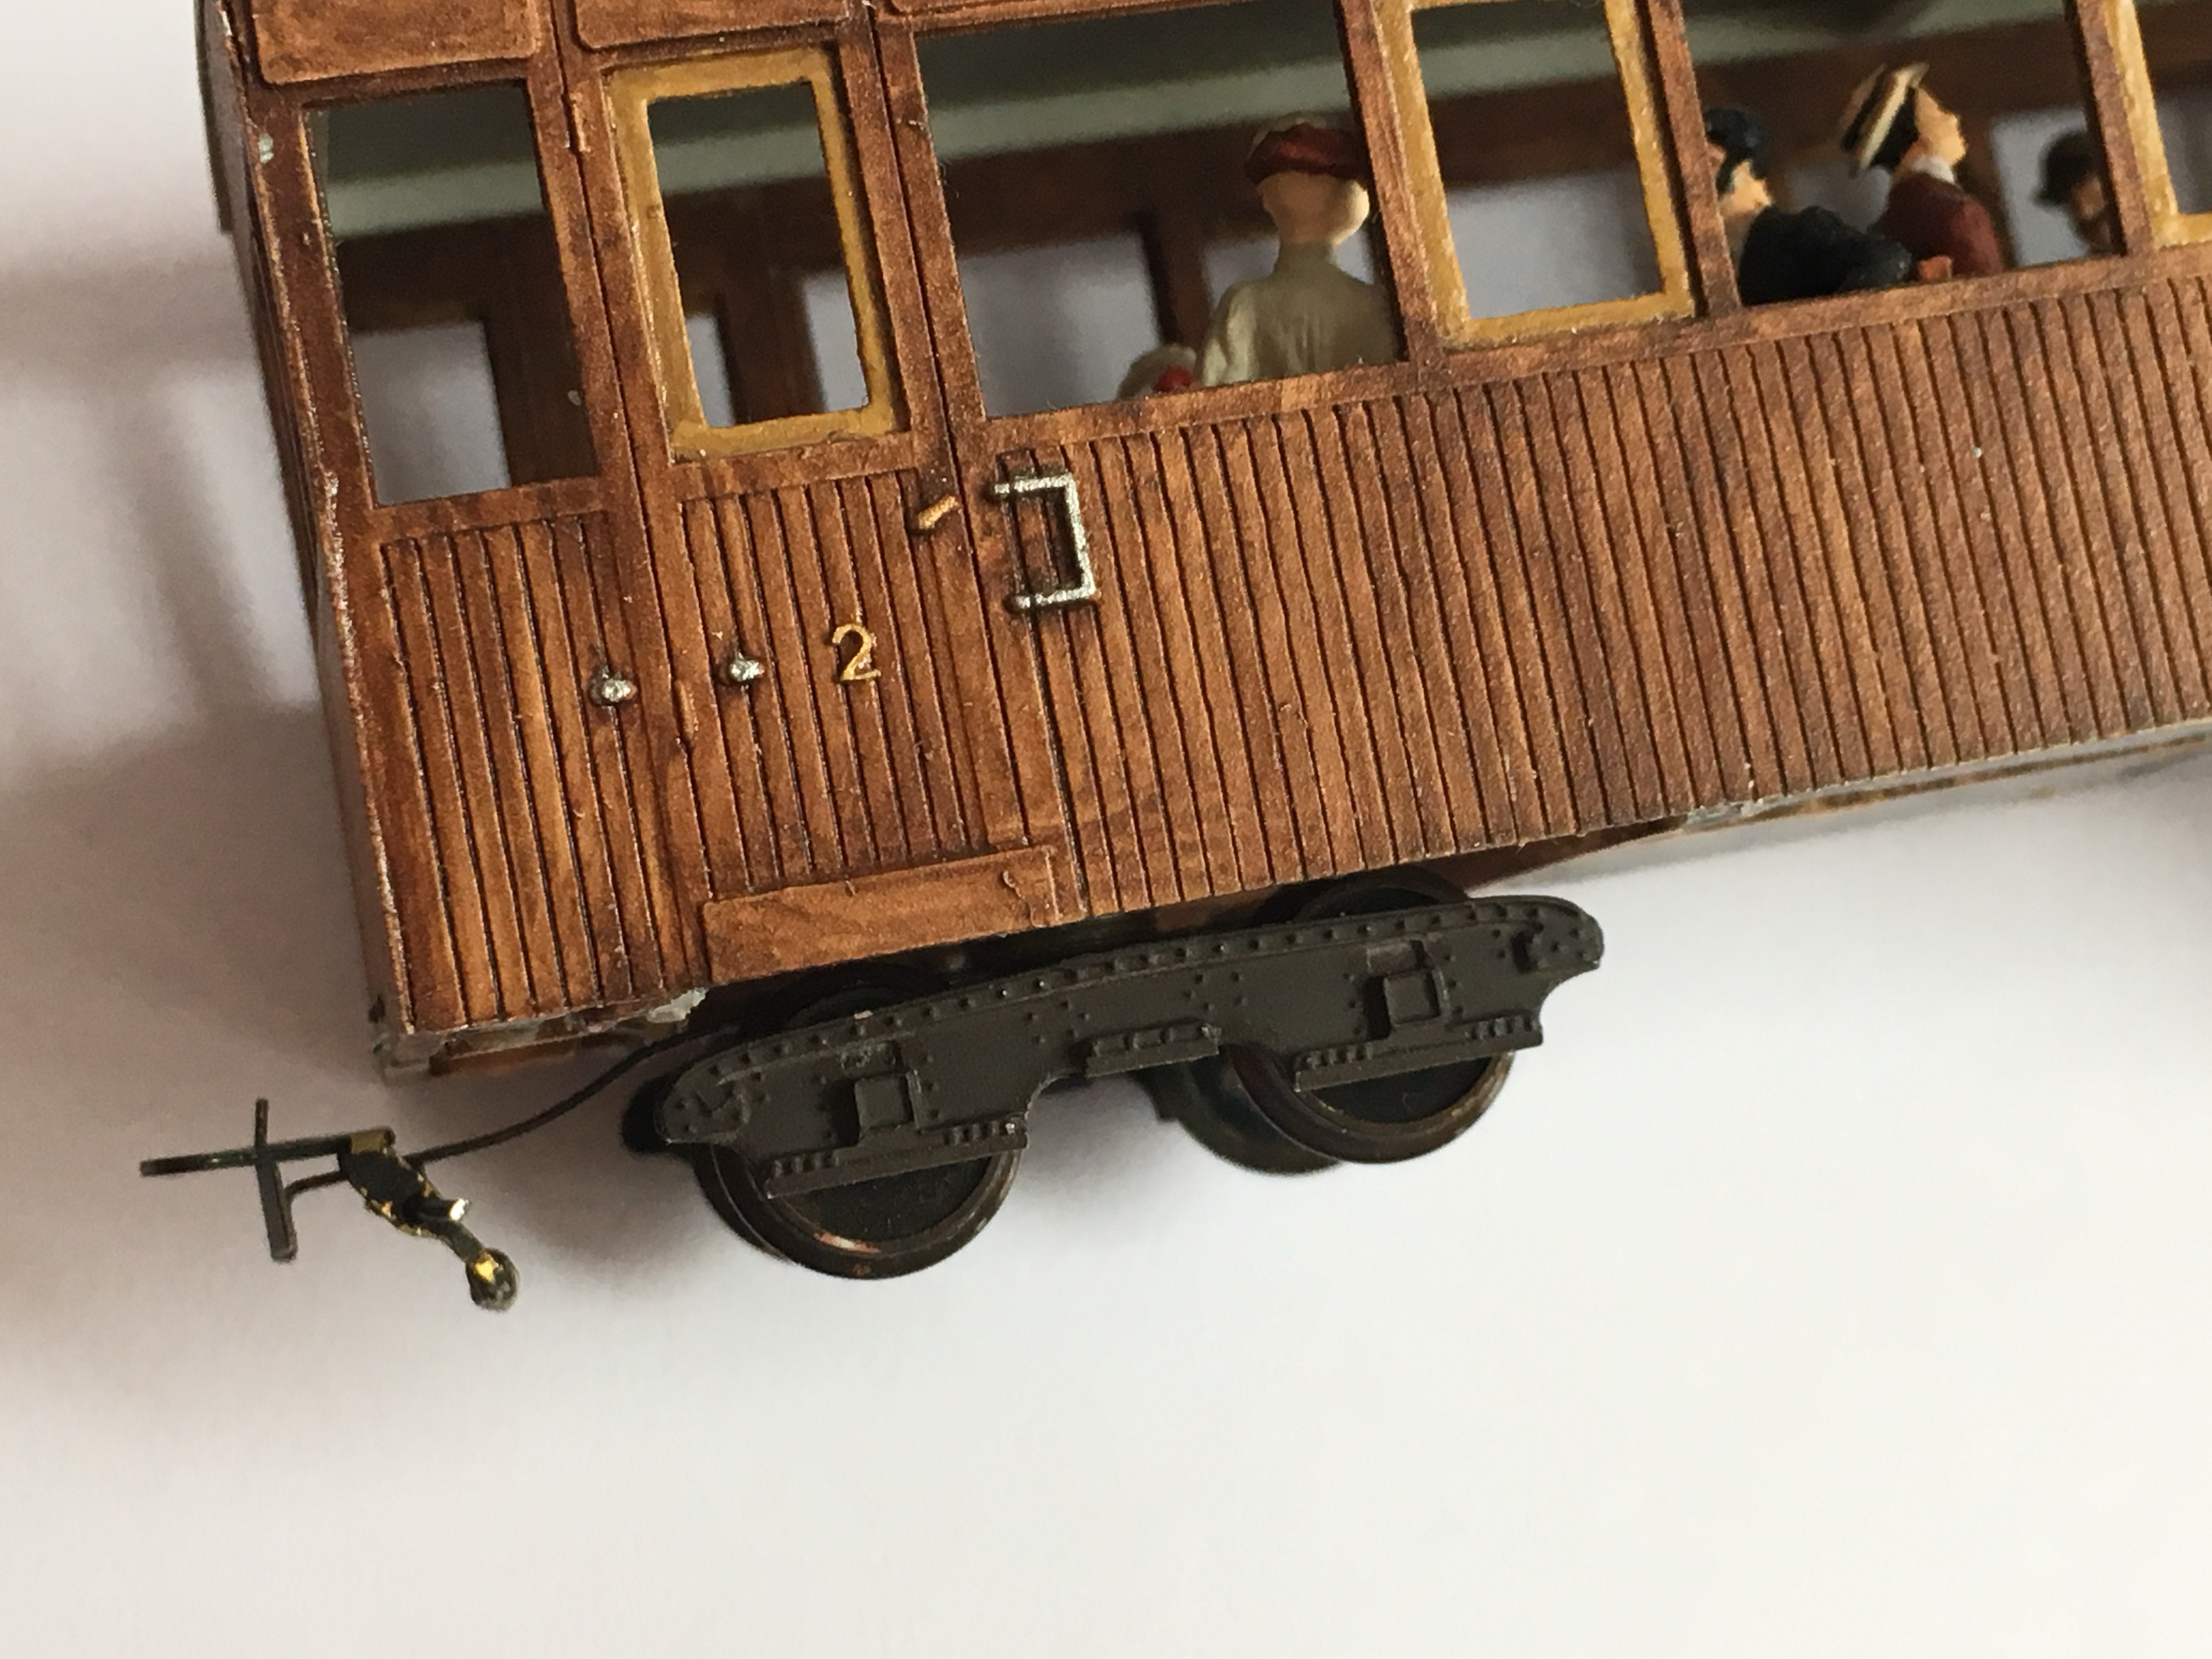
Coupling
Now we move our attention to the coupling. Click here for the instructions how to fold the coupling.
About the phosphor bronze wire: This is part of the kit for those who want their coupling to be centred all the time. When you have very tight curves or short points, I advise not to fit these.
Take a piece of the phosphor bronze wire. Bend it in the way seen on the pictures and solder it on the coupling. To get the right length, you have to decide where the centre point of the bogie will be in the coupling. Fit the coupling with a M1.6 screw to the bogie and bend the wire in the right shape.
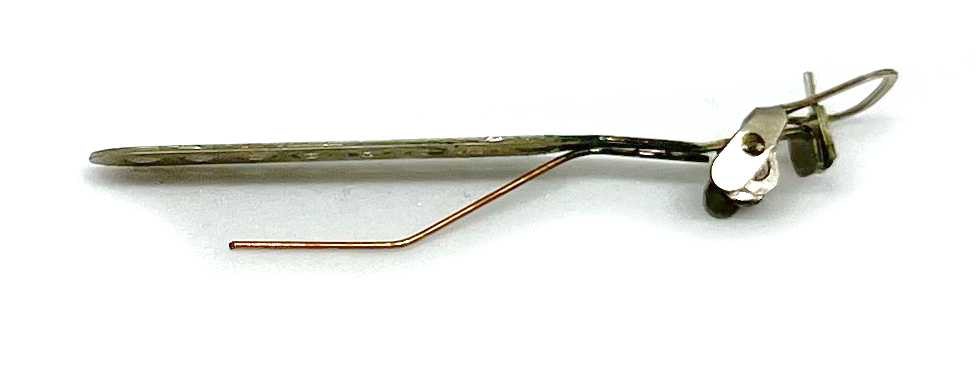
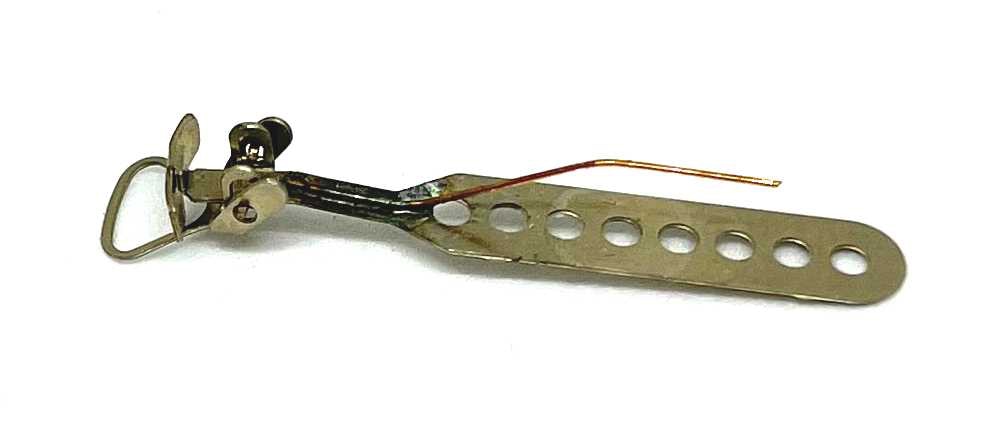
When the rod is fitted, it goes through the two holes in the bottom of the bogie. It has to fit the whole way through.
This is how it should look like. You might want to give it a test run. Bend the side skirts if they are too tight or too wide. On the picture the decorative part of the side skirts are not fitted, but ignore that. You should have these parts fitted.
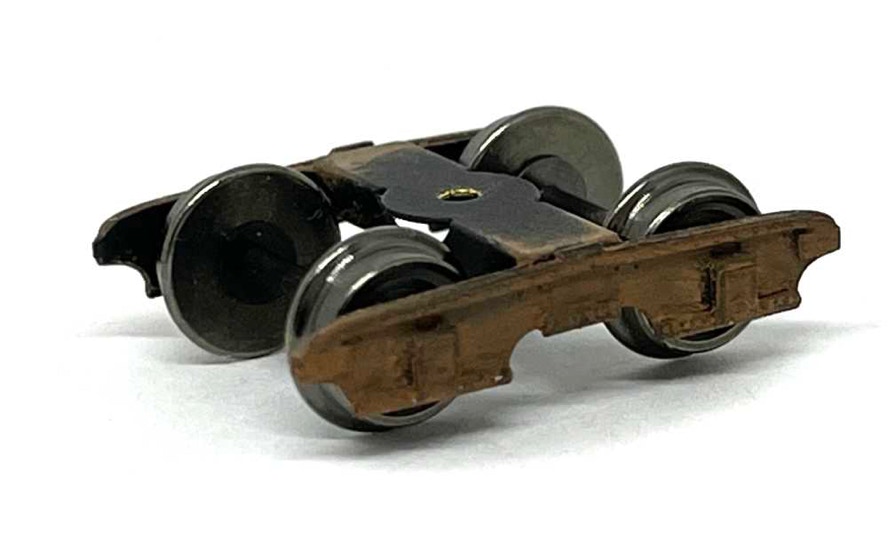
Painting
Remove the couplings from the bogies. Clean the parts with warm water, a drop of dishwasher soap and an old toothbrush. Spray with grey or black etch primer (available from car part shops, like Halfords) and after drying with your preferred colour for the bogies. I used black here, after which I dry brush it with a variety of brown colours.
And then you end up with this lovely bogie. Even better: two of those!
•